

[Scroll down to see the thumbnail products | Desliza hacia abajo para ver las imágenes de productos]
Hello crafty people! It's me, Cha! Today I made two different cards using the same stamp, a layering stamp. These stamps allow you to create realistic images when you stamp them one by one. Love this kind of stamp because you can create a lot of looks using different colored inks. For these cards, I used the Color Layering Cupcake Stamp Set from Hero Arts. I love their layering stamps and their HeroScape stamps that I will use soon! So, I hope you like these two cards but, tell me, which one is your favorite of these two? Let me know in the comments below!
¡Hola mi gente creativa! Soy Cha. Hoy hice dos tarjetas diferentes utilizando el mismo sello, un sello en capas. Estos sellos te permiten crear imágenes realistas cuando los estampas uno a uno. Me encanta este tipo de sellos porque puedes crear diferentes tarjetas con diferentes tintas de colores. Para estas tarjetas, utilicé el sello en capas de Hero Arts, Color Layering Cupcake Stamp set. Me encantan sus sellos en capas y...¡sus sellos HeroScape que utilizaré muy pronto! Así que espero que les guste estas dos tarjetas pero, digánme... ¿Cuál es tu favorita de estas dos tarjetas? ¡Díganmelo en los comentarios abajo!

Featuring products | Presentación de productos
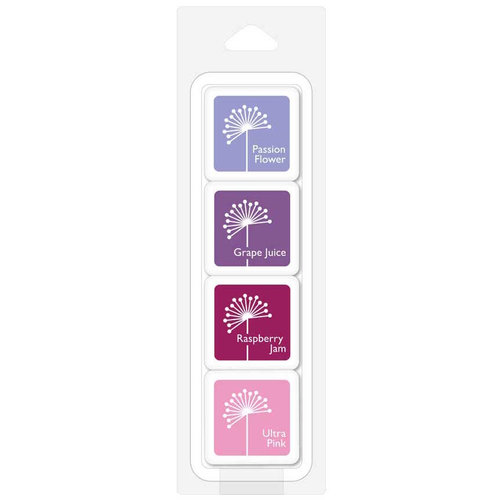
• Hero Arts Clear Stamps COLOR LAYERING CUPCAKE
 ——— https://ldli.co/e/49dx6r [ SSS ]
 ——— https://ldli.co/e/2dxy7z [ HA ]
 ——— https://ldli.co/e/5kz1gp [ SBC ]

• Hero Arts Frame Cuts Dies COLOR LAYERING CUPCAKE
 ——— https://ldli.co/e/3z1lnj [ SSS ]
 ——— https://ldli.co/e/mq6krd [ HA ]
 ——— https://ldli.co/e/egx0rp [ SBC ]
First Card | Primera Tarjeta

First of all, I stamped the background. I just picked a 4,00 by a 5,25-inch white cardstock and an acrylic block. I used the sprinkles stamp that comes with the Color Layering Stamp Set from Hero Arts and stamped this on the whole cardstock piece repeatedly. To stamp this small image, I used HA Soft Cantaloupe Shadow ink.
Primero, estampé el fondo. Escogí un trozo de cartulina blanca de 4,00 por 5,25 pulgadas y una base de metacrilato. Utilicé el sello de sprinkles que viene con el set de sellos de Hero Arts, Color Layering Stamp Set y lo estampé en toda la cartulina repetidamente. Para estampar esta imagen pequeña, utilicé la tinta HA Soft Cantaloupe Shadow ink.

Then, I created the images for this card. I also picked a piece of white cardstock and put it inside the MISTI Stamping Tool. This tool is really helpful for creating layering stamps and saves you a lot of time if you want to create many cards at once. Later, I started to stamp the cupcakes from the Color Layering Cupcake Stamp Set from Hero Arts. I created two cupcakes with the same colored inks - HA Soft Yellow ink, HA Lemon Yellow Shadow ink, HA Soft Brown Shadow ink, HA Cup O'Joe Shadow ink, HA Soft Purple Shadow ink, HA Grape Juice ink. I die cut these cupcake images with the coordinating dies with the Sizzix Sidekick Mini Die Cutting Machine.
Entonces creé las imágenes para esta tarjeta. También escogí un trozo de cartulina blanca y la puse dentro de la Herramienta de Estampación MISTI. Esta herramienta es muy útil cuando estampas con sellos con capas y te ahorra mucho tiempo si quieres crear muchas tarjetas de una sola vez. Luego, comencé a estampar los cupcakes del set de sellos Color Layering Cupcake Stamp Set. Estampé dos cupcakes con las mismas tintas - HA Soft Yellow ink, HA Lemon Yellow Shadow ink, HA Soft Brown Shadow ink, HA Cup O'Joe Shadow ink, HA Soft Purple Shadow ink, HA Grape Juice ink. Troquelé estas imágenes de cupcake con los troqueles coordinados con la Mini Troqueladora Sidekick de Sizzix.

The card base was created for this card that I created myself from HA Cherry Premium Cardstock with a scoreboard. I glued the background that I'd created earlier on top of this card base and added a white piece of cardstock inside to write the message. Later, I glued one of the cupcakes in the background, and the other one was added with some adhesive foam circles.
La base de tarjeta fue creada para esta tarjeta que creé yo misma de la cartulina HA Cherry Premium Cardstock con una tabla de hendido. Pegué el fondo que había creado antes sobre esta base de tarjeta y añadí una pieza de cartulina blanca en el interior para escribir el mensaje. Más tarde pegué uno de los cupcakes sobre el fondo y el otro fue añadido con círculos adhesivos de espuma.

Later, I stamped the sentiment on a piece of HA Cherry Premium Cardstock with Versamark ink and heat embossed with HA White Embossing Powder. I cut the sentiment around with scissors and added it to the card with some adhesive foam strips.
Más tarde estampé la frase en un trozo de la misma cartulina de la base de la tarjeta, HA Cherry Premium Cardstock, con la tinta Versamark ink y embosé con los Polvos de Embossing Blancos. Recorté alrededor de la frase con unas tijeras y la añadí a la tarjeta con tiras adhesivas de espuma.

To finish off this card, I added some little biscuits that I also stamped earlier, some sprinkles, and confetti clay embellishments. I also added some white and red dots to the background.
Para terminar esta tarjeta, añadí unas pequeñas galletas que había estampado anteriormente, algunos adornos de arcilla en forma de sprinkles y confetti. También añadí algunos puntos blancos y rojos en el fondo.

Second Card | Segunda Tarjeta

For this card, I also used some white cardstock pieces to create the images and the background. I used the MISTI Stamping Tool to stamp the images, too. I wanted a lot of contrast in colors, so I stamped three different colored cupcakes:
Para esta tarjeta, también utilicé un trozo de cartulina blanca para crear las imágenes y el fondo. Utilicé la Herramienta de Estampación MISTI para estampar las imágenes también. Quería mucho contraste en los colores, así que estampé tres diferentes cupcakes y con colores distintos:
Cupcake 1: HA Soft Sky Shadow ink, HA Indigo Bold ink, HA Soft Brown ink, HA Cup O'Joe shadow ink, HA Cotton Candy Shadow ink, HA Pale Tomato Shadow ink.
Cupcake 2: HA Soft Yellow Shadow ink, HA Butter Bar Shadow ink, HA Soft Brown ink, HA Cup O'Joe ink, HA Fresh Peach Shadow ink, HA Red Royal Shadow ink.
Cupcake 3: HA Orchid Bold ink, HA Mulled Wine Bold ink, HA Soft Brown ink, HA Cup O'Joe ink, HA Soft Apricot Shadow ink, HA Tangerine Bold ink.

For creating the background, I masked this card with some Masking Tape in the center and colored this area with the HA Aegean Bold ink. I used Ink Blending Brushes to color this background. Then, I colored the left area with HA Soft Pool Shadow ink, and on the right area with HA Lime Green Shadow ink. I trimmed this background to 4,00 by 5,25 inches. I glued the cupcakes to the background, excepting the center one that I used some adhesive foam dots to adhere to.
Para crear el fondo, enmascaré esta tarjeta con Cinta de Enmascarar en el centro y coloreé esta parte con la tinta HA Aegean Bold ink. Utilicé los Cepillos Aplicadores de Tintas para colorear este fondo. Luego, coloreé la parte izquierda con la tinta HA Soft Pool Shadow ink, y la parte derecha con la tinta HA Lime Green Shadow ink. Recorté el fondo a 4,00 por 5,25 pulgadas. Pegué los cupcakes en el fondo, excepto el del centro que utilicé círculos adhesivos de espuma para pegarlo.

Then, this piece was glued to a white piece of cardstock that was a little bit smaller than the background. Later, this whole piece was attached to a notecard that I scored myself with HA Mustard Premium Cardstock. I also added a white panel inside of this card to write the message on.
Luego esta pieza fue pegada a un trozo de cartulina blanca que era un poquito más pequeña que el fondo. Más tarde, esta pieza entera la pegué a una base de tarjeta que creé yo misma con la cartulina HA Mustard Premium Cardstock. También añadí una pieza blanca en el interior para poder escribir el mensaje.

The sentiment was stamped on HA Mustard Premium Cardstock with Versamark ink and heat embossed with HA White Embossing Powder. I cut it around with scissors and added it to the card with some adhesive foam strips.
Estampé la frase en el mismo color de cartulina de la base de tarjeta, HA Mustard Premium Cardstock, con la tinta Versamark ink y embosé con Polvos de Embossing Blancos. La recorté alrededor con unas tijeras y la añadí a la tarjeta con tiras adhesivas de espuma.

To embellish this card, I did the same as the previous card, I added some biscuits that I stamped earlier, some confetti, and sprinkles clay embellishments. I also added some silver shimmer and Glossy Accents to the biscuits.
Para adornar esta tarjeta, hice lo mismo que la tarjeta anterior, añadí algunas galletas que estampé antes, también añadí adornos de arcilla en forma de confetti y sprinkles. También añadí un brillo plateado y pegamento transparente, Glossy Accents, para relieve sobre las galletas.

And these are the two cards! What do you think? Which one of these cards do you like the most? I hope you like these two cards and don't forget to subscribe to my blog not to miss the latest posts and news!
¡Y estas son las dos tarjetas! ¿Qué piensan ustedes? ¿Cuál de estas tarjetas les ha gustado más? Espero que les haya gustado estas tarjetas y ¡no se olviden subscribirse a mi blog para no perderse las últimas publicaciones y noticias!
Thank you so much and see you very soon!
¡Muchas gracias y hasta pronto!


|


.jpg)
.jpg)
.jpg)

2 Comments
Marisela Delgado said: Cha, que lindas! I love, love, love, love these! ☺☺☺ Mari
ReplyDeleteMuchas gracias Mari!!!! 💗
Delete