

[Thumbnail image links are listed below this post | Los enlaces en imágenes de los productos se encuentran publicados al final de esta publicación]
Hello there! It's me, Cha! With My Monthly Hero kit from Hero Arts - July 2018 (learn about these kits HERE), I wanted to create a tunnel card. I was inspired on many tunnel books that I've seen on YouTube and they are incredible! So, why we don't use these techniques on a card! Let's start!
Hello there! It's me, Cha! With My Monthly Hero kit from Hero Arts - July 2018 (learn about these kits HERE), I wanted to create a tunnel card. I was inspired on many tunnel books that I've seen on YouTube and they are incredible! So, why we don't use these techniques on a card! Let's start!

¡Hola a todos! ¡Soy Cha! Con el kit de Hero Arts My Monthly Hero - julio 2018 (lee más sobre los kits AQUÍ) quise crear una tarjeta túnel. Me inspiré en muchos libros túneles que he visto en YouTube y...¡son increíbles! Así que pensé que sería una opción crear una tarjeta parecida a esos libros túneles. ¡Comencemos!
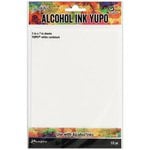
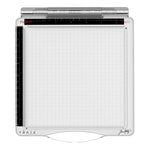
First of all, as I wanted to create three backgrounds with three different alcohol inks - dandelion, valencia, and turquoise, I used YUPO paper to work with. Then, I wanted to stamp the Hero Arts Country Fair bold prints on each background. I used my Travel Stamp Platform by Tim Holtz to stamp this background because I don't have a big acrylic block for this kind of stamps. I wanted to lift the ink from each background. I mean that I wanted to leave colorless the part where I stamped the background. To do this, I used Archival ink - potting soil that is alcohol base. So, I stamped the background with this ink (potting soil) several times and then, I removed the ink from the background rubbing with a cloth. Instead of using the new Alcohol Lift Ink, I used the Archival ink for doing this technique but for better results, I would prefer the new one. For the background with the turquoise color, I stamped the same background with Hero Arts pigment ink - unicorn and let it dry very well. You can use your heat tool but I think it is too risky because this paper would crumple fast with the heat.
Primero, como quise crear tres fondos con tres tintas diferentes de alcohol - dandelion, valencia y turquoise, utilicé el papel especial YUPO para este tipo de tintas. Luego, decidí estampar el sello de caucho de Hero Arts County Fair en cada uno de los fondos que creé con las tintas de alcohol. Para la estampación, utilicé la Plataforma de Estampación de Viaje de Tim Holtz porque no tengo una base de metacrilato lo suficientemente grande para este tipo de sellos. Quería utilizar la técnica de "lentantar la tinta" ("lift the ink"), es decir, dejando sin tinta la parte en la que he estampado el sello. Para ello, utilicé la tinta Archival ink - potting soil. Así que impregné el sello con esta tinta y lo estampé sobre el papel varias veces, y después, quité la tinta frotando con un trapo. En vez de utilizar la tinta nueva Alcohol Lift Ink para este fin, utilicé la tinta Archival pero para mejores resultados es recomendable la nueva. Para el fondo con tono turquesa, impregné el sello con la tinta de pigmento blanco - unicorn de Hero Arts y lo dejé secar muy bien. Se podría utilizar la pistola de calor o embossing pero pienso que es demasiado arriesgado ya que el papel se arruga muy rápido con poco calor.

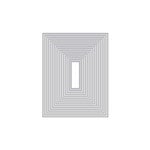
Once I have these three backgrounds done, I die cut each one. For the die cutting, I used the fancy die from the kit but I just die cut two backgrounds with this die - the dandelion (the yellow tone) and the valencia one (the orange tone). Then, I combined these two backgrounds together to give a contrast to the card with these two colors. For this combination, I just added the entire valencia (or orange) piece on a piece of white cardstock and filled the gaps with dandelion (or yellow) small pieces. As I wanted to create a tunnel effect, I also decided to cut the pieces in different sizes of rectangles - as pictures frames. I used the Infinity Dies - rectangles from Hero Arts. I picked the first, the third, the fifth and the seventh biggest rectangles. I lined them up very well and attached them together with some temporarily tape or carpenters tape (or masking tape). I didn't remove this tape until I'd cut all my pieces cut in order to have the same sizes for all the frames from the different backgrounds. I die cut the piece with my die cutting machine - the Big Shot. So, I had now many different sizes of frames from the same background. I also die cut the turquoise piece and a Distress Oxide panel that I had kept.
Una vez que estos tres fondos de tarjetas estuvieran listos, los troquelé. Para troquelar, utilicé el troquel del kit pero solo corté con este troquel dos de los tres fondos que creé - el del fondo amarillo (dandelion) y el de tono anaranjado (valencia). Después de troquelarlos, los combiné juntos para dar un contraste de color a la tarjeta con estos dos colores. Para esta combinación, simplemente pegué la pieza entera naranja en una cartulina blanca y rellené los huecos con la otra pieza, de color amarillo (dandelion). Como quise crear el efecto de un túnel, decidí cortar las piezas en diferentes tamaños rectangulares - como los marcos de fotografías. Utilicé los troqueles rectangulares de Hero Arts (infinity dies). Escogí el primero, tercero, el quinto y el séptimo de mayor tamaño de los rectángulos. Los alineé muy bien y los sujeté temporalmente con cinta de carrocero o carpintero (o cinta de enmascarar). No quité esta cinta removible hasta que no tuviera todas las piezas cortadas porque así tenían todas las piezas el mismo tamaño rectangular. Troquelé esta pieza con mi troqueladora de la Big Shot. Así que ahora tenía diferentes tamaños de marcos de un mismo fondo. También troquelé la pieza de color azul turquesa y un fondo con tintas Distress Oxide que tenía guardado.

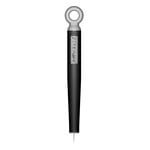
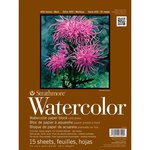
Later, I wanted to color all my images with some watercolors. So, I placed my images from the main kit onto the Travel Stamp Platform because I wanted to heat embossed the images later. For stamping the images, I used watercolor paper. I stamped these images with Versamark ink and as my Versamark ink pad is a little dirty, I could see the fine lines of all my images very well. These "dirty" lines helped me to color my images without any problem but if your Versamark ink is a new one, probably you won't see the fine lines. So, you could use the Inkon3 fadeout no line ink instead. This technique, called no-line coloring. I decided to color my images with Hero Arts liquid watercolors and using a water brush. The colors that I used were strawberry, dandelion, pink, mulled wine, purple, art print brown, indigo, deep ocean and black. I do not an expert in coloring with watercolors, so, I just colored the images the best I could and removed the excess of water with a tissue in order to avoid to mix the colors. Then, I positioned again this piece on the Stamp platform and added some anti-static powder. I stamped the images again with Versamark ink. Remember to not remove the images from the stamp platform to keep them placed during the process of creation. Later, I added some white detail embossing powders and heat embossed all the images. Finally, I died cut all my images with their coordinating dies that came with the kit.
Después, quise colorear las imágenes con acuarelas. Así que posicioné las imágenes en la Plataforma de Estampación de Viaje de Tim Holtz porque quería realizar embossing caliente más tarde. Las imágenes que escogí eran del kit principal y utilicé papel de acuarela. Impregné las imágenes con la tinta Versamark ink (especial para embossing), y como la almohadilla de mi tinta está un poco sucia de tanto utilizarla, se podía ver perfectamente las líneas que definían las imágenes, y por tanto, me ayudaban a colorear sin ningún problema. Por el contrario, si tu tinta Versamark es nueva, probablement no podrás ver muy bien las líneas, así que podrías utilizar la tinta de Inkon3 fadeout no line que es especial para esta técnica. Esta técnica es llamada colorear imágenes sin línea. Decidí colorear las imágenes con las acuarelas líquidas de Hero Arts y utilizando un pincel de agua. Los colores que utilicé fueron strawberry, dandelion, pink, mulled wine, purple, art print brown, indigo, deep ocean y black. No soy experta en colorear con acuarelas, así que simplemente coloreé las imágenes lo mejor que pude e iba eliminado el exceso de agua con una trozo de papel o servilleta para evitar que se mezclaran los colores. Luego, posicioné las imágenes en la Plataforma de Estampación nuevamente y añadí los polvos anti estáticos para evitar que los polvos de embossing quedaran impregnados en la pintura. Impregné las imágenes con la tinta Versamark y estampé exactamente lo mismo justo donde había estampado anteriormente. Recuerden de no quitar los sellos de la Plataforma de Estampación desde el principio. Después, añadí polvos de embossing blancos y los sequé con la pistola de calor. Finalmente, troquelé todas las imágenes con sus troqueles coordinados que venían con el kit.

For creating this tunnel card, I created the background from the inside to the outside. First, I cut many strips of foam tape to give the dimension to the frames that I cut previously. As I got four frames to use for this card, the centerpiece would adhere on the center of the card with double-sided tape (no foam tape). Then, I added some of the images over this piece but I just attached the image inside the piece, cutting the excess with scissors. Later, I attached the second frame around the centerpiece with one strip of foam tape on the back and, also, I added some more images cutting the excess. For the third frame, I added two strips of foam tape on the back and added more images and so on until I reached the last frame with four strips of foam tape on the back and decided to glue the large images at the bottom of the card. What's more, I decided to add some clouds at the top of the card. These images were from a previous Hero Arts kit - MMH June kit 2018 (sold out). I just die cut these clouds and stamped the second layered stamp on top using Hero Arts soft sky dye ink.
Para crear esta tarjeta túnel, creé el fondo desde el interior hasta el exterior. Primero, dejé preparadas algunas tiras de adhesivo de espuma. Para comenzar, tenía cuatro marcos para utilizar en esta tarjeta túnel. Escogí una cartulina blanca regular para comenzar a montar el túnel, así que la pieza del centro la adherí en el centro con cinta adhesiva de doble cara. Ésta será la única pieza que no tenga adhesivo de relieve (de espuma). Añadí sobre esta pieza algunas imágenes que había creado anteriormente pero corté el excedente. Después, añadí el segundo marco alrededor de la pieza central y en su parte trasera adherí una tira adhesiva de espuma (de relieve) y añadí algunas imágenes más recortando el excedente. Para el tercer marco, añadí en la parte trasera dos tiras de adhesivo para relieve y lo añadí alrededor del segundo marco. También añadí imágenes y recorté el excedente y así hasta llegar al último marco con cuatro tiras de adhesivo dimensional de espuma y decidí añadir las imágenes más largas en la parte inferior de la tarjeta. Además, decidí añadir algunas nubes en la parte superior. Para ello troquelé algunas nubes que venían con un kit anterior de Hero Arts - MMH junio 18 (agotado) y estampé la segunda capa de este sello por capas utilizando la tinta de Hero Arts - soft sky.

For the sentiment, I stamped the phrase on a piece of red cardstock, using Versamark ink and added some white detail embossing powders. I heat embossed and added to the card with some tape. For final details, I added some shimmer to the rides with my NUVO aqua shimmer pen and some touches of Glossy Accents.
Impregné la frase con la tinta Versamark ink y la estampé sobre un trozo de cartulina roja y añadí polvos blancos de embossing. Los sequé utilizando la pistola de embossing y la añadí en la tarjeta con cinta adhesiva dimensional. Para los detalles finales, simplemente añadí purpurina a las imágenes (a las atracciones) con el NUVO aqua shimmer pen y, algunos toques con el Glossy Accents.
Finally, I adhered the whole piece on a 5.5" x 4.25" white notecard.
Finally, I adhered the whole piece on a 5.5" x 4.25" white notecard.
Finalmente, adherí la pieza entera en una base de tarjeta de color blanco de 5.5 x 4.25 pulgadas.
I really love the result of this card. Maybe it is a little complicated to create but if I made it, then you can do it too! Probably I will create more cards like this one in the future!
Me encanta cómo ha quedado esta tarjeta. Quizás es un poco complicado para crear pero si yo lo he hecho, entonces...¡tú también puedes! Probablemente crearé más tarjetas como esta en el futuro.
Thanks so much!
Gracias.


For Americans, I highly recommend the Wagner heat tool from Hero Arts. I cannot use this tool because I live outside of the States and this tool cannot be used internationally due to the electrician requirements that are not the same for all the continents. No possible for use with outlet adapters.
Para los americanos, recomiendo la pistola de embossing de Hero Arts - Wagner. No puedo utilizar esta herramienta porque vivo fuera de los EEUU y es incompatible debido a los requisitos eléctricos que no son iguales para todos los continentes. Tampoco es posible utilizarse con un adaptador.
[Not all the thumbnail image links take part of Affiliate Programs | No todos los enlaces en imágenes forman parte del Programa de Afiliados]


.jpg)
.jpg)
.jpg)

0 Comments