

[Thumbnail image links are listed below this post | Los enlaces en imágenes de los productos se encuentran publicados al final de esta publicación]
Hello there! It's me, Cha! I received the Hero Arts kit, MMH July 2018 a few weeks ago and I've been playing with it a lot. Finally, I've decided to create some cards using a fun technique with Hero Arts liquid watercolors and... ¡some salt! I've also planned some cards with this Hero Arts kit in future weeks! So, stay tuned!

¡Hola a todos! ¡Soy Cha! He recibido el kit de Hero Arts, MMH julio 2018 hace varias semanas y he estado creando muchas tarjetas. Finalmente, he decidido crear algunas tarjetas utilizando una técnica divertida con las acuarelas líquidas de Hero Arts y... ¡sal! También he planeado otras tarjetas utilizando este kit así que...¡atentos!

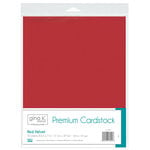
First of all, I made some backgrounds. I picked some watercolor paper and chose some Hero Arts liquid watercolors. I didn't do any fancy coloring technique, I just added some colors on the paper and mixed them up a little bit until I was satisfied. When each panel was done, I added some salt. I used table salt but I think you will get better results when using thick salt. I let the panels dry completely. I waited one hour approximately although it can take longer depending on the paper that you use. At this moment, all my panels were a rough surface because of the salt, so, I removed the salt rubbing my fingers until I got a smooth surface.
Lo primero que hice fue crear los fondos para estas tarjetas. Escogí papel de acuarela y elegí algunas acuarelas líquidas de Hero Arts. No hice nada interesante a la hora de colorear los fondos, simplemente añadí los colores y algunos los mezclé y así... hasta que me terminaran de gustar. Cuando tuve cada panel preparado, añadí la sal. Para estos paneles utilicé sal fina pero pienso que pueden conseguir mejores resultados utilizando sal gruesa. Dejé que los paneles se secaran por completo. A mí me tardaron una hora en secarse aproximadamente aunque depende del papel que utilicen pueden tardar más o menos. En este momento, todos mis paneles tenían una superficie rugosa por la sal, así que quité la sal frotando mis dedos sobre el papel hasta que la superficie estuviese suave.
For these three cards, I used three backgrounds mixing them in two cards. Before creating the cards, I cut the panels using the fancy die that came with the Hero Arts July 18 kit. I love this die and I wanted to give it a very good use.
I must say that this kit is sold out but there are many dies like this in the market that you can use for creating cards like this.
Back to the cards, I die cut the three panels with this fancy die using my die cutting machine, the Big Shot. I also die cut some extra pieces in different cardstock, black and white cardstock and in white and black craft foam sheets.
Back to the cards, I die cut the three panels with this fancy die using my die cutting machine, the Big Shot. I also die cut some extra pieces in different cardstock, black and white cardstock and in white and black craft foam sheets.
Para estas tres tarjetas, utilicé tres de los fondos que creé y mezclándolos en dos de las tarjetas que hice. Antes de crear las tarjetas, corté los tres paneles utilizando el troquel adornado que vino con el kit de Hero Arts, julio 2018. Me encanta este troquel y, por eso, quise darle un buen uso.
Debo decir que este kit está agotado pero hay muchos troqueles parecidos a este en el mundo de la tarjetería y scrap y que pueden crear tarjetas como estas.
De vuelta a las tarjetas, troquelé los tres paneles con este troquel decorativo utilizando la troqueladora Big Shot. También corté algunas piezas extras en cartulina blanca y negra, y en foamy o goma eva negra y blanca.
For the first card, I placed the cut white cardstock on top of another 5.5 by 4.25 inches piece of white cardstock. I started creating the card filling the gaps with different colors from the other three panels. I alternated warm and cool colors for this card and the result is very beautiful. For gluing all the pieces, I used some strong liquid adhesive. Then, I removed the white piece that I had glued temporarily and glued another piece but in black color in order to create more contrast. I also filled the gap in the center with a piece of black foam and on top, I placed a piece of black cardstock.
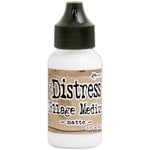
Para la primera tarjeta, coloqué la pieza blanca que corté con el troquel adornado sobre una cartulina de 5.5 por 4.25 pulgadas con un pegamento temporal. Comencé rellenando los huecos con diferentes colores de tres paneles que troquelé. Alterné los colores cálidos con los fríos para esta tarjeta y el resultado es bastante bonito. Pegué todas las piezas con el pegamento líquido Distress Collage Medium que bastante fuerte y rápido. Quité la pieza blanca que había adherido temporalmente y añadí otra pieza igual pero de color negra para dar más contraste. Para el centro de la tarjeta, añadí un trozo de foamy o goma eva negra y sobre ésta, adherí un trozo de cartulina negra.

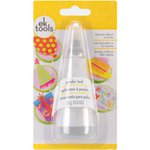
For the sentiment of this card, I used two stamps from the main kit, Hero Arts kit MMH July 2018. I stamped the phrase "ticket for fun" on a piece of red cardstock using Versamark Ink and added some white detail embossing powder. I heat it to dry the powder with my craft tool. The second sentiment that I used was the word with an arrow - "here". I stamped this word onto a piece of yellow cardstock using Versafine onyx black ink and added some ultra fine clear embossing powder. I heat set it. I attached the sentiments in the center.
Para la frase de esta tarjeta, utilicé dos sellos del kit principal, Kit Hero Arts MMH julio 2018. Estampé la frase "ticket for fun" (en español, "ticket para divertirse") en un trozo de cartulina roja utilizando la tinta Versamark y añadí polvos de embossing blancos. Los sequé con la pistola de calor o de embossing. La segunda palabra que utilicé fue "here" (en español, "aquí"). Estampé esta palabra en un trozo de cartulina amarilla utilizando la tinta negra Versafine onyx y añadí polvos de embossing claros. Los sequé con la pistola de calor nuevamente. Pegué la frase y la palabra en el centro.

For final touches to this card, I added some shimmer to the words using the NUVO aqua shimmer pen and some glossy accents. I also added some inexpensive sequins here and there and some black enamel dots. For this, I used the Ranger Enamel Accents (or, NUVO crystal drops - ebony).
Para finalizar esta tarjeta, añadí brillo a la frase y la palabra utilizando el NUVO aqua shimmer pen y un toque en relieve con el glossy accents. Añadí también algunas lentejuelas y algunos puntos esmaltados de color negros. Para ello, utilicé el Ranger Enamel Accents (o, el NUVO crystal drops - ebony).

The second card that I created it is quite similar to the previous one but, instead of using the piece of black cardstock to give some contrast to the card, I used one of the pieces of watercolor panels that I previously cut. Then, I also filled the gaps as I did before but, this time, I first filled with white pieces of foam and then, I filled the gaps with similar colored pieces except for some gaps that I changed the colors in order to give an interesting look. I filled the gap in the center with a piece of white craft foam and then, I placed a piece of white cardstock on top. Next, I stamped the Ferris wheel from the stamp set from the kit on a piece of kraft cardstock using Versamark ink, added white detail embossing powder and heat it. Later, I cut this piece with its coordinating die that came with the kit. I added this piece in the center of the card.
La segunda tarjeta que creé es bastante similar a la anterior pero, en vez de utilizar la pieza negra para dar contraste a la tarjeta, utilicé una de las piezas de acuarelas que troquelé anteriormente. Entonces, rellené los huecos como hice en la tarjeta anterior pero, esta vez, las rellené primero con foamy o goma eva blanca para dar relieve y luego, añadí trozos de papel de acuarela con tonos cálidos excepto en algunas piezas para darle un toque interesante. En el centro, decidí añadir un trozo de foamy o goma eva blanca, y sobre ésta, una pieza de cartulina blanca. Luego, estampé el sello de la noria que vino con el kit en un trozo de cartulina kraft (papel de estraza) utilizando la tinta Versamark para añadir polvos de embossing blancos y secarlos con la pistola de calor. Después, corté esta noria, con su troquel coordinado que, también, vino con el kit. Pegué esta pieza en el centro de la tarjeta.

For the sentiment, I used a phrase from Hero Arts kit MMH April 2018, "it's your birthday". I stamped this sentiment using Versamark ink on a piece of white cardstock, added some gold embossing powder and heat it with my craft tool. I cut it as a banner and placed on top of the Ferris wheel.
La frase que utilicé para esta tarjeta es del kit de Hero Arts MMH de abril 2018, "it's your birthday" (en español, "es tu cumpleaños"). Estampé esta frase con la tinta Versamark en un trozo de cartulina blanca y añadí polvos de embossing dorados que los sequé con la pistola de embossing. Recorté el sentimiento en forma de bandera y lo coloqué en el panel, sobre la noria.

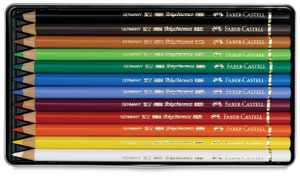
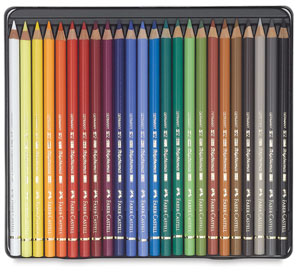
For final touches, I just added a yellow adhesive gem in the center of the Ferris wheel. Then, I colored some the Ferris wheel with white Faber Castell Polychromos and some glossy accents.
Para los toques finales, simplemente añadí una gema adhesiva amarilla en el centro de la noria. Luego, pinté la noria de color blanco utilizando el lápiz de color Faber Castell Polychromos y algo de relieve con el glossy accents.
This is my favorite card! So, I used this card for challenging myself on the ABNH blog (July 2018).
¡Ésta es mi tarjeta favorita! Así que la utilicé para retarme este mes en el blog de ABNM (julio 2018).
 |
| ABNH Challenge - Birthday Cards | Reto ABNH - Tarjetas de Cumpleaños |


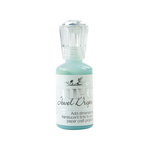
Para la última tarjeta, creé una vez más, una tarjeta parecida a las previas pero no rellené los huecos con piezas de acuarela, en vez de ello, rellené los huecos utilizando el NUVO jewel drops - sea breeze. Dejé que esta tarjeta se secara durante la noche. En el centro, añadí un trozo de foamy o goma eva blanca en el hueco.

For the sentiment, I decided to add "happy" with the Altenew script word die 2 set and the word "birthday" from the Hero Arts Kit MMH March 2018. I die cut four pieces of the word "happy" on a piece of white cardstock and using some double-sided sheets. Then, I stacked the pieces together. Later, I stamped the word "birthday" on a piece of kraft cardstock using Versamark ink. Then, I added some white detail embossing powder and heat it with my craft tool. I added this piece in the center of the card, just on top of the white piece of craft foam. Next, I added the word "happy" just above the word "birthday".
Para la frase, decidí añadir la palabra troquelada "happy" (en español, "feliz") del set de troqueles 2 de Altenew, y la palabra "birthday" (en español, "cumpleaños") del kit de Hero Arts MMH marzo 2018. Troquelé cuatro piezas de la palabra "happy" en un trozo de cartulina blanca y utilizando papel adhesivo de doble cara. Pegué cada palabra una sobre otra. Después, estampé la palabra "birthday" en un trozo de cartulina kraft utilizando la tinta Versamark. Añadí los polvos de embossing blancos y los sequé con la pistola de calor. Añadí esta pieza en el centro de la tarjeta, justo sobre la pieza de goma eva blanca (o foamy). Luego, añadí la palabra "happy" por encima de la palabra "birthday".

For finishing this card, I added some shimmer to the word "happy" with the NUVO aqua shimmer pen and, also, added some glossy accents. Finally, I added some sequins.
Para finalizar esta tarjeta, añadí algo de brillo a la palabra "happy" con el NUVO aqua shimmer pen y añadí un toque de relieve con el glossy accents. Finalmente, añadí algunas lentejuelas.

I hope you like the process of creation of these three cards and if you do, remember to subscribe to my blog and my Youtube channel.
Which of these cards do you prefer? Let me know in the comments below!.
Which of these cards do you prefer? Let me know in the comments below!.
Thanks
See ya!
Espero que les haya gustado el proceso de ceración de estas tarjetas y si les ha gustado, recuerden subscribirse a mi blog y a mi canal de YouYube.
¿Cuál de estas tarjetas prefieren? ¡Dejen sus comentarios!
Gracias
¡Hasta pronto!


¡Hasta pronto!


[Not all the thumbnail image links take part of Affiliate Programs | No todos los enlaces en imágenes forman parte del Programa de Afiliados]


.jpg)
.jpg)
.jpg)

0 Comments