

[Thumbnail image links are listed below this post | Los enlaces en imágenes de los productos se encuentran publicados al final de esta publicación]
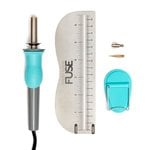
Hello and welcome to my blog! This week I would like to show you some shaker cards that I made with the Fuse tool from We R Memory Keepers and some sheet protectors for documents or fuseable clear sheets. There are many ways to create shaker cards. In the past, I created some of these cards using acetate and some foam tape. However, after having made shaker cards with sheet protectors and the Fuse, I must say that I prefer this one. I made two cards with the same technique but slight variations. I hope you enjoy it!

¡Hola y bienvenidos a mi blog! Esta semana me gustaría enseñarles algunas tarjetas shakers (o tarjetas cockteleras) que creé utilizando la herramienta Fuse de We R Memory Keepers y algunas fundas protectoras para documentos o fundas para fuse. Hay muchas maneras diferentes de crear tarjetas shaker. Las tarjetas cocketeleras son tarjetas que contienen lentejuelas en un bolsillo y que cuando lo agitas, las lentejuelas se mueven. Yo las llamo tarjetas cocketeleras en español porque me recuerdan a cuando el bárman te sirve un cocktel. Hace algún tiempo creé tarjetas como estas utilizando acetato y cinta de espuma adhesiva. Sin embargo, después de haber creado estas tarjetas shaker con las fundas protectoras y con la herramienta Fuse, debo decir que prefiero esta manera de crearlas debido a lo sencillo que es crearlas. He realizado dos tarjetas con la misma técnica pero con algunas variaciones entre ellas. ¡Espero que les guste!
First of all, I decided to use the Hummingbirds stamp set from Hero Arts. As I wanted to color the images first and then, make some heat embossing, I decided to use my Travel Stamp Platform by Tim Holtz. This useful tool helps you to stamp the images in the same position and the times that you wish and that's why I always use it. I used some white cardstock to stamp my images. Then, I placed the stamps on the lid of the platform and inked with some Versafine Onyx black ink. I closed the lid over my piece of cardstock and pressed down firmly. I heat the images with my heat gun in order to dry them very well before starting coloring all the images.
Hello and welcome to my blog! This week I would like to show you some shaker cards that I made with the Fuse tool from We R Memory Keepers and some sheet protectors for documents or fuseable clear sheets. There are many ways to create shaker cards. In the past, I created some of these cards using acetate and some foam tape. However, after having made shaker cards with sheet protectors and the Fuse, I must say that I prefer this one. I made two cards with the same technique but slight variations. I hope you enjoy it!
¡Hola y bienvenidos a mi blog! Esta semana me gustaría enseñarles algunas tarjetas shakers (o tarjetas cockteleras) que creé utilizando la herramienta Fuse de We R Memory Keepers y algunas fundas protectoras para documentos o fundas para fuse. Hay muchas maneras diferentes de crear tarjetas shaker. Las tarjetas cocketeleras son tarjetas que contienen lentejuelas en un bolsillo y que cuando lo agitas, las lentejuelas se mueven. Yo las llamo tarjetas cocketeleras en español porque me recuerdan a cuando el bárman te sirve un cocktel. Hace algún tiempo creé tarjetas como estas utilizando acetato y cinta de espuma adhesiva. Sin embargo, después de haber creado estas tarjetas shaker con las fundas protectoras y con la herramienta Fuse, debo decir que prefiero esta manera de crearlas debido a lo sencillo que es crearlas. He realizado dos tarjetas con la misma técnica pero con algunas variaciones entre ellas. ¡Espero que les guste!
First of all, I decided to use the Hummingbirds stamp set from Hero Arts. As I wanted to color the images first and then, make some heat embossing, I decided to use my Travel Stamp Platform by Tim Holtz. This useful tool helps you to stamp the images in the same position and the times that you wish and that's why I always use it. I used some white cardstock to stamp my images. Then, I placed the stamps on the lid of the platform and inked with some Versafine Onyx black ink. I closed the lid over my piece of cardstock and pressed down firmly. I heat the images with my heat gun in order to dry them very well before starting coloring all the images.
Primero, decidí utilizar el set de sellos Hero Arts Hummingbirds. Como quise colorear las imágenes primero y luego realizar embossing caliente, decidí utilizar la Plataforma de Estampación de Viaje de Tim Holtz. Esta herramienta útil te ayuda a estampar imágenes en la misma posición y las veces que desees y, es por ello, que siempre la utilizo. Utilicé cartulina blanca para estampar las imágenes. entonces, posicioné los sellos en la tapa de la plataforma y tinté con la Versafine Onyx Black. Cerré la tapa sobre mi trozo de cartulina y presioné firmemente. Le dí calor a las imágenes con la pistola de embossing para secarlas antes de comenzar a colorear.

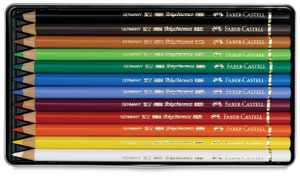
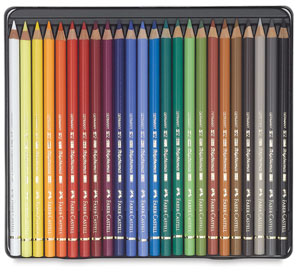
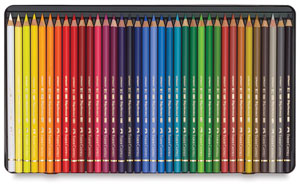
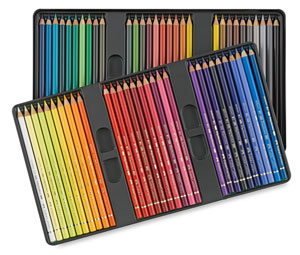
For coloring my images, I used Polychromos from Faber Castell. I love how these colored pencils blend so nicely! I don't have too many but I'm happy with the ones that I have already. When I finished coloring the images, I placed the images on the base of the Travel Stamp Platform again and stamped the images with Versafine Onyx black ink again. After that, I heat embossed my images with Ultra Fine embossing powder. I let these images aside while I assembled the cards.
Para colorear mis imágenes, utilicé los Polychromos de Faber Castell. ¡Me encantan como estos lápices de colores se mezclan muy fácilmente! No tengo demasiados lápices de colores pero estoy contenta con los que ya tengo. Cuando terminé de colorear las imágenes, volví a posicionar las imágenes en la Plataforma de Estampación y estampé las imágenes con la tinta Versafine Onyx black nuevamente. Después, les añadí los polvos de embossing Ultra Fine y los sequé con la pistola de calor o embossing. Dejé estas imágenes a un lado mientras montaba la base para las tarjetas.
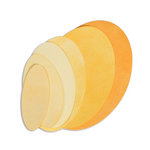
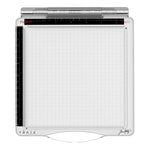
I decided to create some oval shaker cards. So, I used the Sizzix Framelits Oval dies and the Big Shot machine to die cut the shapes for the cards.
Decidí crear algunas tarjetas cockteleras con forma oval. Por ello, utilicé los troqueles Framelits ovales de Sizzix y la máquina troqueladora de la Big Shot para troquelar la forma oval para las tarjetas.
Decidí crear algunas tarjetas cockteleras con forma oval. Por ello, utilicé los troqueles Framelits ovales de Sizzix y la máquina troqueladora de la Big Shot para troquelar la forma oval para las tarjetas.

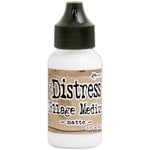
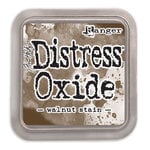
For my first card, I picked a sheet of woodgrain cardstock from Hero Arts that I blended with Distress Oxide - Walnut Stain. I die cut the center of this piece with the third largest dies from the Sizzix Oval dies using my die cutting machine (the Big Shot machine). I also die cut the center from a white craft foam sheet and a white notecard with this die. Then, I decided to create a frame around the centerpiece. So, I lined up the third and fourth largest oval die on top of a piece of white cardstock and passed it through my Big Shot.
Para mi primera tarjeta, elegí una cartulina en relieve de veta (simulando las franjas de la madera) de Hero Arts que combiné con la tinta Distress Oxide - Walnut Stain. Troquelé el centro de este trozo de cartulina con el tecer troquel más largo del set de troqueles ovales de Sizzix utilizando mi troqueladora (la máquina Big Shot). También troqueé el centro de una hoja de foamy o goma eva blanca y una base de tarjeta blanca con el mismo troquel. Luego decidí crear un marco para añadirlo alrededor del centro. Así que alineé el tercer y cuarto troquel oval más largos del set y los puse sobre un trozo de cartulina blanca y la troquelé con la Big Shot.

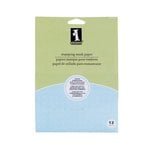
For creating the pocket for this shaker card, I used sheet protectors for documents. I cut a piece and folded in a half. I added the fourth largest oval die on top except for the bottom part that it is a little bit outside from it (the protector sheet). The oval die has to be a little larger so that you can fuse it around the edges with the fuse tool. I put the piece between the cutting pads from my Big Shot but not the bottom part that I didn't want to cut. I passed through my die cutting machine. These dies that I used didn't cut this sheet protector completely but left a marked line of the die, so, I finished cutting the piece along the marked line with a pair of scissors. Later, I used the fuse tool from We R Memory Keepers to seal the edges. I started fusing the bottom and I kept the top part open in order to add some sequins and some flower sequins from Lucy's Cards. When I finished adding the sequins, I sealed the top part.
Para crear el bolsillo central para esta tarjeta cocktelera, utilicé fundas protectoras para documentos. Corté una hoja y la doblé a la mitad. Añadí el cuarto oval más largo del set sobre esta pieza transparente excepto la parte inferior que lo dejé un poco sobresalido (de la funda protectora). Este troquel oval tiene que ser un poco más largo para que puedas sellar la pieza alrededor de los border con la herramienta Fuse. Entonces, puse la cartulina con el troquel entre las bases de corte de la Big Shot pero no la parte inferior, que es la parte que no quería cortar. Pasé el sandwich (las bases de corte con mi cartulina y el troquel) por la troqueladora (Big Shot). Estos troqueles que utilicé no cortaron la funda protectora completamente pero dejaron la marca del troquel, así que, terminé de cortar la pieza por las marcas con la ayuda de unas tijeras. Más tarde, utilicé la herramienta Fuse de We R Memory Keepers para sellar los bordes. Primero fusioné la parte inferior de la pieza y dejé la parte superior abierta para añadir las lentejuelas y lentejuelas de flores de la tienda de Lucy's Cards. Cuando terminé de añadir las lentejuelas, sellé la parte superior.

Now it was time to assemble this card. First, I added the foam piece on top of the white notecard with some double-sided tape. Next, I added some double-sided tape to the foam sheet and added the transparent piece with sequins. Later, I added more double-sided tape around the transparent piece and, then, I added the panel for my card on top. I was sure that all pieces fit nicely with the oval hole in the center. Finally, I added the white frame around the see-through centerpiece with some liquid adhesive.
Ahora era el momento para montar la tarjeta. Primero añadí la hoja de foamy o goma eva sobre la base de tarjeta blanca con cinta adhesiva de doble cara. Luego añadí cinta adhesiva de doble cara sobre la hoja de foamy o goma eva y añadí la pieza transparente con las lentejuelas. Más tarde añadí cinta adhesiva de doble cara alrededor de esta pieza transparente y, entonces, añadí mi panel principal para esta tarjeta. Me aseguré de que todas las piezas encajaban perfectamente con el agujero central ovalado. Finalmente añadí el marco blanco alrededor de la pieza transparente central con adhesivo líquido.
I added my images on top of the transparent piece with double-sided tape and some liquid adhesive.
Añadí mis imágenes sobre la pieza transparente con cinta adhesiva de doble cara y con adhesivo líquido.

For my sentiment, I stamped my phrase on a piece of white cardstock with Versafine Onyx black ink. Then, I decided to add some shimmer, so I added some shimmering pearl embossing powder and heat it with my heat tool. I cut it as a strip. Later, I added it next to the images and on top of the window piece.
Para mi frase, estampé la frase sobre un trozo de cartulina blanca con la tinta Versafine Onyx black. Luego decidí añadirle algo de brillo y, por ello, añadí los polvos de embossing shimmering pearl y los sequé con la pistola de embossing o calor. Recorté la frase en forma de tira. Más tarde la añadí sobre la pieza transparente central y al lado de las imágenes.

For final touches, I added white dots around the white frame with enamel accents (or Nuvo Crystal Drops). Also, I added some gold details with the gold gel pen and, also, white details with white gel pen.
Para los toques finales, añadí algunos puntos blancos alrededor del marco blanco con enamel accents (o Nuvo Crystal Drops). También añadí algunos detalles dorados con el gold gel pen y, también, detalles blancos con el white gel pen.
 |
| ABNH Challenge August 2018 - Shine | ABNH Reto Agosto 2018 - Brillo |
I decided to take part in the A Blog Named Hero Challenge - August 2018 with the last card.
Decidí formar parte del Reto del Blog A Blog Named Hero de agosto 2018 con la última tarjeta.

For my second card, it is quite similar to the previous one except for the main panel that I changed a little bit.
Para la segunda tarjeta, el proceso es bastante parecido excepto por el panel principal que cambié un poco.
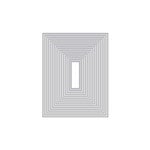
For creating the main panel, I die cut the oval center as I did for my first card. So, I die cut the center with the third largest die from the Sizzix oval die set. For this card, I also die cut a foam sheet and a white notecard. I cut also an oval piece from the Inkadinkado masking sheet with the fourth largest oval die from the same die set. Then, I picked my main panel and added the masking oval piece in the center. As the masking oval piece was larger than the oval gap from the main panel, this would mask a border around the oval in order not to color this part. Next, I colored the main panel (excepting the part with the mask) with Distress Oxide - frayed burlap and heat set it. Later, I used my anti-static tool in order to heat embossed this piece. I added a stone stencil from my stash and used the emboss it dabber from Ranger. Then, I added some marigold embossing powder (yellow tone) and heat embossed.
I removed the mask (Inkadinkado) from my main panel.
Para crear el panel principal, troquelé el centro con el troquel ovalado como hice con la primera tarjeta. Así que troquelé el centro con el tercer troquel más largo del set de Sizzix. Para esta tarjeta, también troquelé una pieza en foamy o goma eva y una tarjeta base blanca. Además, troquelé una hoja de papel de enmascarar de Inkadinkado con el cuarto troquel ovalado más largo del mismo set. Una vez que todo estuviese troquelado, sobre el panel principal puse la pieza de enmascarado en el centro. Como el papel enmascarado que troquelé es más largo que el orificio ovalado del panel principal, este enmascararía solo el borde alrededor del hueco para así, no colorear esta parte. Luego coloreé el panel principal (excepto la parte con la máscara) con la tinta Distress Oxide - frayed burlap y lo sequé con la pistola de calor o embossing. Más tardde, utilicé la herramienta anti estática para realizar embossing caliente. Sobre el panel principal. añadí un stencil o máscara de piedras que tenía desde hace ya tiempo y utilicé la tinta para embossing en tubo llamada emboss it dabber de Ranger. Después, añadí polvos de embossing marigold (color amarillo) y los sequé con la pistola de calor.
Quité la máscara (de Inkadinkado) del panel principal.

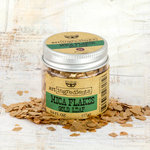
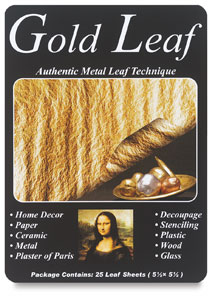
For the frame that it is around the center, I used a Quickie glue pen to adhere some gold-leaf to the border. In my opinion, gold-leaf is quite similar to NUVO gold flakes.
Para el marco blanco que había creado alrededor, utilicé el Quickie glue pen Sakura para adherir pan de oro. En mi opinión, el pan de oro se parece mucho a los NUVO gold flakes.
I assembled this card as the previous one. I attached the foam sheet to white notecard using some double-sided tape. I added the transparent oval piece in the center as I did for my first card and added the main panel on top. Later, I added the images on top of the see-through window.
Monté esta tarjeta como la primera. Pegué la hoja de foamy o goma eva a una tarjeta de base blanca utilizando cinta adhesiva de doble cara. Añadí la pieza transparente ovalada que creé con la fuse de We R Memory Keepers como hice anteriormente y, finalmente, añadí el panel principal encima. Más tarde, añadí las imágenes sobre la ventana transparente.

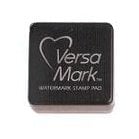
For the sentiment of this card, I inked the phrase with Versamark ink on a piece of kraft cardstock and added some white detail embossing powder. I heat set it and added on top the transparent window.
Para la frase, impregné el sello con la tinta Versamark ink y lo estampé sobre una cartulina Kraft y añadí polvos de embossing blancos. Los sequé con la pistola de calor o embossing y lo adherí sobre la ventana transparente.

For embellishing this card, I added some white details with my Uniball white gel pen and some gold details with the gold gel pen.
Para embellecer esta tarjeta, añadí algunos detalles blancos con el Uniball white gel pen y otros detalles en oro con el gold gel pen.

And that's it! I hope you like these two cards! Do not forget to leave me a comment!
Thank you!
¡Y esto es todo! Espero que les haya gustado estas dos tarjetas. ¡No se olviden de dejar sus comentarios!
¡Gracias!


For Americans, I highly recommend the Wagner heat tool from Hero Arts. I cannot use this tool because I live outside of the States and this tool cannot be used internationally due to the electrician requirements that are not the same for all the continents. No possible for use with outlet adapters.
Para los americanos, recomiendo la pistola de embossing de Hero Arts - Wagner. No puedo utilizar esta herramienta porque vivo fuera de los EEUU y es incompatible debido a los requisitos eléctricos que no son iguales para todos los continentes. Tampoco es posible utilizarse con un adaptador.
[Not all the thumbnail image links take part of Affiliate Programs | No todos los enlaces en imágenes forman parte del Programa de Afiliados]


.jpg)
.jpg)
.jpg)

0 Comments