

Hello everybody! It's me, Cha! This time I'm going to show you some techniques that I made for this card. For this card, I included the sentiment in one of the elements of the card, and also, I created a stained glass effect on some small images. I used the MMH kit June 2018 from Hero Arts. Unfortunately, this kit is not available anymore but there are many kits out there with a summer theme that are very good options for creating scenes like this one. If you want to see the beach card that I made with the kit, link HERE.

¡Hola a todos! ¡Soy Cha! Esta vez les voy a enseñar algunas técnicas que hice para esta tarjeta. Para esta tarjeta, incluí la frase en uno de los componentes de la tarjeta, y también, creé el efecto cristal manchado en las imágenes. Utilicé el kit de Hero Arts MMH de junio 2018. Este kit ya no está disponible pero hay muchos kits de otras compañías con la temática veraniega que son buenas opciones para crear escenas como ésta. Si quieres ver la tarjeta veraniega que creé utilizando este mismo kit, puedes verlo AQUÍ.

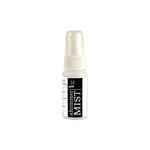
First of all, for creating this scene, I created the sea. So, I used an acrylic block to do the stamping of my acrylic stamps. I picked the second stamp layer of this set. I stamped the sea from the middle to the bottom of my white panel. I used Hero Arts ink - deep ocean. When I finished, I masked with a post-it note the sea area in order to color the sky. For coloring the sky, I wanted to blend some bright colors. So, I blended Hero Arts MMH ink - fiesta yellow and Hero Arts MMH ink - ruby. As these inks cubes are not available anymore because they were part of past Hero Arts kits, they may be similar to dandelion ink and strawberry ink. Later, I masked the part of the sky in order to give some shine to the sea using the MMH shimmer spray - seafoam (similar to this one). When adding this spray, I put my card in a box to not stain my work surface. I let it dry for a while although we can use the craft heat tool.
Primero, para realizar esta escena, creé el mar. Así que, utilicé una base de metacrilato para realizar la estampación de sellos acrílicos. Escogí la segunda capa de sello de este kit. Comencé a estampar el mar desde el medio hasta la parte inferior de mi cartulina blanca. La tinta que utilicé fue Hero Arts - deep ocean. Cuando terminar de estampar esta parte, enmascaré con un post it (o cinta de enmascarar) esta área que creé de mar para así, colorear el cielo. Para colorear el cielo, quería combinar colores brillantes, así que mezclé la tintas MMH de Hero Arts - fiesta yellow y ruby. Como estas tintas ya no están disponibles porque fueron parte de pasados kit mensuales de Hero Arts, podrían ser similares a otras tintas, la tinta dandelion y la tinta strawberry, ambas de Hero Arts. Entonces, enmascaré la parte inversa, es decir, el cielo, para poder darle al mar un poco de brillo utilizando el MMH spray de Hero Arts - sea foam (parecido a este). Cuando añades un producto como este, es aconsejable ponerlo en el interior de una caja antes de rociar con el producto, ya que si lo echamos directamente sobre la cartulina, mancharemos toda la superficie de trabajo. Dejé secar el panel un poco aunque podemos utilizar la pistola de embossing o calor.

Next, I masked again the sea in order to create a black line on the horizon - meaning the line where the sky and the sea meet. So, I picked the first stamp layer of the sea and inked just the top part of the stamp with Versafine onyx black ink. I stamped several times until I got a well-defined black line. Then, I stamped some palm trees on the right part of my card, right on top of this line and, with the same ink (Versafine onyx black). At this point, I decided to add some clouds to the sky, so I stamped the second stamp layer of the cloud from the same stamp set, using Hero Arts pigment ink - unicorn.
Más tarde, enmascaré la parte del mar otra vez para crear una línea negra en el horizonte, es decir, la línea en dónde el mar y el cielo se encuentran. Así que, escogí la primera capa del sello del mar, que es más sólida, y la impregné con la tinta Versafine onyx black, pero solo la parte superior del sello. Estampé varias veces hasta conseguir una línea gruesa bien definida. Después, estampé algunas palmeras en la parte derecha de la tarjeta y sobre la línea negra con la misma tinta (la Versafine onyx black). En este momento, decidí añadir algunas nubes en el cielo, así que estampé la segunda capa de sello de la nube del mismo kit y utilizando la tinta de pigmento Hero Arts - unicorn.

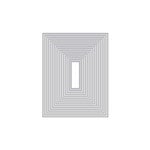
I wanted to create some dimension to this card. For this, I just die cut several rectangles to attach together in order to create a frame. For cutting these rectangles, I just lined up two rectangle dies from the Hero Arts Infinity Dies - rectangles and adding to them some masking tape in order to avoid moving. Then, I die cut four pieces of heavyweight white cardstock using my die cutting machine - the Big Shot. So, I attached all the pieces with a strong glue - Distress collage medium.
Quería dar algo de relieve a la tarjeta. Para ello, troquelé algunos rectángulos y los pegué juntos, es decir, uno encima de otro, para crear un marco. Para cortar estos rectángulos, alineé dos troqueles de rectángulos del set de troqueles de Hero Arts Infinity dies - rectangles y les puse cinta de enmascarar para que no se movieran. Entonces, troquelé cuatro trozos en cartulina blanca utilizando mi máquina de la Big Shot. Así que pegué todas las piezas utilizando un pegamento fuerte - Distress collage medium.

For mounting my card, I marked with a pencil the inside corners of my frame on a 4.25 by 5.5 inches white notecard. Then, I adhered the panel positioned the card centered to these marks trying to hide them in some way. Then, I attached the frame that leaves a white strip around my panel.
Para montar mi tarjeta, hice unas marcas con un lápiz en las esquinas de la parte interior del marco sobre una base de tarjeta blanca de 4.25 por 5.5 pulgadas. Entonces, posicioné el panel que creé previamente lo más dentrado posible a estas marcas e incluso escondidas debajo del panel de alguna manera. Finalmente, pegué el marco sobre el panel que deja una tira blanca alrededor del panel.

At this point, I also die cut several white clouds (from the same stamp kit) that I added to the sky of my panel but mounting part of the cloud on top of the frame, and another part on top of the panel using some foam tape. I also added my sentiment from the kit on top of one of the clouds in order to take part of the card.
En este punto, también troquele algunas nubes blancas (del mismo kit de sellos) y que las añadí al cielo de mi panel pero parte de las nubes están sobre el marco y, la otra parte sobre el cielo del panel principal que adherí utilizando cinta adhesiva de espuma. También añadí la frase del mismo kit en una de las nubes para que formara parte de la tarjeta.


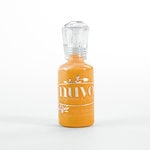
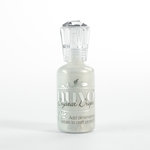
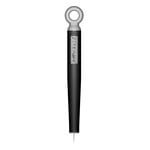
Finally, I decided to add some images on top of the sea. I just stamped a seashell and two starfishes using Hero Arts ink - butter bar, orange soda and fiesta red (MMH ink, so similar to crimson ink). I die cut with their coordinating dies and using my Big Shot machine and adhered to the card with some foam tape. Then, I added some shimmer to these images using my Nuvo aqua shimmer pen. Later, I added some glossy accents to the images, and I wanted some different effect, so I mixed the glossy accents with different Nuvo Crystal and Jewel Drops (ivory seashell, ripened pumpkin, English mustard and strawberry coulis) depending on the color of the ink that I used for each image and I mixed them with the Tim Holtz retractable craft pick. The effect that I created is so unique that I decided to keep this process in order to create just one card with this effect in the future.
Finalmente, decidí añadir algunas imágenes sobre el mar. Estampé algunas imágenes, una caracola y dos estrellas de mar utilizando las tintas Hero Arts - butter bar, orange soda y fiesta red. Ésta última corresponde a la tinta de los kits y es parecida a la tinta crimson. Utilicé los troqueles coordinados para cortar las imágenes utilizando la Big Shot y las añadí a la tarjeta con cinta adhesiva de espuma. Entonces, le dí un poco de brillo a estas imágenes con el rotulador Nuvo aqua shimmer pen. Más tarde, también les añadí glossy accents a las imágenes mezclados con diferentes Nuvo Crystal y Jewel Drops (ivory seashell, ripened pumpkin, English mustard y straberry coulis) dependiendo del color de la tinta que utilicé para cada imagen y las iba mezclando con el Tim Holtz retractable craft pick. El efecto que creé es tan único y bonito que he decidido guardar este proceso para poder crear una tarjeta con este efecto en un futuro.
I hope you like this card and if you like my projects, please subscribe to my blog and my YouTube Channel to receive my notifications.
Thank you!
Espero que les haya gustado esta tarjeta y si te gustan mis proyectos, por favor subscríbanse a mi blog y a mi Canal de YouTube para recibir notificaciones.
¡Gracias!


.jpg)
.jpg)
.jpg)

0 Comments