

[Scroll down to see the thumbnail products | Desliza hacia abajo para ver los productos en imágenes]
Hello crafters! It's me, Cha. Today I'm very excited because I've tried to make an interactive card called 'Diorama Card' that is like an accordion. I was inspired by Sam Calcott UK who made it some weeks ago. I was very fascinated by her talent. She made all interactive cards that I hadn't ever imagined, could exist. Calcott is also a designer of cardmaking products that are really beautiful and colorful. I encourage you to have a look at her YouTube Channel and products! (See HERE) Back to the card, I modified it a little bit because Calcott made a 6 by 6-inch card but I preferred the standard size which is 4,25 by 5,5 inches. I had to fit the measurements for this card, also Sam Calcott made some "Diorama Swing Cards" in which the elements swing from one side to another but I preferred to skip this part and just make a diorama card. Besides, this card that I made was a challenge, Stay Crafty with Hero #25. I hope you like this card!
¡Hola artistas! Soy Cha. Hoy estoy muy emocionada porque he intentado hacer una tarjeta interactiva llamada "Tarjeta Diorama" que es como un acordeón. Me inspiré en una tarjeta de Sam Calcott UK que hizo hace varias semanas. Me impresionó todas sus tarjetas interactivas que ha realizado y que ni sabía que se podían realizar. Calcott es también una diseñadora de productos de tarjetería que realmente son productos muy bonitos y coloridos. ¡Te animo que eches un vistazo a su canal de Youtube y sus productos! (Mira AQUÍ). Con respecto a la tarjeta, la modifiqué un poco porque Calcott hizo una tarjeta de 6 por 6 pulgadas pero yo preferí utilizar las medidas estándares de 4,25 por 5,5 pulgadas. Tuve que encajar las medidas para esta tarjeta, también ella creó unas tarjetas llamadas "Tarjetas Dioramas con Vaivén" en el que los elementos se mueven de izquierda a derecha o viceversa, es decir, en vaivén, pero preferí mantener esta tarjeta un poco más simple y hacer simplemente tarjetas diorama. Además, esta tarjeta que hice fue parte para un reto de tarjetería, los retos de Hero Arts, Stay Crafty with Hero #25. ¡Espero que les guste!


First of all, the bases for this interactive card were created. I trimmed two pieces of 5,5 (5 1/2) by 8,75 (8 3/4) inches. I used Neenah Solar White 80lb for creating these pieces. Then, I also created six supports that I was gonna need, the measurements for these were 3/4 by 4 inches although I trimmed some extra pieces in case I needed them. Once these pieces were created, I picked one of the bigger pieces and used a scoreboard to start scoring it at 4,25, then every half of an inch. Later, on the right part that I'd scored, I measured 3/4 perpendicular to the scoring line of 4,25, I marked two times, one at the top and one at the bottom. Then, between these two lines, I cut with scissors. See the next picture to see the patterns clearly.
Primero, diseñé las bases para esta tarjeta interactiva. Corté dos piezas de 5,5 por 8,75 pulgadas. Utilicé cartulina blanca, Neenah Solar White 80lb, para crear estas piezas. Luego, diseñé seis soportes que iba a necesitar con medidas de 3/4 por 4 pulgadas aunque corté algunas más como extras por si las necesitaba. Una vez que creé estas piezas, cogí las piezas grandes y comencé a marcarlas con una tabla de hendido, las marqué en 4,25, y luego cada media pulgada. Más tarde, en la parte derecha que había marcado, medí 3/4 perpendicularmente a la línea marcada en 4,25, y marqué dos vecesm una en la parte superior y otra en la parte inferior. Luego, entre estas dos líneas, recorté con unas tijeras. Mira la siguiente foto para poder ver el patrones de manera más clara.


Later, I had to decide which one of the two pieces was on the front of the card, and which one was on the back. I die cut a rectangle to the one that was on the front to create a window to see the elements that were inside. For creating this window, I used the HA Nesting Rectangle Infinity Dies and the Sizzix Big Shot Die-Cutting Machine - you could use the one that you often use. Then, I created the backgrounds using a Cloud Stencil from my stash (See HERE) and an Ink Blending Brush. I used the HA Soft Sky Shadow ink. I created two pieces of these backgrounds but I die cut one of them with the same rectangle die so that I could glue it on the card front as a beautiful cloudy frame.
Luego, tuve que decidir cuál de las dos piezas iba en la parte frontal de la tarjeta, y cuál iba a estar en la parte trasera. Troquelé un rectángulo en la parte frontal para crear una ventana y ver los elementos de la parte interior. Para crear esta ventana, utilicé el set de troqueles Nesting Rectangle Infinity Dies de Hero Arts y la Máquina Troqueladora Big Shot de Sizzix - puedes utilizar la que tengas. Entonces creé los fondos utilizando un Esténcil o Máscara de Nubes que tenía entre mis materiales (Mira AQUÍ) y un Cepillo Aplicador de Tintas. Utilicé una tinta azul pálido, HA Soft Sky Shadow ink. Creé dos piezas de estos fondos pero troquelé uno de ellos con el mismo troquel rectangular para así poder crear un marco más bonito.


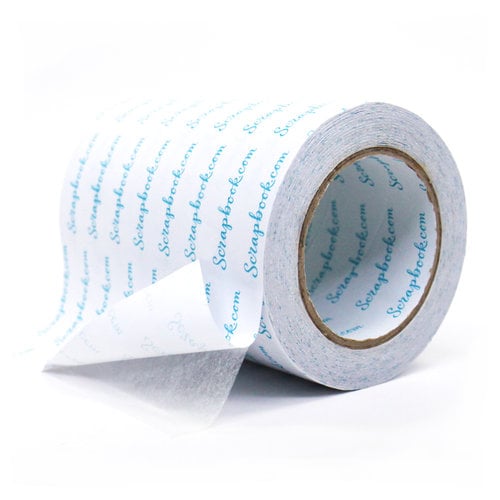
For the elements of this card, I used a sky and rainbow theme. So, the rainbow die was from the PinkFresh Studio Color Block Die Set was die on white cardstock. As this rainbow was too wide for this card, I decided to color just five arches of this rainbow that I colored with different colored inks using an Ink Blending Brush - HA Strawberry Bold ink, HA Tangerine Bold ink, HA Lemon Yellow Shadow ink, HA Lime Green Shadow ink, HA Summer Sky Bold ink. To give this piece a little bit of sturdiness, I used Adhesive Double-Sided Paper and copy paper to glue this piece on it and cut it around.
Para crear los elementos de esta tarjeta, utilicé como temática el cielo y el arcoiris. El arcoiris que utilicé es del set de troqueles Color Block Die Set de PinkFresh Studio y lo troquelé sobre cartulina blanca para poder colorearlo. Como este arcoiris era muy ancho para esta tarjeta, decidí colorear solamente cinco arcos del arcoiris que coloreé con diferentes tintas utilizando un Cepillo Aplicador de Tintas - HA Strawberry Bold ink, HA Tangerine Bold ink, HA Lemon Yellow Shadow ink, HA Lime Green Shadow ink, HA Summer Sky Bold ink. Para dar a esta pieza un poco más de firmeza, utilicé Papel Adhesivo de Doble Cara y papel común para pegar esta pieza y recorté alrededor.

A colored hot air balloon, some clouds, and sun were created to add them to the card. These dies were from a past My Monthly Hero kit, May 2020. This kit is not available anymore but you can find similar images in your stash similar to these from other companies. I colored the hot air balloon with Copic Sketch Markers - B00, BV00, R21, Y00, E15, E53. Then, I colored the sun with some HA bold and shadow inks - HA Soft Yellow Shadow Ink and HA Dandelion Bold Ink. I did not color the clouds.
Los elementos que utilicé para esta tarjeta fueron algunas nubes pequeñas, un globo aeroestático coloreado y el sol. Estos troqueles venían con un kit pasado de Hero Arts, My Monthly Hero kit Mayo 2020. Este kit ya no está disponible pero pueden encontrar imágenes similares entre sus materiales de otras compañías. Coloreé el globo aeroestático con los Rotuladores Copic Sketch - B00, BV00, R21, Y00, E15, E53. Luego coloreé el sol con las tintas HA Soft Yellow Shadow Ink y HA Dandelion Bold Ink. No coloreé las nubes.

I used the HA Cloudy Sky Scene Dies to add some clouds to the frame from the front card and to decorate the inside of the card. I also adhered an acetate piece to the back of the front card. I also used some seagulls from this set as embellishments.
Utilicé el set de troqueles HA Cloudy Sky Scene Dies para añadir algunas nubes en el marco en la parte frontal y decorar el interior de la tarjeta. También pegué un trozo de Acetato en la parte trasera de la parte frontal. Además, utilicé las gaviotas que vienen con este set como adornos para la tarjeta.

Later, I folded the strips from the front and the back base card that I'd cut in 3/4 inches. I folded them first forward, then back, forward, back, and so on. Is this difficult to understand? Don't worry I have a video for you! (See HERE) Then, I glued the last piece of the strip from the card front to the back of the card, the top one and the bottom one. The supports were glued to every folded piece from the right side to the other, three supports at the top and the other three to the bottom but one by one while I was adding the elements or images. I used the Kokuyo Adhesive (temporarily adhesive) so that I could move the pieces around until they were in the right position.
Más tarde, doblé las tiras de la base frontal y trasera de la tarjeta que había cortado en 3/4 de pulgadas. Las doblé primero hacia delante y luego hacia atrás, hacia adelante y hacia atrás, y así sucesivamente. ¿Es difícil de comprender? ¡No te preocupes tengo un vídeo para ti! (Mira AQUÍ) Luego pegué la última pieza de esta banda o tira de la tarjeta trasera a la parte frontal, tanto en la parte superior como en la parte inferior. Pegué los soportes a cada trocito doblado de la parte derecha a la parte izquierda, tres soportes en la parte inferior y tres soportes en la parte superior pero uno a uno mientras iba añadiendo los elementos o imágenes. Utilicé el Adhesivo Kokuyo (adhesivo temporal) para poder mover las piezas hasta estar en la correcta posición.

In the first two supports, I added a cloud and a rainbow, in the second supports, I added small clouds and sun. These elements were added with an acetate piece as if they were hanging from the sky. Then, I added more small clouds and the hot air balloon.
En el primer soporte, añadí una nube y el arcoiris, en los segundos soportes añadí las nubes pequeñas y el sol. Estos elementos fueron añadidos con un trozo de acetato como si ellos estuvieran colgando del cielo. Entonces, añadí más nubes pequeñas y el globo aeroestático.

Finally, I adhered the top and bottom laps to the front card to close this diorama card. I tried that the card was closed nicely. Then, I stamped the sentiment on top of a cloud that I'd die cut with Versafine Onyx Black Ink. Later, I glued the seagulls here and there, some gold shimmer was added to the sun, and some clay embellishments, too, some rainbows to the front, and some white hearts to the inside.
Finalmente, adherí las tiras a la parte frontal para cerrar esta tarjeta diorama. Intenté que la tarjeta cerrara bien. Entonces, añadí la frase para esta tarjeta en la parte superior sobre una nube que había troquelado con la tinta Versafine Onyx Black ink. Más tarde, pegué las gaviotas aquí y allí, añadí un poco de brillo dorado en el sol, y algunos adornos de arcilla también, algunos arcoiris y algunos corazones.


As this card is flat so that you could send it inside of an envelope, I decided to add a small folded card on the back and added to it a piece of a remaining cloudy sky that I created earlier to write some message.
Como esta tarjeta es plana se puede enviar en un sobre regular, decidí añadir una pequeña base de tarjeta por detrás y le añadí un trozo de cartulina que quedó con nubes que había creado antes para poder escribir el mensaje.

Besides, I also created another diorama card but I did not add the acetate piece to the front card. I hope you like this card too!
Además, también creé otra tarjeta diorama pero no añadí el trozo de acetato en la parte frontal. ¡Espero que les guste esta tarjeta también!


And these are the cards for today! Explaining the process of this card was a challenge. Remember there is a video so, maybe, seeing the process could be very helpful for you to understand it. I hope you like it! Please, leave a comment below if you want to know something about this card.
¡Y esta estas son las tarjetas para hoy! Explicar el proceso de esta tarjeta fue un reto. Recuerda que hay un vídeo así, quizás, viendo el proceso puede ser más útil para entenderlo. ¡Espero que les guste! Por favor, deja un comentario abajo si quisieras saber algo más de esta tarjeta.
Thank you so much for your support and see you soon!
¡Muchas gracias por su apoyo y hasta prontito!


|


.jpg)
.jpg)
.jpg)

4 Comments
Wonderful how you created and sized your diorama to a standard A2 card. Wonderful scene. I also created a Floating Shadow Box Card. I'll ck out your size & directions to make one of the A2 size.
ReplyDeleteMelissa
"Sunshine HoneyBee"
Thank you Melissa! I'll check your Floating Shadow Box Card! I'm trying interactive cards right now! Thank you so much! 💗
DeleteMarisela Delgado said: Hola, Cha! Que lindas te salieron las tarjetas! Estan divinas! Me encanta la imagen del sol. ☺ Mari
ReplyDeleteHola Mari! El sol es de un kit de Hero Arts que ya no está disponible pero tienen un set de troqueles con un set parecido a este sol! Muchas gracias! 💗
Delete