

Hello there! It's me, Cha! Today I decided to make a Halloween card. For making this, I chose the owl from the Hero Arts stamp set - color layering owl, some alcohol inks and the glow-in-the-dark embossing powder from Lawn Fawn. Also, I used some past Hero Arts kits! I hope you like this card!
¡Hola a todos! ¡Soy Cha! Para hoy decidí crear una tarjeta de Halloween. Para hacerla, elegí el búho del set de sellos de Hero Arts - color layering owl, algunas tintas de alcohol y el embossing powder -glow-in-the-dark (brilla-en-la-oscuridad) de Lawn Fawn. ¡También utilicé varios kits pasados de Hero Arts! ¡Espero que les guste!

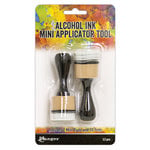
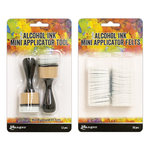
First, I used some YUPO paper to make some backgrounds with alcohol inks. On one piece of this paper, I just colored with alcohol ink - pitch black and played and sprayed some rubbing alcohol to give a more interesting look to the background. I die cut this piece with a frame that came with a kit from Hero Arts - MMH kit May 2018. This frame had a swing that I removed with scissors. I also cut this piece in 5" 1/4 x 4".

First, I used some YUPO paper to make some backgrounds with alcohol inks. On one piece of this paper, I just colored with alcohol ink - pitch black and played and sprayed some rubbing alcohol to give a more interesting look to the background. I die cut this piece with a frame that came with a kit from Hero Arts - MMH kit May 2018. This frame had a swing that I removed with scissors. I also cut this piece in 5" 1/4 x 4".
Primero, utilicé papel YUPO para hacer algunos fondos con las tintas de alcohol. En un trozo de este papel, simplemente coloreé con la tinta de alcohol - pitch black y jugué y rocié con alcohol desinfectante para dar un toque más interesante a este fondo. Troquelé la pieza con un marco que vino con el kit de Hero Arts - MMH kit de Mayo 2018. Este marco tenía un columpio que quité con unas tijeras. También corté la pieza en 5.25" por 4" (en pulgadas).


Second, I created another background to put behind that frame that we'd created before. For this second background, I created a scene with alcohol inks and using my alcohol inks palette, just one brush, and some rubbing alcohol. I started coloring the piece with dandelion although I changed my mind later. Then, I colored a circle with snow cap color in the middle. Later, I added some turquoise from the center to the borders and mixing a little bit with the color white (snow cap). Closer to the edges, I colored with pitch black and mixed with turquoise. I was coloring and mixing the colors until I was satisfied. I let it aside to dry but just 5-6 minutes because I added some silver foil on top of this panel and passed through my die cutting machine without any die and with a piece of felt on the base to make pressure and transferred the foil onto the piece.
Segundo, creé otro fondo que puse detrás de ese marco que había creado antes. Para este fondo, creé una escena con las tintas de alcohol y utilizando la paleta de tintas de alcohol, un pincel, y alcohol desinfectante. Comencé a colorear la pieza con la tinta dandelion aunque luego cambié de opinión. Luego pinté un círculo en el centro con el color snow cap. Despues añadí el color turquesa desde el centro hacia los bordes y mezclándo un poco con el color blanco (snow cap). Más cerca de los bordes, coloreamos con la tinta pitch black y mezclé con el color turquesa. Iba coloreando y mezclándo los colores hasta estar satisfecha con el resultado. Lo dejé secar unos 5-6 minutos porque añadí foil plateado sobre este panel y lo pasé por la troqueladora sin ningún troquel y con una pieza de fieltro en su base para hacer presión y así, transferrir el foil al panel.


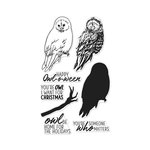
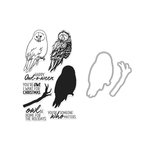
For my images, I decided to use the color layering owl from Hero Arts. I stamped the owl in layers with Hero Arts dye inks. For stamping, I used the Travel Stamp Platform for multiple stamping. I stamped the first layer with soft granite ink but I stamped the left side darker than the right one due to the moon reflection. I stamped the second layer with cup o'joe ink. For the last layer, I did embossing. So, I applied the anti-static powder tool and stamped the last layer with versafine onyx black and added some ultra fine embossing powder that I heat it with my heat tool. I also created two color layering pumpkins from a past Hero Arts kit - MMH September 2017 and stamped one small and a big one in the same colors. I stamped with soft granite the first layer, then, I stamped with sapphire ink (exclusive kit ink - MMH December 2017). This ink pad is similar to navy. Finally, I stamped the last layer with the versafine onyx black ink.
Para las imágenes de esta tarjeta, decidí utilizar el set de sellos de Hero Arts - color layering owl. estampé el búho de este set en capas para crear un búho bastante similar a la realidad y estampando con las tintas de Hero Arts (de tinte). Para estampar, utilicé la plataforma de estampación de Tim Holtz para estampar muchas veces sobre la misma área. Estampé la primera capa del búho con la tinta soft granite pero estampé la parte izquierda más oscura que la derecha debido al reflejo de la luna. Estampé la segunda capa con la tinta cup o'joe. Para la última capa, realicé embossing y, para ello, apliqué la herramienta de polvo antiestática primero y estampé la útlima capa con la tinta versafine onyx black y añadí los polvos de embossing ultra fine a la que le dí calor para secarlos con la pistola de embossing o calor. También creé dos calabazas en capas de un Hero Arts pasado - MMH Septiembre 2017, una calabaza pequeña y una calabaza un poquito más grande. La primera capa de estas calabazas la estampé con la tinta soft granite. Luego estampé la segunda capa con la tinta sapphire (tinta exclusiva de un kit pasado - MMH Diciembre 2017). Esta tinta es parecida a la tinta navy. Finalmente la última capa la estampé con la tinta versafine onyx black.

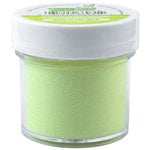
For the sentiment, I stamped one phrase from the owl color layering stamp set - "happy owl-o-ween". I stamped this sentiment onto a piece of black cardstock with versamark ink and added the Lawn Fawn embossing powder - glow-in-the-dark. I heat it with my heat tool. I also added this "glowing" embossing powder on the eyes of the owl using an embossing pen.
Para la frase de esta tarjeta, utilicé una frase del set de sellos color layering owl - "happy owl-o-ween". Estampé esta frase en una trozo de cartulina negra con la tinta versamark y añadí los polvos de embossing de Lawn Fawn - glow-in-the-dark. Los sequé con la pistola de calor. También añadí estos polvos de embossing de brillo en los ojos del búho con un rotulador para embossing.


For mounting the card, I added the background with the moon on a black notecard with some double-sided tape. Later, I added the black frame with some foam squares. I added the big pumpkin on the left side, then, I added the banner with the sentiment and the small pumpkin and, finally, I added the owl over the banner.
Para montar esta tarjeta, añadí una base de tarjeta negra con cinta de doble cara. Luego, añadí el fondo con el marco con cuadritos adhesivos de espuma. Añadí la calabaza grande en el lado izquierdo y en la parte inferior. luego añadí la tira con la frase, la calabaza pequeña y, finalmente, el búho sobre la tira.
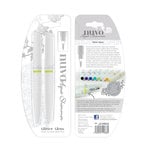
For finishing touches, I just added some shimmer to the pumpkins with the NUVO aqua shimmer pen.
Para los toques finales, simplemente añadí algo de brillo a las calabazas con el NUVO aqua shimmer porque quería que el búho y el fondo resaltaran.


I hope you like this card!
Thank you!
¡Espero que les haya gustado esta tarjeta!
¡Gracias!


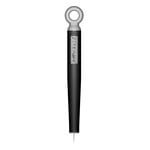


For Americans, I highly recommend the Wagner heat tool from Hero Arts. I cannot use this tool because I live outside of the States and this tool cannot be used internationally due to the electrician requirements that are not the same for all the continents. No possible for use with outlet adapters.
I use Artemio heat gun (available in Europe only).
Para los americanos, recomiendo la pistola de embossing de Hero Arts - Wagner. No puedo utilizar esta herramienta porque vivo fuera de los EEUU y es incompatible debido a los requisitos eléctricos que no son iguales para todos los continentes. Tampoco es posible utilizarse con un adaptador.
Utilizo la pistola de calor de Artemio (disponible solo para Europa)
[Not all the thumbnail image links take part of Affiliate Programs | No todos los enlaces en imágenes forman parte del Programa de Afiliados]


.jpg)

.jpg)

0 Comments