

Hello everyone! It's me, Cha! One of the techniques that I love is Masking. I think this technique is especially useful for creating scenes and this is why I love it so much!
Masking is a technique in card making or mixed media whose aim is not to contaminate or just we want to leave without coloring a space or an image on a card or canvas.

¡Hola a todos! Soy Cha. Una de las técnicas que me encanta para crear mis tarjetas es la técnica de enmascar. Pienso que esta técnica es especialmente útil para crear esceneas y es por ello...¡que tanto me gusta! El enmascarado (masking en inglés) es una técnica en tarjetería o mixed media cuyo objetivo es no contaminar o, solamente queremos dejar sin colorear un espacio o una imagen de nuestra tarjeta o de nuestro lienzo.
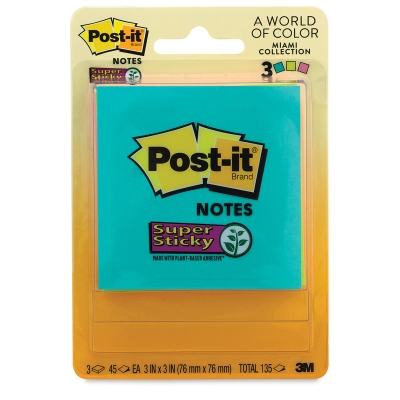
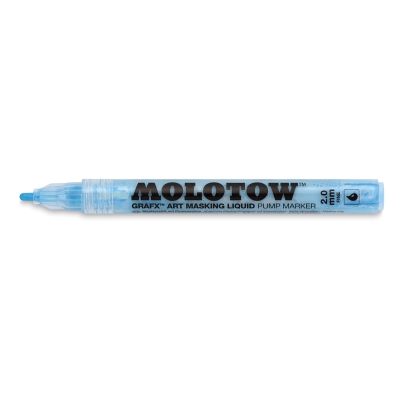
You can create a Masking Scene using many different products: 1) Full Sticky Post-it notes, 2) Masking Paper, 3) Masking Liquid (Molotow) or, 4) Masking Fluid.
Puedes crear una escena utilizando el enmascarado con diferentes productos: 1) Post-its con pegue en toda la hoja, 2) Papel de enmascarar, 3) Rotulador de enmascarado (conocido como Molotow) o, 4) Líquido para enmascarar.
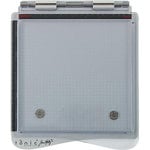
Full Sticky Post-it Notes and Masking Paper | Post-it Notes con Pegue en Toda la Hoja y Papel de Enmascarar
From my point of view, the best masking options for card making are the Masking Paper or the Full Sticky Post-it Notes because it is the fast way to make the masking. In fact, both of these products are paper. So, the only thing we need to do is to cut the paper and just place on top of the image that we want uncolored. The other two ways are quite similar.
Desde mi punto de vista, las mejores opciones para tarjetería son el papel de enmascarado y los post-it notes porque estos métodos son los más fáciles. En realidad, estos dos productos para realizar esta técnica son papel. Así que lo único que necesitamos hacer es cortarlo de la misma forma que lo quieres enmascarar y ponerlo encima de la imagen que no queremos colorear. Las otras dos formas de enmascarar son parecidas a estas.

Masking Liquid and Masking Fluid | Rotulador de Enmascarado y Líquido para Enmascarar
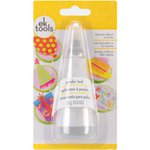
With the Masking Liquid, you need to color the image that you want with no color and let it dry for a while. Then, you erase the Masking Liquid rubbing with your fingers or with a glue eraser. The last one - Masking Fluid - is more or less the same as the Masking Liquid but instead of applying with the marker itself, you would need a brush.
Con el rotulador de enmascarado, necesitamos colorear la imagen que queremos enmascar y dejarlo secar por un tiempo. Una vez seco, frotamos con el dedo o con una goma de pegamento para quitar el rotulador. El último producto de enmascarado - el Líquido de enmascarar - es más o menos lo mismo que el rotulador pero en vez de aplicardo con el rotulados mismo, lo aplicaríamos con un pincel.
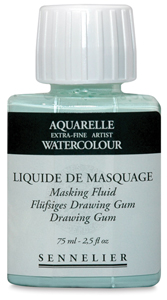 However, I've always had problems to make masking on my cards because I didn't find the good product to make it! (Remember that I live in a small town). So, I always played with simple post-it notes and I don't recommend these ones because I have to be careful because they are easy to move. I also have some Masking Fluid and I think it is a very good product but sometimes I don't like to use it because it is smelly.
Sin embargo, siempre he tenido problemas en realizar esta técnica del enmascarado en mis tarjetas porque... ¡no encontraba el producto! (Recuerden que vivo en un lugar pequeño). Así que siempre suelo utilizar post-it notes simples pero obviamente, recomiendo las que son más fuertes y las que tienen pegamento en toda su hoja porque así son más difíciles de mover. También he utilizado el Líquido de Enmascarar y pienso que es una buena alternativa porque el producto es bueno pero no me gusta utilizarlo demasiado porque tiene un olor muy fuerte.
I have been looking for a way in which I can make my masking without any problem. So, I decided to create my own Masking Paper using the Tombow Multi Liquid Glue. This glue is a permanent adhesive if you use it just right away after applying over a surface, but if you want this glue to be repositionable, you just need to let it dry first after applying.
He estado buscando una alternativa para poder crear enmascarado sin ningún problema. Así que decidí crear mi propio Papel de Enmascarado utilizando el Pegamento Líquido Multi de Tombow. Este pegamento es un adhesivo permanente si lo usas justo después de aplicarlo sobre la superficie, pero si quieres un pegamento que sea reposicionable, simplemente aplícalo a la superficie y déjalo secar antes de pegar.
So, I took a piece of white cardstock and I applied slightly this Tombow's glue over the surface, quickly I extended the glue with a tissue and let it dry for a couple of hours or until is totally dry. Then, I put something non-sticky or released paper on the part that I applied the glue. I used the blue cover of the Silhouette cutting mat (the blue released paper) that I always keep when I throw away the broken mats (yes, I'm a mess!).
Así que cogí un trozo de cartulina blanca y, sobre ella, apliqué ligeramente sobre la superficie el pegamento (el de Tombow). Rápidamente extendí el pegamento con una servilleta y lo dejé secar por un par de horas o hasta que estuviera seco totalmente. Una vez seco y para guardarlo, le puse un papel no adhesivo. Yo para esto utilicé el papel azul que cubre el tapete de la Silhouette que siempre guardo cuando tiro los tapetes que se me rompen (sí...¡soy un desastre!).
I created a card using this Masking Paper Alternative and I think it is acceptable, especially if you are creating at home and you run out of this paper, this could be a possibility to make it!
Para utilizar esta Alternativa al papel de enmascarar, creé una tarjeta y sí, este papel es aceptable, especialmente si estás creando en casa y te quedas sin este tipo de papel y este podría ser una posibilidad.

For creating this card, I decided to use this flower stamp set from Hampton Art Stamps. First, I made the masking, so I stamped the flowers and leaves on the Masking Paper that I made earlier using Tombow's glue. I cut the images but just the Masking paper and not the released paper in order to reuse it. When I finished cutting the images, I kept these pieces on the same non-sticky paper.
Para crear esta tarjeta, decidí utilizar este set de sellos de flores de Hampton Art. Primero, hice el papel para enmascarar, así que estampé las flores y las hojas en el papel de enmascarar que creé anteriormente utilizando el pegamento Tombow. Recorté las imágenes por el borde pero no recorté el papel no adhesivo para poder reutilizarlo. Cuando recorté las imágenes, las guardé en mismo papel no adhesivo.

I used the Tim Holtz Stamping Platform to stamp the flowers. I decided to use a white panel, so I positioned it on the base of the Stamping Platform. I stamped my images with the juicy pigment ink (Versafine Onyx Black Ink) in order to make embossing. When I finished stamping these images, I added some clear embossing powders and heat embossed with my craft gun tool.
Utilicé la Plataforma de Estampado de Tim Holtz para estampar las flores. Decidí utilizar una cartulina blanca, así que la posicioné sobre la base de esta plataforma. Estampé mis imágenes con una tinta jugosa de pigmento (Versafine Onyx Black Ink) para realizar embossing. Cuando terminé de estampar las imágenes, añadí los polvos de embossing claros y los quemé con la pistola de calor para embossing.

Then, I started to add the masking pieces one by one on top of each image that we stamped before. I decided to stamp again some more flowers. When I finished stamping them with the same ink, I also embossed the images with clear embossing powders. As I finished again to heat embossed all the images, I added more masking pieces to the new images. So, I stamped some leaves using an acrylic block and I did the same thing as before - same ink (Versafine Onyx Ink) and same embossing powder (clear). Later, I also added the corresponding masking pieces to these new images and, at this time, the whole panel was completely full of these pieces of masking.
Entonces, comencé añadir las imágenes recortadas en papel de enmascar y las puse encima de cada imagen estampada. Decidí estampar más flores. Cuando terminé de estamparlas con la misma tinta, también le añadí los polvos de embossing claros y, cuando terminé de quemar los polvos de embossing, nuevamente volví a añadir sobre cada imagen estampada, su imagen correspondiente sobre papel de enmascarar. Entonces, esta vez estampé algunas hojas utilizando un bloque de metacrilato e hice lo mismo que anteriormente - misma tinta (Versafine Onyx) y los mismos polvos de embossing claros. Luego, añadí también las correspondientes imágenes en papel enmascarado a estas nuevas imágenes estampadas. Cuando terminé, todo el panel estaba completamente lleno de estas piezas de enmascarado.

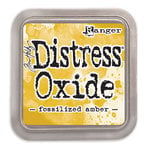
I colored the background blending some Distress Oxide Inks - worn lipstick, fossilized amber, spiced marmalade. I removed all the masking paper and .... what a beautiful background! The flowers in white pop up over the colored background.
Coloreé el fondo combinando algunas tintas Distress Oxide - worn lipstick, fossilized amber, spiced marmalade. Cuando terminé de colorear, quité todos los papeles de enmascarado y.... ¡quedó más bonitooo! Las flores en blanco resaltan sobre el fondo coloreado.
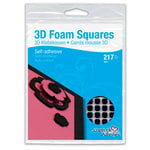
I stamped my sentiment and I decided to stamp the word 'flowers' on black cardstock using Versamark ink to emboss it with white embossing powders. I cut this word and added to my panel with black foam squares. These sentiments that I used for this card are from another kit from Hero Arts (September 2017).
Estampé la frase para esta tarjeta y decidí estampar la palabra 'flores' (flowers en inglés) sobre una cartulina negra con la tinta Versamark ink y realizar embossing con blanco. Recorté esta palabra y la añadí a mi panel utilizando cuadrados adhesivos para dar relieve. Estas palabras que utilicé para esta tarjeta son de otro kit de Hero Arts (Septiembre 2017).
I added the piece to a black craft foam and adhered the whole piece to a black notecard.
Añadí el panel principal coloreado a un trozo de goma eva o foamy de color negro y adherí todo a una base de tarjeta negra.
For final touches, I just added some glitter to my white flowers with my Wink of Stella glitter clear.
Para toques finales, añadí brillo a las flores blancas utilizando Wink of Stella.

I hope you like this card! If you do, please subscribe to my blog and you can also subscribe to Youtube channel! Thank you and I hope you see you soon! Bye-bye.
Espero que les haya gustado esta tarjeta. Si te gustan tarjetas como esta, subscríbete a mi blog y... ¡también puedes subscribirte a mi canal de YouTube! ¡Gracias y espero verles pronto! Chao.


Masking is a technique in card making or mixed media whose aim is not to contaminate or just we want to leave without coloring a space or an image on a card or canvas.
¡Hola a todos! Soy Cha. Una de las técnicas que me encanta para crear mis tarjetas es la técnica de enmascar. Pienso que esta técnica es especialmente útil para crear esceneas y es por ello...¡que tanto me gusta! El enmascarado (masking en inglés) es una técnica en tarjetería o mixed media cuyo objetivo es no contaminar o, solamente queremos dejar sin colorear un espacio o una imagen de nuestra tarjeta o de nuestro lienzo.
You can create a Masking Scene using many different products: 1) Full Sticky Post-it notes, 2) Masking Paper, 3) Masking Liquid (Molotow) or, 4) Masking Fluid.
Puedes crear una escena utilizando el enmascarado con diferentes productos: 1) Post-its con pegue en toda la hoja, 2) Papel de enmascarar, 3) Rotulador de enmascarado (conocido como Molotow) o, 4) Líquido para enmascarar.
Full Sticky Post-it Notes and Masking Paper | Post-it Notes con Pegue en Toda la Hoja y Papel de Enmascarar
From my point of view, the best masking options for card making are the Masking Paper or the Full Sticky Post-it Notes because it is the fast way to make the masking. In fact, both of these products are paper. So, the only thing we need to do is to cut the paper and just place on top of the image that we want uncolored. The other two ways are quite similar.
Desde mi punto de vista, las mejores opciones para tarjetería son el papel de enmascarado y los post-it notes porque estos métodos son los más fáciles. En realidad, estos dos productos para realizar esta técnica son papel. Así que lo único que necesitamos hacer es cortarlo de la misma forma que lo quieres enmascarar y ponerlo encima de la imagen que no queremos colorear. Las otras dos formas de enmascarar son parecidas a estas.
With the Masking Liquid, you need to color the image that you want with no color and let it dry for a while. Then, you erase the Masking Liquid rubbing with your fingers or with a glue eraser. The last one - Masking Fluid - is more or less the same as the Masking Liquid but instead of applying with the marker itself, you would need a brush.
Con el rotulador de enmascarado, necesitamos colorear la imagen que queremos enmascar y dejarlo secar por un tiempo. Una vez seco, frotamos con el dedo o con una goma de pegamento para quitar el rotulador. El último producto de enmascarado - el Líquido de enmascarar - es más o menos lo mismo que el rotulador pero en vez de aplicardo con el rotulados mismo, lo aplicaríamos con un pincel.
Sin embargo, siempre he tenido problemas en realizar esta técnica del enmascarado en mis tarjetas porque... ¡no encontraba el producto! (Recuerden que vivo en un lugar pequeño). Así que siempre suelo utilizar post-it notes simples pero obviamente, recomiendo las que son más fuertes y las que tienen pegamento en toda su hoja porque así son más difíciles de mover. También he utilizado el Líquido de Enmascarar y pienso que es una buena alternativa porque el producto es bueno pero no me gusta utilizarlo demasiado porque tiene un olor muy fuerte.
I have been looking for a way in which I can make my masking without any problem. So, I decided to create my own Masking Paper using the Tombow Multi Liquid Glue. This glue is a permanent adhesive if you use it just right away after applying over a surface, but if you want this glue to be repositionable, you just need to let it dry first after applying.
He estado buscando una alternativa para poder crear enmascarado sin ningún problema. Así que decidí crear mi propio Papel de Enmascarado utilizando el Pegamento Líquido Multi de Tombow. Este pegamento es un adhesivo permanente si lo usas justo después de aplicarlo sobre la superficie, pero si quieres un pegamento que sea reposicionable, simplemente aplícalo a la superficie y déjalo secar antes de pegar.
So, I took a piece of white cardstock and I applied slightly this Tombow's glue over the surface, quickly I extended the glue with a tissue and let it dry for a couple of hours or until is totally dry. Then, I put something non-sticky or released paper on the part that I applied the glue. I used the blue cover of the Silhouette cutting mat (the blue released paper) that I always keep when I throw away the broken mats (yes, I'm a mess!).
Así que cogí un trozo de cartulina blanca y, sobre ella, apliqué ligeramente sobre la superficie el pegamento (el de Tombow). Rápidamente extendí el pegamento con una servilleta y lo dejé secar por un par de horas o hasta que estuviera seco totalmente. Una vez seco y para guardarlo, le puse un papel no adhesivo. Yo para esto utilicé el papel azul que cubre el tapete de la Silhouette que siempre guardo cuando tiro los tapetes que se me rompen (sí...¡soy un desastre!).
I created a card using this Masking Paper Alternative and I think it is acceptable, especially if you are creating at home and you run out of this paper, this could be a possibility to make it!
Para utilizar esta Alternativa al papel de enmascarar, creé una tarjeta y sí, este papel es aceptable, especialmente si estás creando en casa y te quedas sin este tipo de papel y este podría ser una posibilidad.
For creating this card, I decided to use this flower stamp set from Hampton Art Stamps. First, I made the masking, so I stamped the flowers and leaves on the Masking Paper that I made earlier using Tombow's glue. I cut the images but just the Masking paper and not the released paper in order to reuse it. When I finished cutting the images, I kept these pieces on the same non-sticky paper.
Para crear esta tarjeta, decidí utilizar este set de sellos de flores de Hampton Art. Primero, hice el papel para enmascarar, así que estampé las flores y las hojas en el papel de enmascarar que creé anteriormente utilizando el pegamento Tombow. Recorté las imágenes por el borde pero no recorté el papel no adhesivo para poder reutilizarlo. Cuando recorté las imágenes, las guardé en mismo papel no adhesivo.
I used the Tim Holtz Stamping Platform to stamp the flowers. I decided to use a white panel, so I positioned it on the base of the Stamping Platform. I stamped my images with the juicy pigment ink (Versafine Onyx Black Ink) in order to make embossing. When I finished stamping these images, I added some clear embossing powders and heat embossed with my craft gun tool.
Utilicé la Plataforma de Estampado de Tim Holtz para estampar las flores. Decidí utilizar una cartulina blanca, así que la posicioné sobre la base de esta plataforma. Estampé mis imágenes con una tinta jugosa de pigmento (Versafine Onyx Black Ink) para realizar embossing. Cuando terminé de estampar las imágenes, añadí los polvos de embossing claros y los quemé con la pistola de calor para embossing.
Then, I started to add the masking pieces one by one on top of each image that we stamped before. I decided to stamp again some more flowers. When I finished stamping them with the same ink, I also embossed the images with clear embossing powders. As I finished again to heat embossed all the images, I added more masking pieces to the new images. So, I stamped some leaves using an acrylic block and I did the same thing as before - same ink (Versafine Onyx Ink) and same embossing powder (clear). Later, I also added the corresponding masking pieces to these new images and, at this time, the whole panel was completely full of these pieces of masking.
Entonces, comencé añadir las imágenes recortadas en papel de enmascar y las puse encima de cada imagen estampada. Decidí estampar más flores. Cuando terminé de estamparlas con la misma tinta, también le añadí los polvos de embossing claros y, cuando terminé de quemar los polvos de embossing, nuevamente volví a añadir sobre cada imagen estampada, su imagen correspondiente sobre papel de enmascarar. Entonces, esta vez estampé algunas hojas utilizando un bloque de metacrilato e hice lo mismo que anteriormente - misma tinta (Versafine Onyx) y los mismos polvos de embossing claros. Luego, añadí también las correspondientes imágenes en papel enmascarado a estas nuevas imágenes estampadas. Cuando terminé, todo el panel estaba completamente lleno de estas piezas de enmascarado.
I colored the background blending some Distress Oxide Inks - worn lipstick, fossilized amber, spiced marmalade. I removed all the masking paper and .... what a beautiful background! The flowers in white pop up over the colored background.
Coloreé el fondo combinando algunas tintas Distress Oxide - worn lipstick, fossilized amber, spiced marmalade. Cuando terminé de colorear, quité todos los papeles de enmascarado y.... ¡quedó más bonitooo! Las flores en blanco resaltan sobre el fondo coloreado.
I stamped my sentiment and I decided to stamp the word 'flowers' on black cardstock using Versamark ink to emboss it with white embossing powders. I cut this word and added to my panel with black foam squares. These sentiments that I used for this card are from another kit from Hero Arts (September 2017).
Estampé la frase para esta tarjeta y decidí estampar la palabra 'flores' (flowers en inglés) sobre una cartulina negra con la tinta Versamark ink y realizar embossing con blanco. Recorté esta palabra y la añadí a mi panel utilizando cuadrados adhesivos para dar relieve. Estas palabras que utilicé para esta tarjeta son de otro kit de Hero Arts (Septiembre 2017).
I added the piece to a black craft foam and adhered the whole piece to a black notecard.
Añadí el panel principal coloreado a un trozo de goma eva o foamy de color negro y adherí todo a una base de tarjeta negra.
For final touches, I just added some glitter to my white flowers with my Wink of Stella glitter clear.
Para toques finales, añadí brillo a las flores blancas utilizando Wink of Stella.
I hope you like this card! If you do, please subscribe to my blog and you can also subscribe to Youtube channel! Thank you and I hope you see you soon! Bye-bye.
Espero que les haya gustado esta tarjeta. Si te gustan tarjetas como esta, subscríbete a mi blog y... ¡también puedes subscribirte a mi canal de YouTube! ¡Gracias y espero verles pronto! Chao.


.jpg)
.jpg)
.jpg)
