

Hi everyone! It's me, Cha! I've received My Monthly Hero (MMH) kit from December 2017 - called A Magical Journey. I love this kit because it reminds me the tales of A Thousand and One Nights or the adventurer of Aladdin in the Disney film. I think that this is your kit if you are a Disney fan but, in my opinion, who doesn't love Disney films?
For these cards, I just used the fancy die, some coordinating dies and the stencil that are included in this kit. Besides, I used some more extra supplies, the pigment markers from Winsor&Newton.

For these cards, I just used the fancy die, some coordinating dies and the stencil that are included in this kit. Besides, I used some more extra supplies, the pigment markers from Winsor&Newton.
¡Hola a todos! Soy Cha. Por fin he recibido el kit de Hero Arts (MMH) de diciembre de 2017 - llamado Un Viaje Mágico. Me encanta este kit porque me recuerda a los cuentos de Mil y Una Noches o el aventurero Aladdin en la película de Disney. Pienso que este sería tu kit si eres un fan de Disney aunque, desde mi punto de vista... ¿A quién no le gusta las películas de Disney?
Para estas tarjetas, utilicé el troquel decorativo, algunos troqueles coordinados y el stencil o máscara que están incluidos en el kit. Además, utilicé material extra, como los rotuladores de pigmentos de Winsor&Newton.
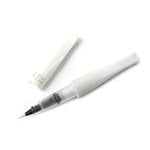
These Winsor&Newton markers are original because they are very bright and you can soften the color using the blend white marker, or create new colors mixing them without any problem. As they are pigment markers, they can be also used on black cardstock using first the blend white marker, and then, use the markers on it to give a darker color as you wish. I've created two different backgrounds using these colors - one in white cardstock and another one using black cardstock.
Estos rotuladores de Winsor&Newton son originales porque son muy brillantes y puedes aclarar su color utilizando el rotulador mezclador de color blanco o, simplemente mezclandolos entre sí para formar nuevos colores sin ningún problema. Como son rotuladores de pigmento, pueden también utilizarse en cartulina negra. Para ello, primero se debe colorear con el rotulador blanco y luego, sobre este, colorear con los otros colores. He creado dos fondos para tarjetas diferentes utilizando estos rotuladores de pigmento - uno en cartulina blanca y la otra en cartulina negra.

Estos rotuladores de Winsor&Newton son originales porque son muy brillantes y puedes aclarar su color utilizando el rotulador mezclador de color blanco o, simplemente mezclandolos entre sí para formar nuevos colores sin ningún problema. Como son rotuladores de pigmento, pueden también utilizarse en cartulina negra. Para ello, primero se debe colorear con el rotulador blanco y luego, sobre este, colorear con los otros colores. He creado dos fondos para tarjetas diferentes utilizando estos rotuladores de pigmento - uno en cartulina blanca y la otra en cartulina negra.
You can enjoy trying new techniques using these pigment markers but here, I'm just trying them out!
Puedes emplear muchas técnicas utilizando estos rotuladores de pigmento, pero para hoy... ¡Simplemente estaba realizando pruebas! Y la verdad es que no ha quedado nada mal...
Backgrounds with Stencil and Pigment Markers | Fondos con Máscara y Rotuladores de Pigmento
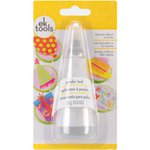
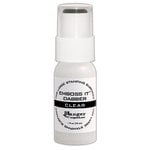
First, I picked a piece of white cardstock. For this background, I used some special smooth paper from Sakura - Manga paper. Then, I placed the stencil from MMH on top. I applied the Powder Tool to remove electricity from the paper and, added some embossing ink (the Ranger Dabber) in order to heat emboss later. For this first card, I added some gold embossing powders and heat it with my craft gun tool. For the other card, I used the same technique of stenciling but using black cardstock and silver embossing powders. In relation to the coloring, I colored the cards in a different way.
Primero, utilicé cartulina blanca. Para este fondo, utilicé un papel suave y especial de Sakura - Papel Manga. Entonces puse sobre esta cartulina el estencil del kit de Hero Arts (HA). Como iba aplicar la técnica de embossing, primero apliqué la herramienta antiestática para eliminar la electricidad de papel. Acto seguido utilicé la tinta para embossing que viene en un tarrito de Ranger. Añadí polvos de embossing dorados y los derretí utilizando la pistola de calor. Para la otra tarjeta, realicé la misma técnica para máscaras pero utilizando cartulina negra y polvos de embossing plateados. En cuanto al color, coloreé las tarjetas de manera diferente.
Primero, utilicé cartulina blanca. Para este fondo, utilicé un papel suave y especial de Sakura - Papel Manga. Entonces puse sobre esta cartulina el estencil del kit de Hero Arts (HA). Como iba aplicar la técnica de embossing, primero apliqué la herramienta antiestática para eliminar la electricidad de papel. Acto seguido utilicé la tinta para embossing que viene en un tarrito de Ranger. Añadí polvos de embossing dorados y los derretí utilizando la pistola de calor. Para la otra tarjeta, realicé la misma técnica para máscaras pero utilizando cartulina negra y polvos de embossing plateados. En cuanto al color, coloreé las tarjetas de manera diferente.
For the first card (Sakura paper), I picked some vibrant warm tones pigment markers to color the background. I also colored the embossing area that I previously melted using the heat gun tool. I used the following colors (from the bottom to the top of the card): LemonYellow (346), Magenta Red Shade (023) and Scarlet (601). I first colored the panel with each of these colors and then, blended between them move back and forth. When I finished coloring, I just cleaned the embossed area with some tissue in the same direction of the colors to avoid mix them more.
Para la primera tarjeta (papel Sakura), escogí colores vibrantes de los rotuladores de pigmento para colorear el fondo. Para esta tarjeta me centré más en tonalidades cálidas. Con estos rotuladores también pinté el área de embossing que había derretido anteriormente con la pistola de calor. Utilicé los siguientes colores (desde abajo hacia la parte de arriba de la tarjeta): Amarillo Limón (346), Magenta Matiz Rojo (023) y Escarlata (301). Primero coloreé el panel con cada uno de estos colores y entonces, comencé a mezclarlos de un color a otro para que transendiera de un color a otro y no se viera el cambio. Cuando terminé de colorear, simplemente limpié con un pañuelo o o un trapo el área de embossing para eliminar los restos de color, de manera suave y hacia la dirección del color para evitar mezclar aún más.

For the second card (black cardstock), I picked also some vibrant warm-cold tones pigment markers but first, I had to color the whole background with the White Blender Marker (163). This pigment marker helps to color dark paper. When I colored the whole panel using the white marker, I started coloring the panel using the following pigment markers (again, from the bottom to the top of the card): Lemon Yellow (345), Sap Green (599) and Phthalo Teal Light (067). I also blended the colors between them and cleaned the embossed area with some tissue. The result is gorgeous! It gives the panel a dark and an old look.
Para la segunda tarjeta (en cartulina negra), escogí los mismos colores (los rotuladores de pigmento) pero me centré más en tonalidades frías, pero primero, y al ser cartulina negra, primero tuve que pintar todo el papel con el Rotulador Blanco para Mezcla (163), la parte de embossing plateado inclusive. Cuando terminé de colorear con este color blanco, comencé a colorear el panel utilizando los colores de pigmento (desde abajo hacia la parte de superior de la tarjeta nuevamente): Amarillo Limón (345), Verde Vejiga (599) y Verde Azulado Ftalo Claro (067).También mezclé los colores de manera transitiva y limpié el área de embossing con un trapo suavemente y en la misma dirección de los colores. Esta tarjeta me resultó bastante interesante ya que los colores cambian a un color más oscuro y viejo en cartulina oscura y como los colores son visibles.

Finally, I cut the two panels a little bit smaller than the card base to leave a border around.
Finalmente, corté los dos paneles un poco más pequeños que las bases de la tarjetas para así dejar un borde alrededor.
Elements and Card Mounting | Elementos y Montaje de Tarjeta
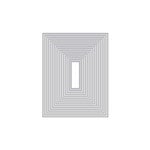
First, I cut all the elements that I was going to use to create my cards. I cut several palm trees using a coordinating die that is included in the kit. I cut six of them on black cardstock. Later, I cut two pieces with the fancy die window frame that also comes with the kit on different colored cardstock - floral mix and foliage mix. Then, I also cut with this die the center of the two panels that I had heated embossed and colored with the pigment markers. Then, I cut some windows with the fancy window die (included in the kit, too!) in some metallic cardstock - gold metallic and silver metallic.
Primero, corté todos los elementos que iba a utilizar en la creación de estas dos tarjetas. Corté algunas palmeras utilizando uno de los troqueles coordinados incluidos en el kit. Corté seis de ellas en cartulina negra. Más tarde, utilizando el troquel de marco de ventana en dos cartulinas coloreadas - la floral mix y la foliage mix. Con este mismo troquel, recorté el centro de los dos paneles en los que había hecho el embossing y coloreado con los rotuladores de pigmento. Entonces, recorté las ventanas con el troquel de ventana decorativo (¡también incluido en el kit!) y en cartulina metalizada - dorado metálico y plateado metálico.

I used earth mix cardstock for creating the borders around the main panel. Just in the center of this piece, I positioned the piece of the colored floral mix (cardstock) window frame. On this piece, I added two black palm trees and added some glitter to them using Wink of Stella - glitter clear. I also added some sequins to this pink piece of cardstock.
Utilicé cartulina earth mix para crear los bordes alrededor de los paneles principales. Justo en el centro de esta cartulina, pegué la cartulina floral mix que recorté utilizando el troquel de marco de ventana. Sobre este, añadí las palmeras (2) y les di algo de brillo utilizando Wink of Stella. También añadí algunas lentejuelas para decorar.
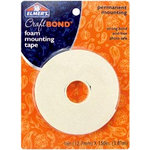
For this card, I used the gold embossed panel. As I previously cut the panel with the fancy die window frame, I added an acetate piece on the back. Then, I glued the gold metallic fancy window die in the center of the panel, just on top of the gap in which there is the piece of acetate. I adhered this piece on the other piece of earth mix cardstock (in which I created the outside of my scene - palm trees). For some dimension, I added the main panel on top, adjusting the position of the windows and using some foam tape.
Para esta tarjeta, utilicé el panel en el que había utilizado el embossing dorado. Como previamente había recortado el panel con el troquel decorativo de marco de ventana, le añadí un trozo de acetato detrás. Entonces, cogí la cartulina metalizada dorada que había recortado utilizando el troquel de ventana y la pegué justo en el hueco en el cual estaba la pieza de acetato, es decir, en el centro. Añadí esta pieza sobre la otra de la cartulina earth mix (en el que había creado el exterior de la escena - con las palmeras). Para añadir algo de dimensión, este panel lo pegué ajustando la posición de las ventanas, una sobre otra, y utilizando cinta de doble cara de espuma o 3D.

Finally, I added the two pieces to a standard card base (4.25 by 5.5 inches).
Finalmente, añadí estas dos piezas pegadas a una tarjeta base americana estándar (4.25 x 5.5 pulgadas).
I followed the same steps than the previous one to create the other card with the foliage mix cardstock and the silver metallic fancy window.
Seguí los mismos pasos que la tarjeta anterior para crear la otra tarjeta con la cartulina foliage mix y la cartulina metalizada plateada para la ventana.

Sentiment | Frase
I stamped the sentiment (from the kit) on floral mix cardstock with Onyx black ink (Versafine). I added some ultra fine embossing powders and heat it with my craft gun tool. I cut the sentiment in a squared-shape and added to the panel with some foam tape.
Para la frase, utilicé un sello (también del kit) y lo añadí a una cartulina floral mix utilizando la tinta Onyx black de Versafine. Le añadí los polvos de embossing claros y los calenté con la pistola de embossing. Recorté la frase de forma cuadrada y la añadí al panel principal con cinta de doble cara 3D.

I did the exact thing for the other card but I used the foliage mix cardstock.
Hice exactamente lo mismo con la otra tarjeta pero utilizando la cartulina foliage mix.
The two palm trees that remain, I added on the inside of each card as a decorative element.
Con las dos palmeras que me quedaron, las añadí en el interior de cada tarjeta como elemento decorativo.

And this was the result of these two cards!
¡Y este fue el resultado para estas dos tarjetas!

If you like this My Monthly Hero cards, you can subscribe to my blog as well as my YouTube Channel to stay tuned! Also, I hope you like the combination of these two products - MMH kits and the Winsor&Newton pigment markers.
Si te ha gustado estas tarjetas con el kit de Hero Arts, puedes subscribirte a mi blog y también a mi canal de YouTube para recibir las novedades! Espero que te haya gustado la combinación de estos dos productos - kits de Hero Arts y los rotuladores de pigmento de Winsor&Newton.
Thanks for stopping by and I hope you see you soon!
Bye, bye
Gracias por pasarte y... ¡hasta pronto!
Chao!

HERO ARTS DECEMBER KIT | KIT DE DICIEMBRE (HERO ARTS)

INCLUDES:

INCLUYE:
- Set de sellos transparentes (6 x 8 pulgadas)
- 12 troqueles coordinados (para el set de sellos)
- 1 troquel de ventana decorativo
- 5 tintas (de tinte) en cubos (colores exclusivos para este kit - Sapphire, Teal Topaz, Pink Tourmaline, Tiger's eye, Ruby)
- 1 Stencil o máscara de 5.25 x 6.5 pulgadas.
- Pegatinas con purpurina


.jpg)
.jpg)
.jpg)

 | MMH Dic 17 + Rotuladores de Pigmento (Winsor&Newton))
 | MMH Dic 17 + Rotuladores de Pigmento (Winsor&Newton))