[Product links are listed at the end of the page | Enlaces a los productos se encuentran a final de página]
Hi there! It's me, Cha! Today I want to show you how I created a scene with masking paper. If you've been following my posts, maybe you'll know that one of my favorite techniques in cardmaking is Masking. Masking is a good way to create one-layer cards, meaning without dimension. I love Masking. Actually, I feel very satisfied when I finish creating a scene with the masking pieces and revealing the design removing all those pieces. It's so super cool!
¡Hola a todos! Soy Cha. Hoy quise enseñarles como he creado una escena con papel de enmascarar. Si has estado siguiendo mis publicaciones, quizás sepas que una de mis técnicas favoritas en tarjetería es Enmascarar (o Masking en inglés). Esta técnica de Enmascarar es una buena forma de crear tarjetas de una sola capa, es decir, sin relieve. Realmente es muy satisfactorio cuando terminas de crear una escena con todos los pedacitos de enmascarado y revelar el diseño quitando todo el papel de enmascarado. ¡Es súper guay!
To create this card, I used different Hero Arts stamp sets. I used the HA In the Study Stamp Set, HA Story Time Stamp Set, and the HA Bookcase woodblock rubber stamp. If you see my video on my YouTube Channel, probably you will notice that the HA Bookcase woodblock stamp is not the same, that's because I turned this stamp into a cling stamp. I just removed the rubber stamp from the woodblock and added it to a thin base, cling material, or EZ Mount that you can get in HERE. Also, the HA Story Time stamp set is discontinued but you can use other stamps that you may have in your stash.
Para crear esta tarjeta, utilicé diferentes sets de sellos de Hero Arts. Utilicé el set de sellos HA In the Study, el set de sellos HA Story Time, y el sello de goma HA Bookcase. Si visualizas mi vídeo en mi Canal de YouTube, probablemente te darás cuenta de que el sello de goma, HA Bookcase, no es el mismo ya que desmonté este sello de goma de su base de madera y la añadí a una base menos pesada y fina, material llamado Cling (o espuma), más conocido por EZ Mount que puedes ver AQUÍ. Además, el set de sellos HA Story Time está descatalogado pero puedes utilizar otros sellos que ya tengas entre tus materiales.
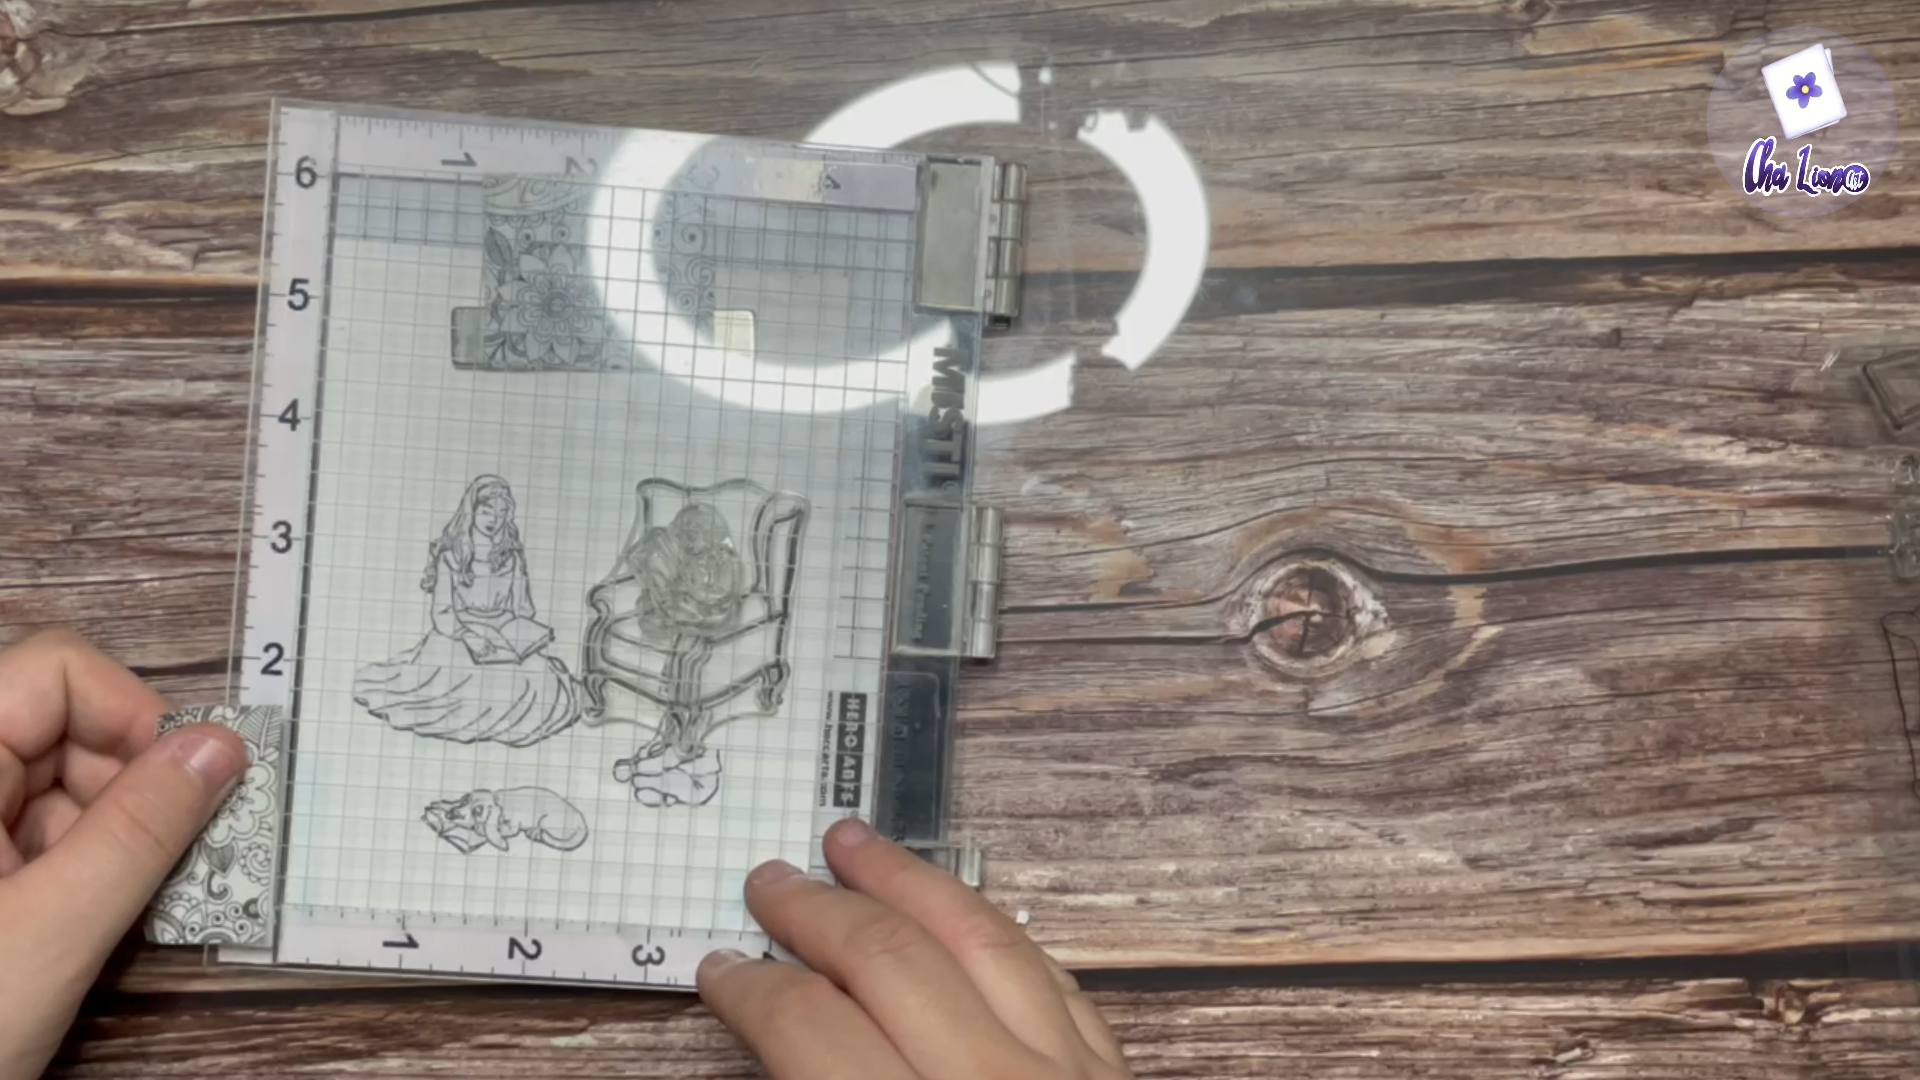
First of all, I stamped the images from the different stamp sets (HA In the Study and HA Story Time) on a piece of Masking paper to create first all the masks to the images. I cut out all the images by hand. Then, I picked a Neenah Solar White 80 lb standard piece to create the scene and put it in the Mini MISTI Stamping Tool to double stamp the images and create more defined images. Before stamping, I added the stamps on top of the piece of cardstock so that I could know where my images would be stamped. With this, first, we would know which stamps are going to be stamped first and these would be the images that are placed in the front of the scene. So, first, I stamped the images that are at the forefront of the scene (the girl, the dog, and the little kid who is sitting on the floor). I used HA Intense Black Ink to stamp the images because I wanted to color the images with Copic Markers. I do not show you how I colored the images because I'm not an expert in coloring and I wanted to focus on the masking technique more than on coloring the images. Besides, I used a white gel pen to color and highlight some areas of the images.
Primero, estampé las imágenes de los diferentes set de sellos (HA In the Study y HA Story Time) en un trozo de papel para enmascarar para crear primero las máscaras de las imágenes, para así, ir cubriendo cada imagen a medida que vaya estampando más imágenes encima. Recorté las imágenes a mano. Luego, escogí una cartulina standard para tarjetería de Neenah Solar White de 80lb para así crear la escena y la puse en la Herramienta de Estampación Mini MISTI para poder estampar las imágenes dos veces y conseguir que las imágenes sean más nítidas. Antes de estampar, añadí los sellos sobre el trozo de cartulina para poder saber dónde estampar las imágenes. Con esto, sabremos qué sellos vamos a estampar primero que son las imágenes que van en frente de la escena. Así que primero estampé las imágenes que están en primer plano de la escena (la chica, el perro y el niño pequeño que está sentado en el suelo). Utilicé la tinta HA Intense Black Ink para estampar las imágenes porque quería colorear las imágenes con los Rotuladores Copic. No enseño el proceso de colorear las imágenes porque no soy una experta y quería concentrar la atención en la técnica de enmascarar más que en colorear imágenes. Además utilicé un rotulador de gel (white gel pen) para colorear y resaltar algunas áreas de las imágenes.
When I finished stamping the images at the forefront, I masked every piece of them with the pieces that we had cut out before. Next, I was going to stamp the kid and the armchair but we had to be careful here because as you could see, the arm of the armchair had to be visible and not the kid so we see the kid is sitting on that armchair. So, I created an extra mask for that arm (armchair). I placed the stamps (the boy and the armchair) and masked the arm of the armchair, then I stamped the boy. I masked the boy excepting the part of the arm of the armchair and, after that, I stamped the armchair. I also masked the armchair.
Cuando terminé de estampar las imágenes en el primer plano, enmascaré cada una de las imágenes con las piezas que había recortado en el comienzo. Luego, iba a estampar al niño y el sillón pero tenía que tener cuidado aquí porque como puedes ver, el brazo del sillón debe ser visible y no el niño para ver que el niño está sentado en ese sillón. Por ello, creé una máscara extra de ese brazo del sillón. Puse los sellos (el niño y el sillón) y enmascaré solamente el brazo del sillón, luego estampé el niño. Enmascaré al niño excepto la parte del brazo del sillón y, a continuación, estampé el sillón. También enmascaré el sillón.
Now, behind the forefront, I decided to stamp a table with some books on and an apple. First, I stamped the apple, I masked the apple. Second, I stamped the books, I masked the books, and at last, I stamped the table, I masked the table, just the top. At this point, I had all my images stamped and masked but I wanted to go beyond and stamped something more in the background of this scene. For this, I added some Masking Tape at the bottom of the panel and I stamped the HA Bookcase stamp. However, when I stamped this image of the bookcase, I realized that the image did not cover the sides of the panel, so I doodled some books and some shelves, just filling those areas where the stamp did not cover. I removed all the masking pieces to reveal the complete scene and started to color the scene with Copic Sketch Markers!
Ahora, detrás del primer plano, decidí estampar una mesa con unos libros y una manzana. Primero, estampé la manzana y la enmascaré. Segundo, estampé los libros y los enmascaré, y finalmente, estampé la mesa y la enmascaré también, aunque solo la parte superior de la mesa. En este momento, tenía todas las imágenes estampadas y con máscaras pero quise ir más allá y estampar algo más en el fondo de esta escena. Para ello, añadí cinta de enmascarar en la parte inferior del panel y estampé el sello HA Bookcase Stamp. Sin embargo, cuando estampé esta imagen de estanterías de libros, me di cuenta que la imagen no cubrió los laterales de la tarjeta, así que decidí garabatear algunos libros y algunas estanterías en ambos lados, solo rellenando las áreas que el sello no cubrió. Finalmente quité los trozos de enmascarado para revelar la escena completa y comenzar a colorear con rotuladores Copic.
Finally, I added the sentiment on the bottom right corner of the card using Versafine Onyx Black ink. Also, I used a black pen to color a little bit the legs of the table. Then, I trimmed a little bit the sides of the panel and mounted the card on a standard white base card.
Finalmente, añadí la frase en la esquina inferior derecha de la tarjeta utilizando la tinta Versafine Onyx Black ink. También utilicé un rotulador negro para colorear las patas de la mesa. Luego, recorté los laterales de la tarjeta y la monté sobre una base de tarjeta blanca de medida standard (4,25 por 5,5 pulgadas).
I hope you like this card and give it a try at masking techniques to create a one-layer card (without dimension). Thanks for stopping by and, see you soon!
Espero que les haya gustado esta tarjeta e intenten técnicas de enmascarar para crear una tarjeta de una sola capa (sin relieve). Gracias por visitarme por aquí y, ¡hasta prontito!
|


.jpg)

0 Comments