

[Product links are listed at the end of the page | Enlaces de productos se encuentran alistados a final de página]
Hello there! It's me, Cha! Today we start a new card challenge at A Blog Named Hero. Get ready your cards to join us in this new challenge which is about "sending hugs from the distance". Remember that you can participate in this challenge to win a Hero Arts gift certificate, just make sure to use this brand on your cards. You can join us until June 10th. I hope you get inspired by my card today so that you can participate in this challenge!
¡Hola a todos! Soy Cha. Hoy comenzamos un nuevo reto de tarjetas en el blog A Blog Named Hero. Preparen sus tarjetas y participen con nosotros en este nuevo reto que es sobre "enviar abrazos desde la distancia". Recuerden que pueden participar en este reto para ganar unos cupones de regalo para Hero Arts, simplemente asegúrense de utilizar productos de esta marca en tus tarjetas. Pueden participar hasta el 10 de junio. Espero que se inspiren viendo mi tarjeta de hoy para que puedan participar en este nuevo reto.


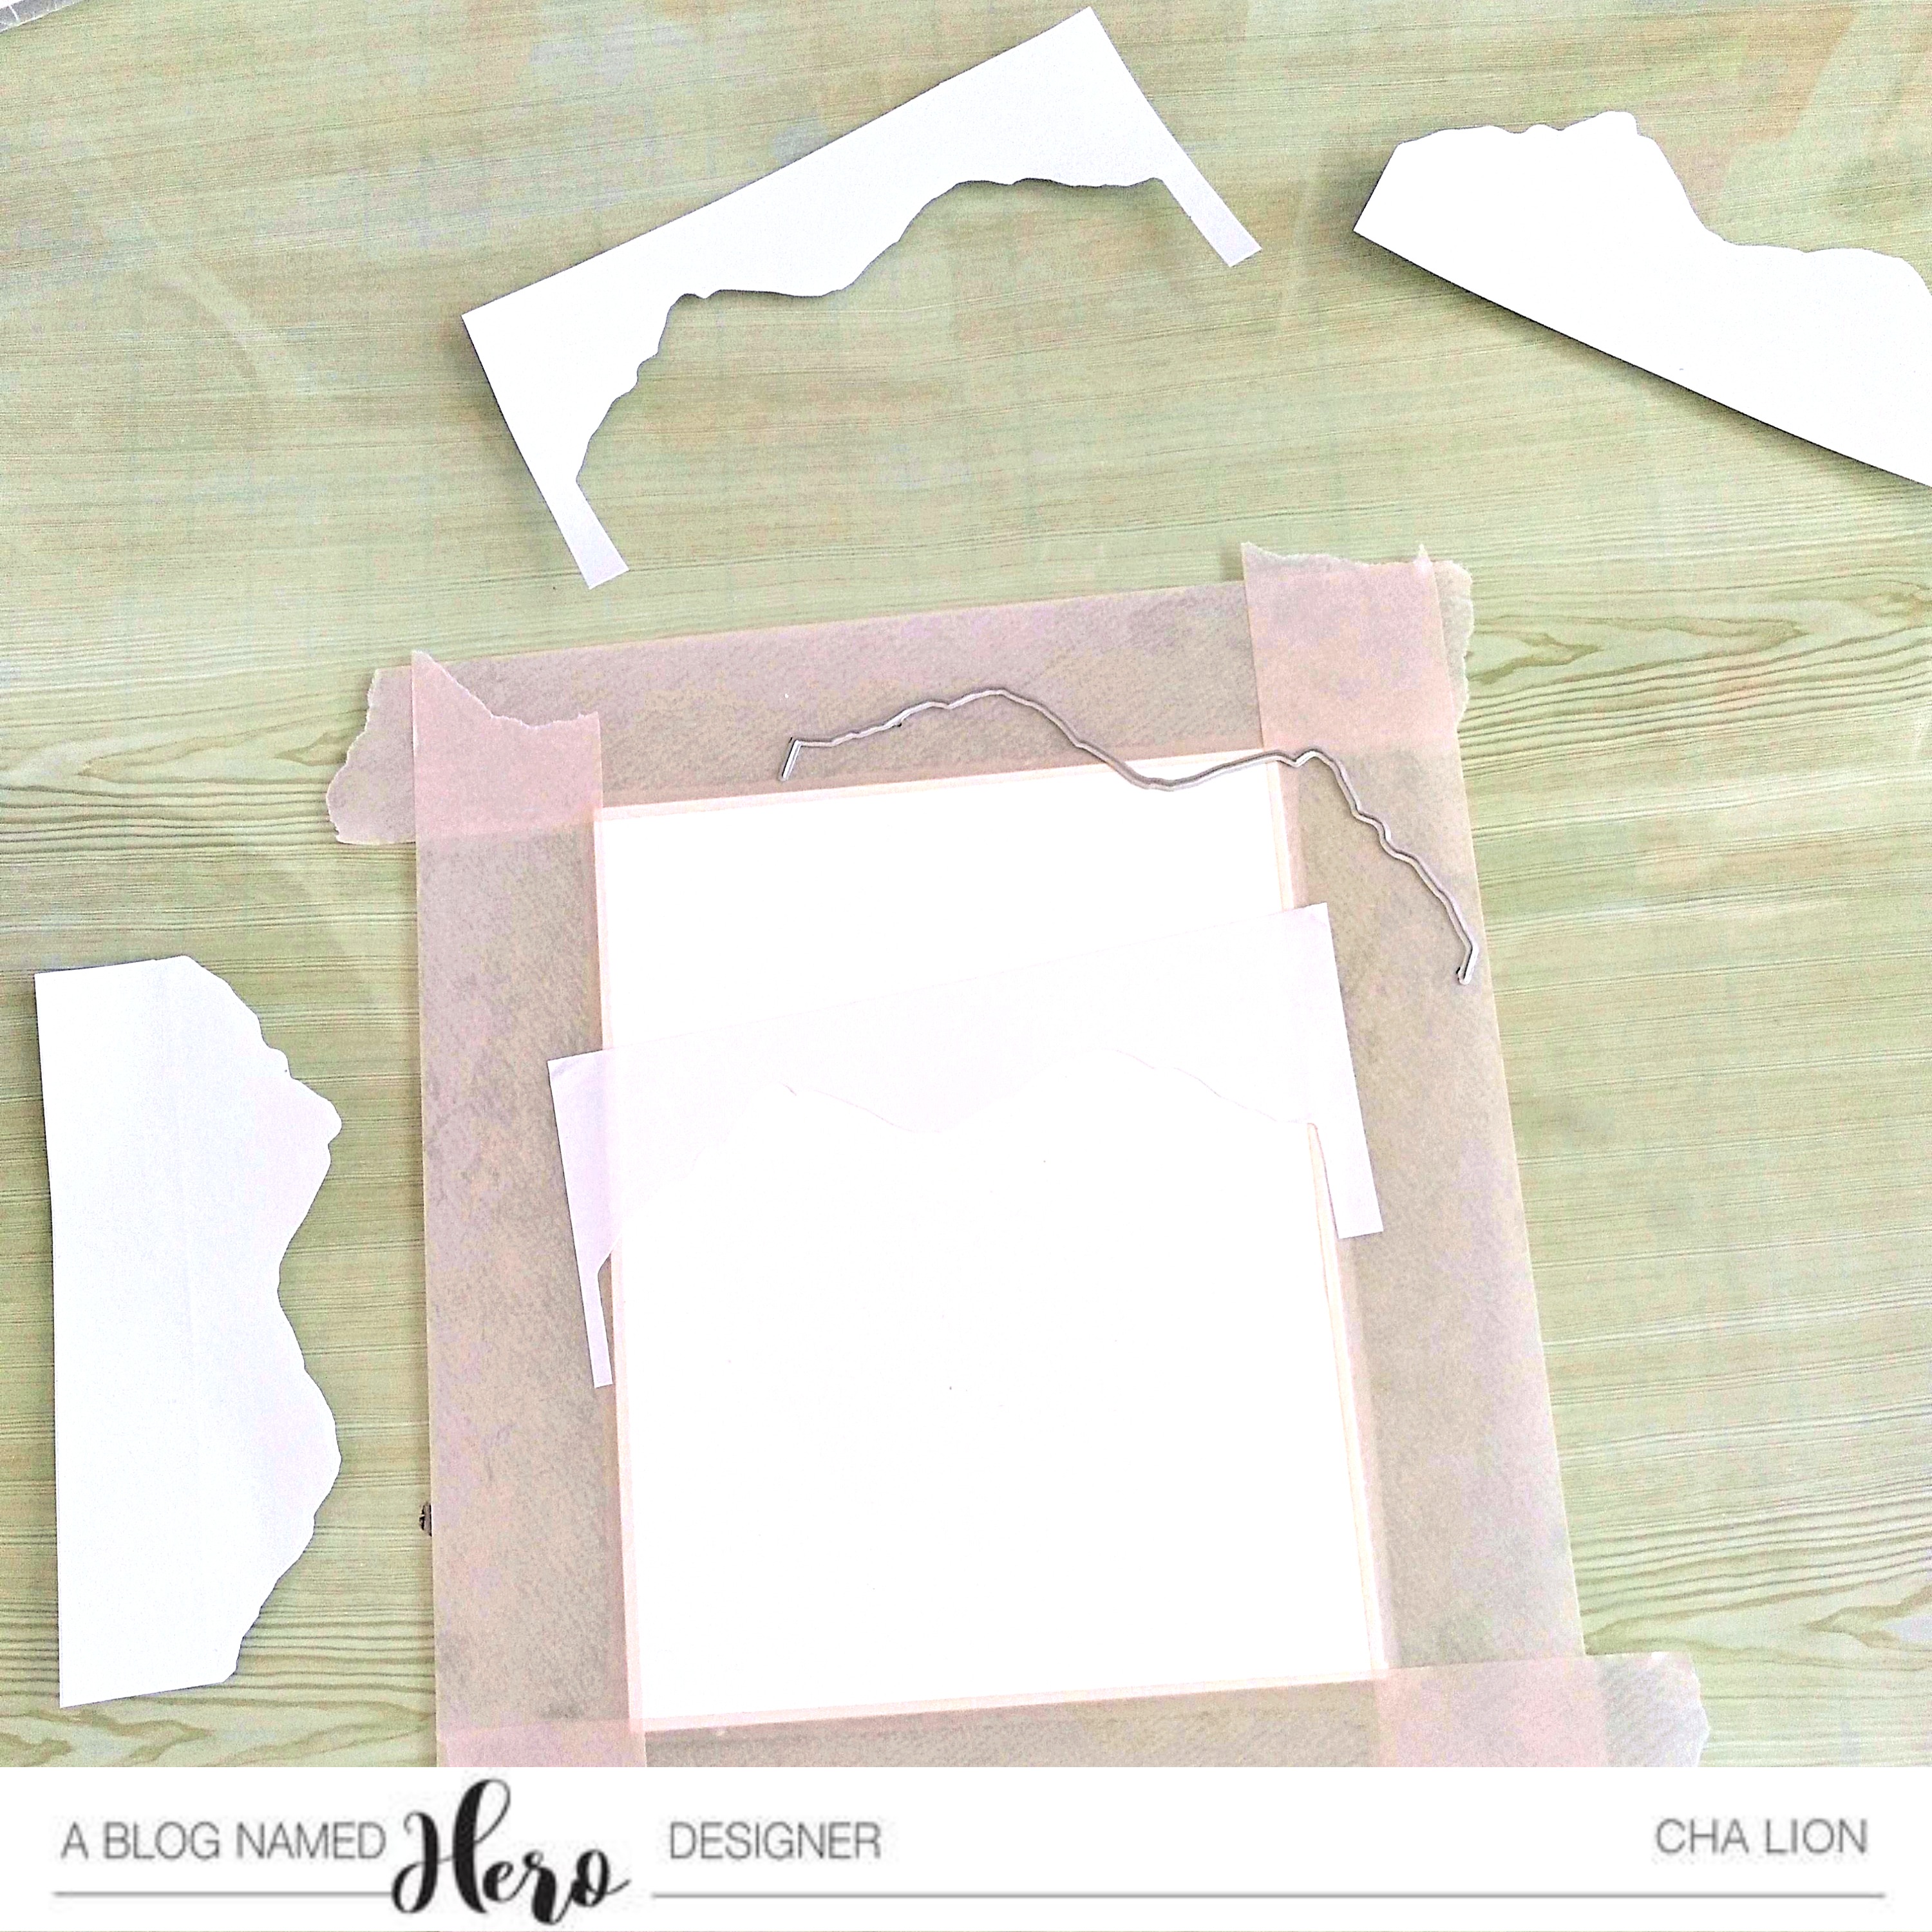
For creating this card, I started die-cutting the mountains from the Color Layering Mountains at the Lake Frame Cuts on Masking Paper. I die cut around 7 pieces and kept both parts, the positive and negative. I picked a 4,25 by a 5,5-inch piece of white cardstock (Hero Arts Dove Premium Cardstock) and started coloring from the bottom of the card to the top. I placed one of the pieces of masking paper (negative area of the mountain) to the bottom of the card and colored with Distress Oxide Weathered Wood, using an Ink Blending Tool. I heat set it a little bit and added the mask of the mountain on top (positive part of the mountain) to continue coloring the mountains. I placed the mask (the negative part) and colored with the same Distress Oxide ink and continued like this until I reached the middle of the card that it is when I switched colors to Distress Oxide Frayed Burlap. Then, I masked the last mountains that I inked on the top of the card and left a narrow strip at the top of the card so that I could create the sky. For this, I mixed Hero Arts Navy ink and Soft Pool ink. Later, I picked the second layer of the mountain from the stamp set Color Layering Mountains at the Lake Stamp Set and stamped in every mountain with the same Distress Oxide inks that I'd used previously. Finally, from the same set, I stamped the pine trees line at the bottom of the card with Distress Oxide Weathered Wood.
Para crear esta tarjeta, comencé troqueñando las montañas del set de troqueles Color Layering Mountains at the Lake Frame Cuts sobre Papel de Enmascarar. Troquelé sobre unos 7 trozos y guardé ambas partes, la parte positiva y la negativa. Escogí un trozo de cartulina blanca (Hero Arts Dove Premium Cardstock) de 4,25 por 5,5 pulgadas y comencé a colorear desde la parte inferior de la tarjeta hacia la parte superior. Puse una de las piezas de enmascarado (la parte negativa de la montaña) en la parte inferior de la tarjeta y coloreé con la tinta Distress Oxide Weathered Wood, utilizando un Aplicador de Tinta (Ink Blending Tool). Sequé la tinta un poco utilizando una Pistola de Calor y enmascaré la montaña que creé utilizando la parte positiva y, continué coloreando las montañas. Puse la máscara (la parte negativa) y coloreé con la misma tinta Distress Oxide ink y seguí coloreando y enmascarando las montañas hasta llegar a mitad de la tarjeta que es cuando cambié de color a la tinta Distress Oxide Frayed Burlap. Luego, enmascaré las últimas montañas que tinté en la parte superior de la tarjeta y dejé una estrecha línea en la parte superior para poder crear el cielo. Para ello, mezclé la tinta Navy ink de Hero Arts y Soft Pool de Hero Arts. Más tarde, escogí la segunda capa del sello de la montaña del set de sellos Color Layering Mountains at the Lake Stamp Set y la estampé en cada montaña con las mismas tintas Distress Oxide inks que había utilizado anteriormente. Finalmente, del mismo set de sellos, estampé la línea de árboles en la parte inferior de la tarjeta con la tinta Distress Oxide Weathered Wood.
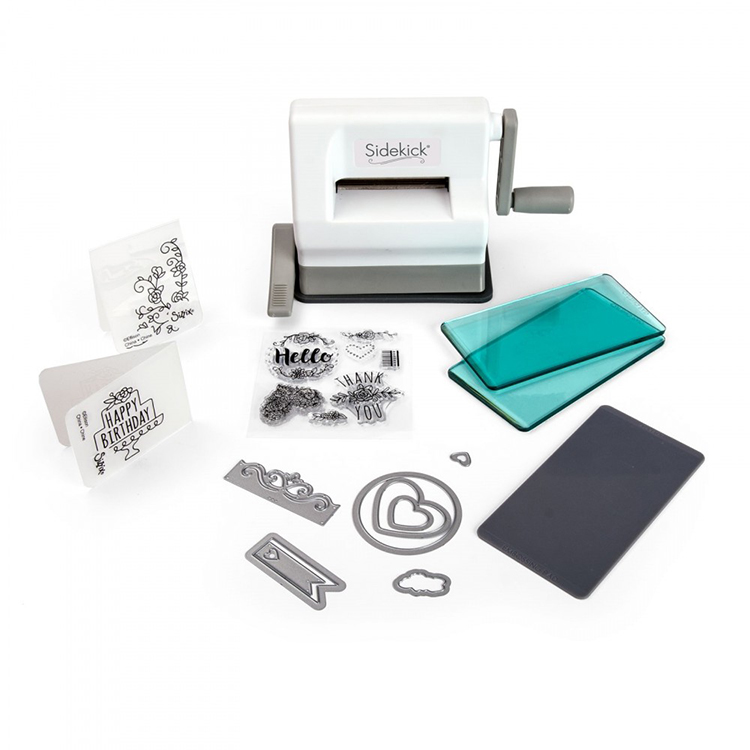
For the sentiment, I took the die 'Hugs' from March 2018 Monthly Hero kit. I put the die on the panel and passed it through my Sizzix Sidekick small Die-Cutting Machine although any die-cutting machine would work. I also die cut the same word on a piece of white fun foam to add a little dimension to the card. Later, I placed the card in the Mini MISTI Stamping Tool and added an Anti-Static Powder Tool to avoid that the embossing particles adhere to other areas of the card that I don't want to. Then, I stamped the sentiment 'For you' with Versamark Ink. This sentiment was part of one of the My Monthly Hero kits that are not available anymore (see HERE for an option). Finally, I heat embossed with Hero Arts White Embossing Powder.
Para la frase, escogí el troquel 'Hugs' ("Abrazos") del kit de My Monthly Hero de Marzo 2018. Puse el troquel sobre el panel y lo pasé por la Troqueladora pequeña Sidekick de Sizzix aunque pueden utilizar cualquier troqueladora. También troquelé la misma palabra sobre Goma Eva o Foamy Blanco para añadir un poco de relieve a la tarjeta. Más tarde, puse la tarjeta dentro de la Herramienta de Estampación Mini MISTI y añadí un poco de la Herramienta Antiestática de Polvo para evitar que los polvos de embossing se adhieran a otras partes de la tarjeta que no quiera. Luego, estampé la frase 'For you' ("Para ti") con la tinta Versamark ink. Esta frase era parte de los kits de Hero Arts, los llamados My Monthly Hero kits que no está disponible (mira AQUÍ para ver una opción). Finalmente, repujé con los Polvos de Embossing Blancos de Hero Arts.
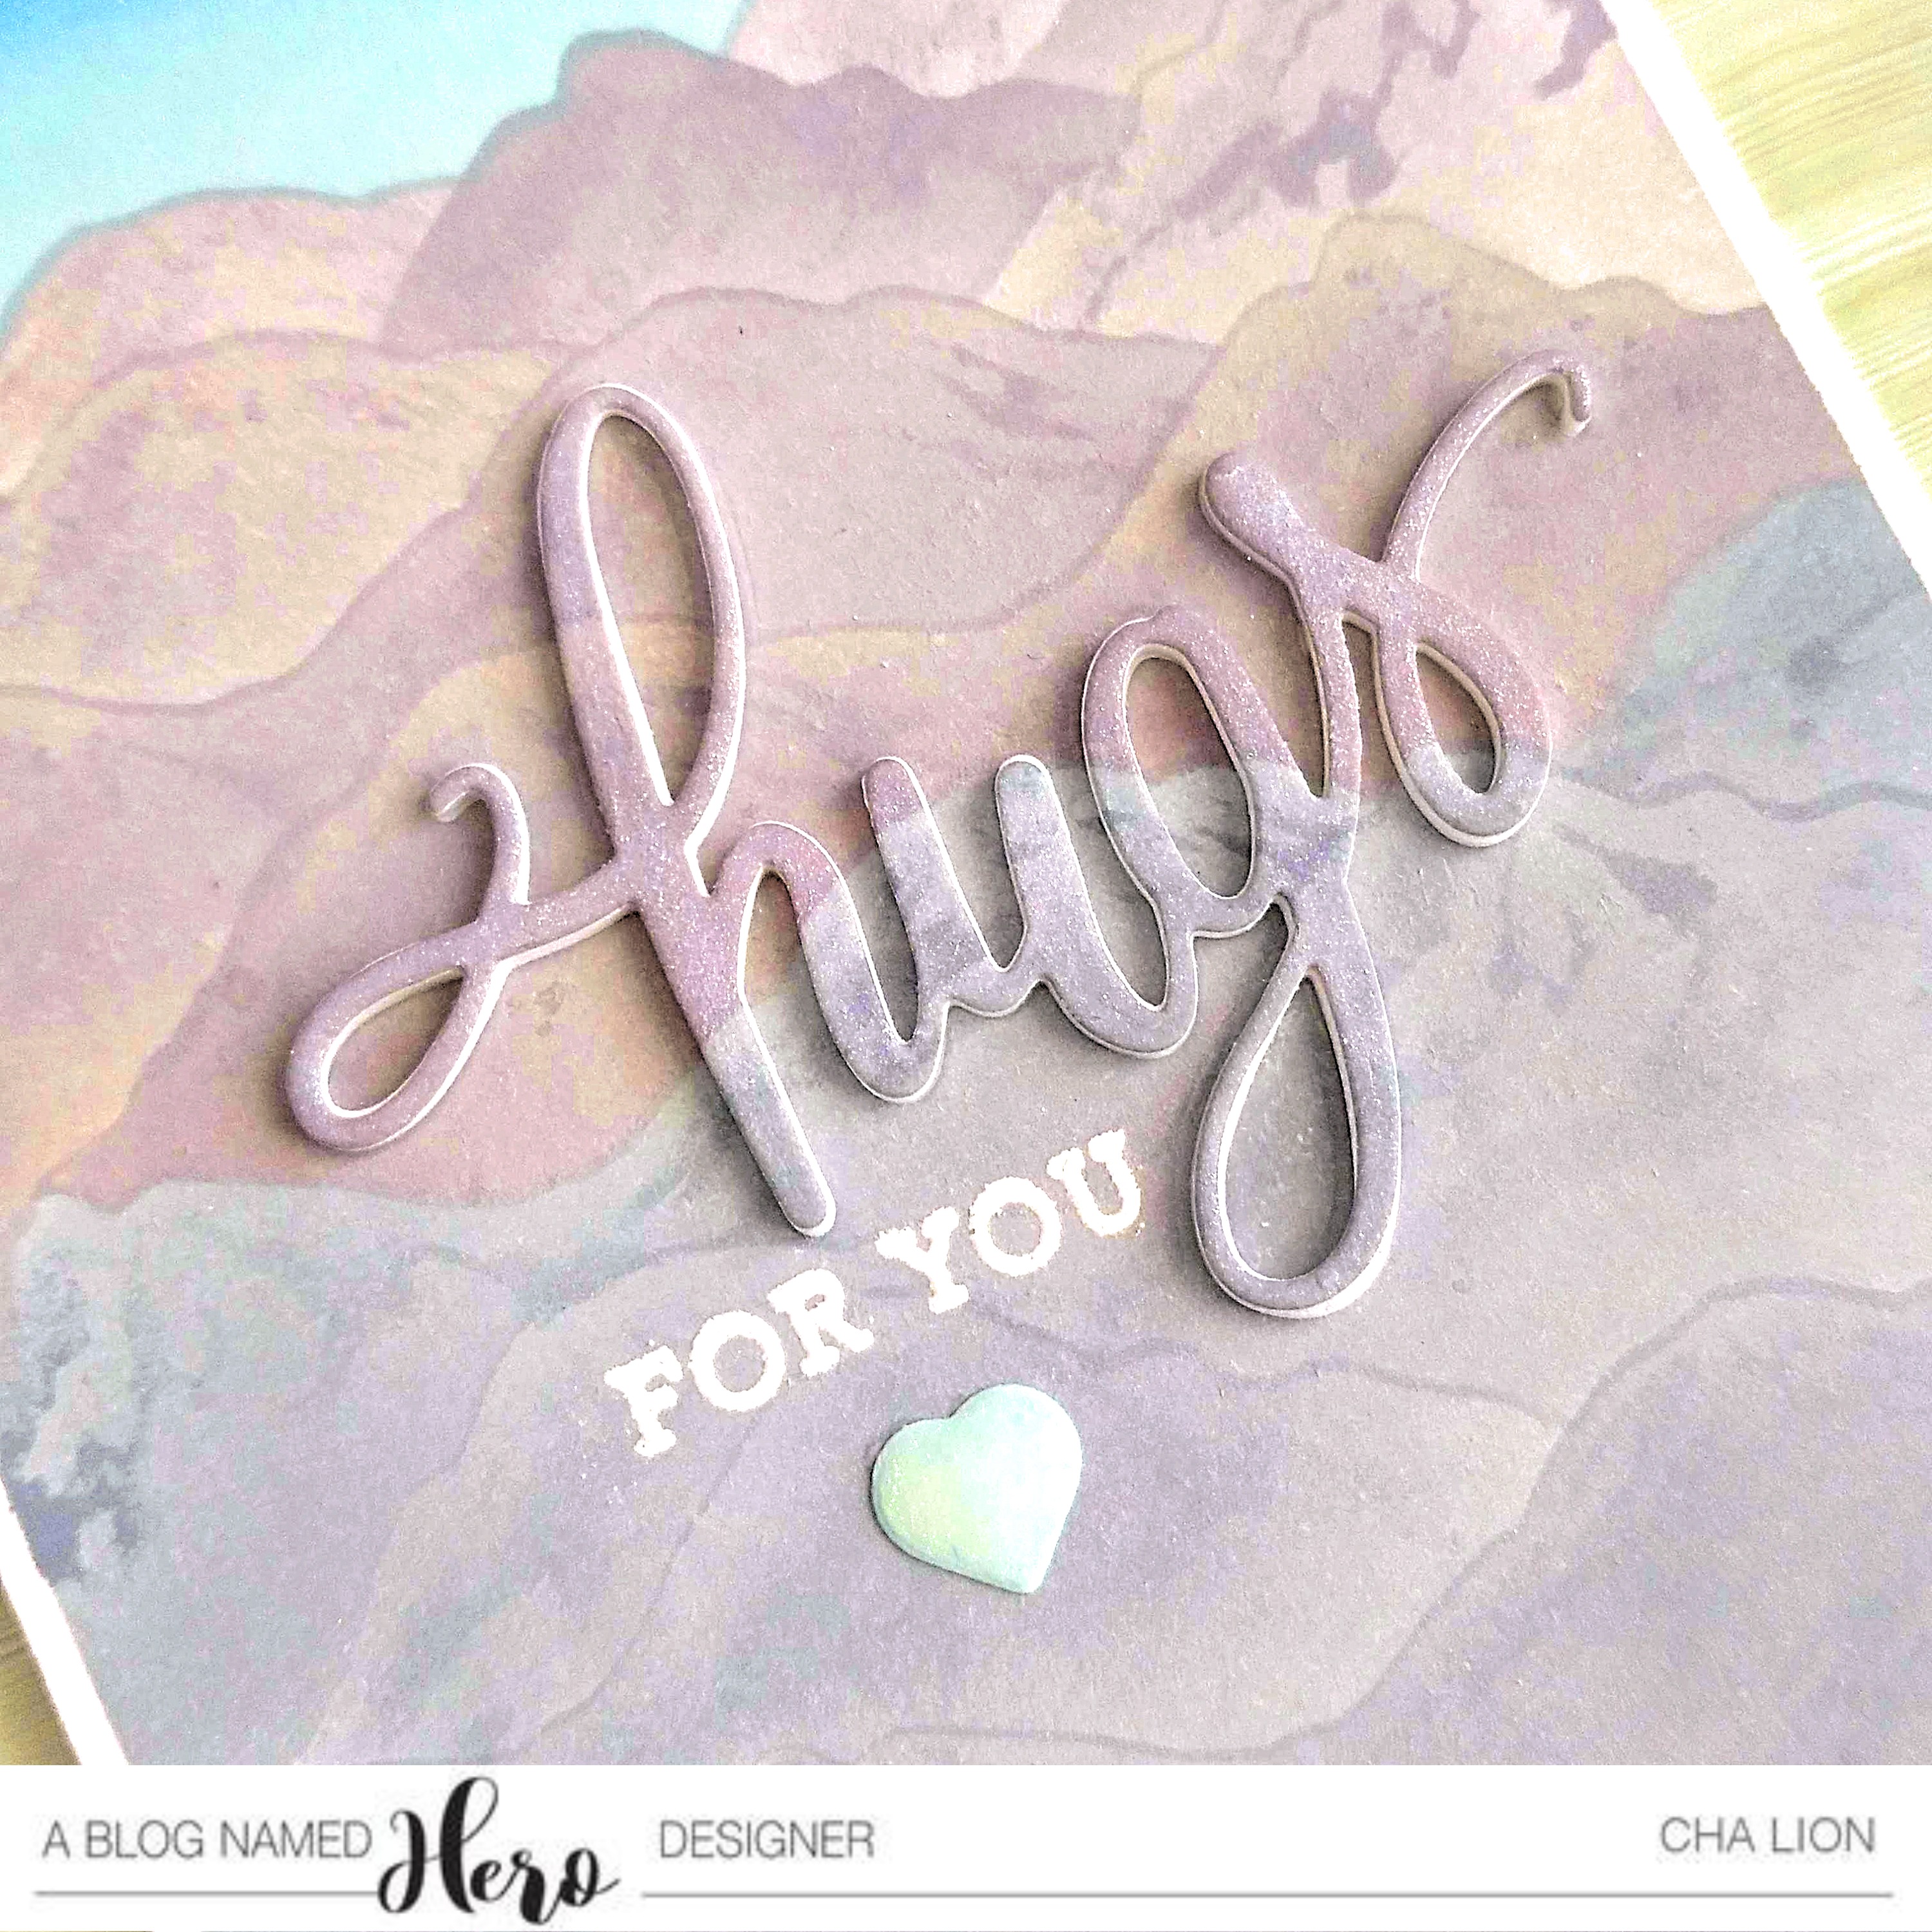
I picked a White Top Folded Card and added some Adhesive Tape on that area that the sentiment was shown up so that I could glue the foam piece in a very easy way. I trimmed the sides of the panel off, just a quarter of an inch. I added the panel on top of the white notecard, and then, I filled the gap with the piece of foam that I'd already die cut before. Finally, I added the other pieces and the die-cut piece from the same panel on top of the foam piece using Precision Glue.
Escogí una Base de Tarjeta Blanca y añadí Adhesivo de Cinta en el área donde el sentimiento de la tarjeta iba a resaltar para poder adherir la pieza de goma eva de una manera más fácil. Recorté los bordes del panel principal, solo un 0,25 pulgada de cada lado y lo pegué sobre la base de la tarjeta, y luego, rellené el hueco con la pieza de goma eva que ya había troquelado anteriormente. Finalmente, añadí la otra pieza troquelada del mismo panel sobre la pieza de goma eva con Pegamento Líquido.
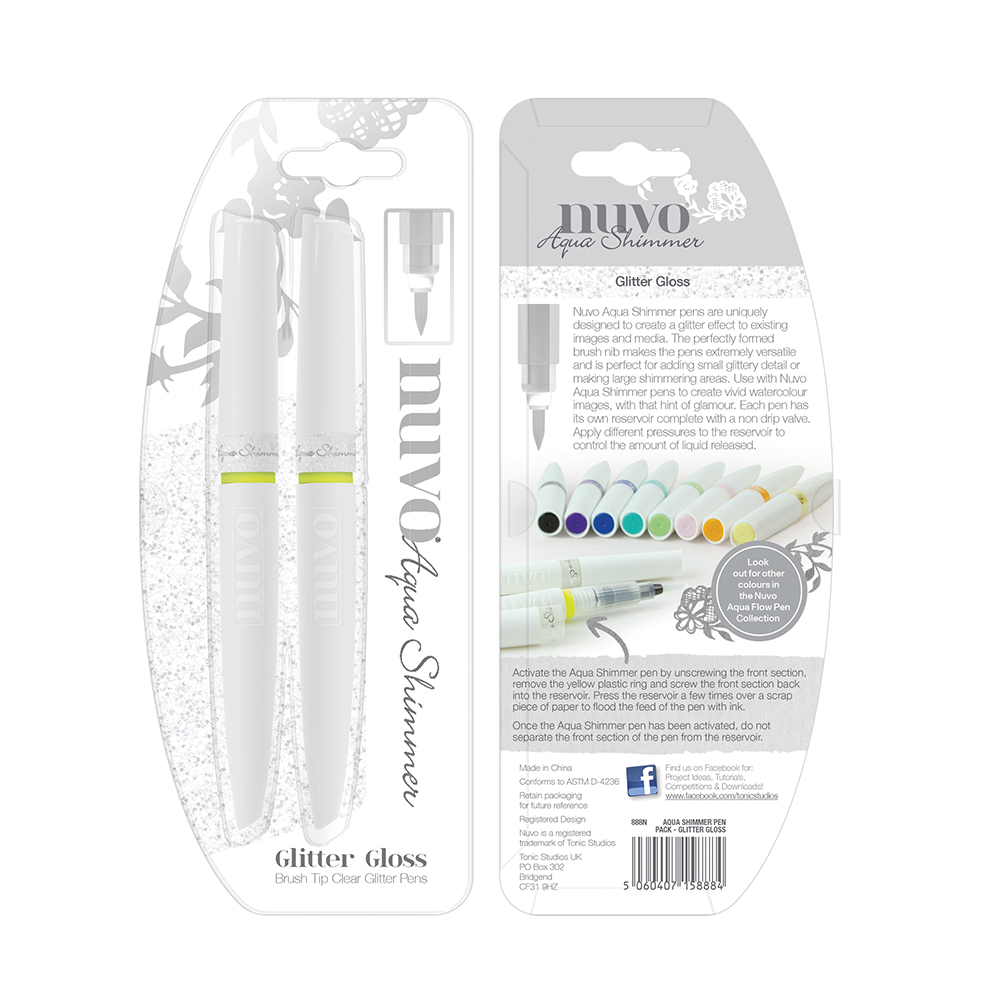
For embellishments, I added a small heart that I die cut from Hero Arts Mist Premium Cardstock and added a little bit of shine on it and also, on the word 'hugs' using the NUVO Aqua Shimmer Pen.
Para adornos, añadí un corazón pequeño que troquelé en cartulina de Hero Arts Mist (Hero Arts Mist Premium Cardstock) y añadí un poco de brillo a este corazón y también sobre la palabra 'Hugs' ("Abrazos") utilizando el NUVO Aqua Shimmer Pen.

And that's it! I hope you like this card and join us in this new challenge that starts today and ends by June 10th.
Thanks for passing by and see you very soon!
¡Y eso es todo! Espero que les haya gustado esta tarjeta y participen con nosotras en este nuevo reto de tarjetas que comienza hoy y termina el 10 de junio.
¡Gracias por pasarte por aquí y nos vemos muy pronto!


[Not all the product links are taking part of Affiliate Programs | No todos los enlaces de productos forman parte del Programa de Afiliados ]
|


.jpg)
.jpg)
.jpg)

1 Comments
Marisela Delgado said: Cha, que Linda tarjeta! So beautiful. Espero que te encuentres bien. Recibiste mi tarjeta? Mari
ReplyDelete