

Hello everyone! This time I'm going to show you how I made partial die cutting with an intricate die without the metallic adapter. I must say that I tried many times until I got the best result, so I just wanted to share with you how I got it. For making this card, I used MMH kit from April 2018. I really love reusing all stamps and dies that I have in my stash.

¡Hola a todos! Esta vez me gustaría enseñarles cómo realicé el troquelado parcial con un troquel complejo sin ningún adaptador metálico en su base. Debo decir que intenté realizar el troquelado parcial con este tipo de troqueles muchas veces hasta que conseguí el mejor de los resultado, y, es por eso, que quise compatir con ustedes cómo lo realicé. Para crear esta tarjeta, utilicé el kit de Hero Arts de abril 2018. Me encanta reutilizar todos mis sellos y troqueles que ya tengo en casa.
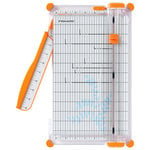
First of all, I decided to use the frame intricate die and some cactus stamps and the coordinating dies from the Hero Arts kit (April 2018). So, I picked a piece of white cardstock and I positioned the intricate die first. Then, I positioned three cactus dies below the intricate die. Once I had all in place, I held the dies with masking tape. This is very important because I cut with the dies several times, I don't want that the dies move. I just wanted to cut from the middle of the cactus to the top of my card. So, I positioned the card on the cutting pads of my Big Shot machine, leaving the part that I didn't want to cut out of these pads. I passed the panel through the machine once. Then, I removed the masking tape from the cactus dies. Now I wanted to cut the intricate die perfectly. In order to see if the die cut the paper, just I looked at the back of my piece of cardstock and I could see that the piece was not cut at all. So, I passed the piece through the die cutting machine over and over again until I could see the clearly defined lines of cutting on the back of the piece. I think I cut this piece about five times although you need to take into account the characteristics of the cardstock. It is worth if you don't want to purchase any other base for your die cutting machine. Then, I removed the masking tape and I could see how well the intricate die was cut. I had to finish to cut the piece because we just cut from the middle to the top of the cardstock, so I cut with a cutter between the cactus.
Primero, decidí utilizar el troquel complejo de un marco y algunos sellos de cactus con sus troqueles coordinados del kit de Hero Arts (Abril 2018). Así que tomé la cartulina blanca y posicioné el troquel complejo primero sobre ella. Entonces, también, posicioné los tres troqueles de cactus por debajo del troquel que había colocado anteriormente. Una vez que todo estuviese puesto y en su posición, sujeté los troqueles con la cinta de carrocero o carpintero (o de enmascarar). Es muy importante mantener los troqueles sujetos porque cortaremos varias veces y no queremos que los troqueles se muevan. Solo quise cortar desde la mitad de los cactus hasta la parte superior de la tarjeta. Así que posicioné la tarjeta con los troqueles en las bases de corte de mi máquina de la Big Shot, dejando la parte que no quería cortar por fuera de estas bases. Pasé la tarjeta por la Big Shot una vez. Entonces quité la cinta de carpintero o masking solo de los troqueles de cactus. Ahora quería cortar el troquel más complejo a la perfección. Para ver si el troquel corta el papel, simplemente observé la parte trasera de la cartulina y podía ve que la pieza no había cortado todo. Así que pasé, nuevamente, la tarjeta por la máquina una y otra vez hasta que pudiese ver las líneas de corte más claras en la parte trasera de la cartulina. Si no me equivoco creo que para conseguir el mejor de los resultados fue pasar la pieza unas cinco veces a través de la máquina pero, también, hay que tener en cuenta el tipo de papel que se utiliza. Merece la pena realizar esta técnica si no quieres adquirir ninguna placa métalica para tu máquina para troquelar. Finalmente, quité la cinta de carpintero y puedes ver cómo de bien a cortado el troquel complejo. Para terminar de cortar la pieza ya que solo hemos cortado desde la mitad hacia la parte superior, simplemente con la ayuda de un regla y un cúter terminamos de cortar la pieza entre los espacios de los cactus.

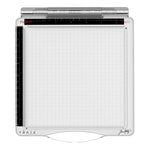
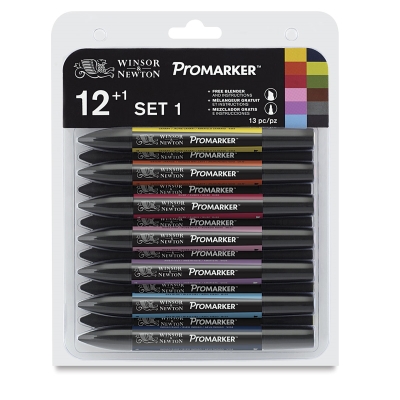
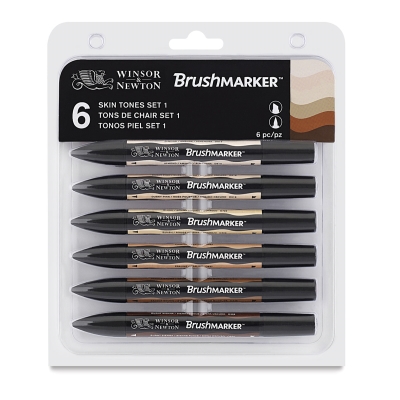
For my stamping, I decided to use the Travel Stamp Platform by Tim Holtz because I wanted to stamp my images several times. I positioned the piece on the base of this platform and lined up the images on top of each shape that I previously partial cut. I closed the lid of the platform and stamped the images using Hero Arts Intense Black ink several times. I also stamped on another piece of white cardstock some other images - some flowers, and the pots that I wanted to add to the cactus later. I colored all the images with alcohol markers - ProMarkers and BrushMarkers. I also cut the images with the coordinating dies. I cut a little bit the pots in the center in order to fit the cactus images. Next, I colored the floor with tones of browns (BrushMarkers) and added the pots to each cactus with some glue.
Para estampar las imágenes, decidí utilizar la Plataforma para Estampar Sellos de Tim Holtz porque quería estampar mis imágenes varias veces. Posicioné la ppieza en la base de esta plataforma y alineé las imágenes de cactus sobre las formas de cactus que previamente había cortado. Cerré la tapa y estampé mis imágenes utilizando la tinta Hero Arts Intense Black varias veces para conseguir una imágen mejor definida. También estampé en otro trozo de cartulina otras imágenes, como flores y macetas que quise añadirle a los cactus. Coloreé todas mis imágenes ya estampadas con rotuladores de alcohol - ProMarkers y BrushMarkers. También corté las imágenes con sus troqueles coordinados. Corté un poquito las macetas por el centro para que encajaran las imágenes de los cactus dentro. Luego, coloreé el suelo con tonos marrones (BrushMarkers) y añadí las macetas a cada cactus con pegamento.

For my sentiment, I also stamped a strip band that came with the kit on a piece of white cardstock and cut it using the coordinating die. I colored with red tones. I also stamped the sentiment (Many thanks!) inside this strip band using Hero Arts Intense Black. I adhered this sentiment to the bottom of my card using black foam squares and attached some flowers around, too.
Para mi frase, también estampé una banda que vino con el kit en una pieza de cartulina blanca y la corté utilizando el troquel coordinado. Coloreé con tonos rojos. A continuación, estampé la frase (Many thanks!) dentro de la banda utilizando la tinta Hero Arts Intense Black. Adherí la frase en la parte inferior de mi tarjeta utilizando cuadritos adhesivos de espuma y, también, pegué algunas flores alrededor.

I mounted the card on a white notecard. First, I added a piece of black cardstock over the white notecard and I glued the main panel on top. I added some shimmer to the part that it is visible, I mean between the frame and the cactus with the Nuvo aqua shimmer pen. I also added some shimmer to the flowers around the sentiment.
Monté mi tarjeta en una base de tarjeta blanca. Primero, añadí un trozo de cartulina negra sobre la base blanca y luego, pegué el panel principal encima. Añadí brillo a la parte de color negro visible, el espacio que se encuentra entre los cactus y el marco con el Nuvo aqua shimmer pen. También añadí a las flores que se encuentran alrededor de la frase.

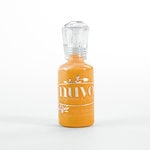
For the final touches, I added some Nuvo Jewel Drops (Strawberry Coulis) and Nuvo Crystal drops (English Mustard) to the flowers. I also added some white dots with Enamel Accents from Ranger here and there.
Para los toques finales, añadí Nuvo Jewel Drops (Strawberry Coulis) y Nuvo Crystal drops (English Mustard) a las flores. También añadí algunos puntos blancos con el Enamel Accents de Ranger aquí y allá.
This is the final result for this card.
Este es el resultado final para esta tarjeta.
Este es el resultado final para esta tarjeta.
I hope you like this card and I invite you to subscribe to my blog and YouTube Channel in order to stay tuned for my new projects.
Espero que les haya gustado esta tarjeta y les invito a subscribirse a mi blog y a mi Canal de YouTube para estar al tanto de todas las novedades.
Espero que les haya gustado esta tarjeta y les invito a subscribirse a mi blog y a mi Canal de YouTube para estar al tanto de todas las novedades.
Thanks so much!
¡Muchas gracias!


.jpg)
.jpg)
.jpg)

0 Comments