[Product links are below the post | Links de productos se encuentran en la parte inferior]
Hello there! It's me, Cha! This time I created a card to celebrate the Independence Day of the USA - 4th of July. I made all the components for this card, even the Statue of Liberty that I designed with Adobe Illustrator a couple of years ago and you can find in my TpT Store - Chadelel's Design.
¡Hola a todos! ¡Soy Cha! Esta vez he creado una tarjeta para la celebración del Día de la Independencia de EEUU - el 4 de julio. Para esta tarjeta creé todos los componentes para esta tarjeta e incluso la imagen de la Estatua de la Libertad que diseñé con Adobe Illustrator hace ya algunos años y que pueden encontrar en mi tienda TpT - Chadelel's Design.
This card is too simple to make. First of all, I printed my image and colored with ProMarkers - turquoise, denim blue and cool blue. I cut the image around and colored the edges with a black marker.
Esta tarjeta es muy simple de crear. Primero de todo, imprimí la imagen a utilizar y la coloreé utilizando rotuladores a base de alcohol, los ProMarkers - turquoise, denim blue y cool blue. Corté la imagen por alrededor y coloreé los bordes con un rotulador negro.
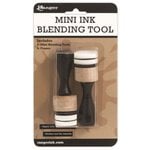
Later, I used a piece of white cardstock to create the background of this card. I started blending Distress Oxide Inks but from the middle of the card to the top. I used blueprint sketch, faded jeans, and black soot. Then, I used the black emboss it pen from Ranger to create some buildings at the bottom of the card. When I finished, I added some ultra fine clear embossing powders and heat it with my craft tool. I used the clear emboss it pen for coloring the windows of the buildings and also added the same embossing powders (ultra fine clear) and heat it again with my heat gun. When all was completed, I decided to color the windows with a yellow marker.
Más tarde, utilicé una cartulina blanca para crear el fondo para esta tarjeta. Comencé mezclando varias tintas Distress Oxide pero desde el centro de la tarjeta hacia la parte superior. Los colores que utilicé fueron blueprint sketch, faded jeans y black soot. Entonces con el rotulador negro para embossing de Ranger creé algunos edificios en la parte inferior de la tarjeta. Cuando terminé, añadí polvos de embossing claros (ultra fine clear de Hero Arts) y los sequé utilizando la pistola de embossing. También utilicé el rotulador claro para embossing para colorear las ventanas de los edificios y, también, añadí los mismos polvos de embossing (ultra fine clear) y los quemé nuevamente con mi pistola de calor. Cuando estaba todo creado, decidí colorear las ventanas con un rotulador amarillo.
Finally, I decided to create some fireworks in the sky. So, I drew some lines using the clear emboss it pen and stamped some stars using the Versamark ink. Then, I mixed some embossing powders - red geranium and marigold (from Ranger). I heat all the embossing with my craft tool.
Finalmente, decidí crear algunos fuegos artificiales en el cielo. Así que dibujé varias líneas utilizando el rotulador claro para embossing y estampé sellos de estrellas utilizando la tinta Versamark. Entoncesm mezclé dos tipos diferentes de polvos de embossing - red geranium y marigold (ambos de Ranger). Los quemé utilizando la pistola de embossing.
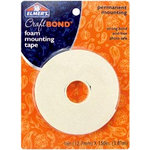
For mounting my card, I just added some foam tape of the behind the image and adhered to the background. I cut the excess of the image at the bottom with scissors. I attached the whole piece to a white notecard 5.5 by 4.25" using double-sided tape.
Para montar la tarjeta a su base, simplemente añadí adhesivo dimensional de espuma en la parte trasera de la imagen y la adherí al fondo creado. Recorté el exceso de la imagen por la parte inferior de la tarjeta con unas tijeras. Luego, añadí toda esta pieza a la base blanca de tarjeta utilizando cinta de doble cara. Las bases de tarjetas las creo en pulgadas, 5.5 por 4.25 pulgadas.
For the final details, I just added some shimmer to the image using the Nuvo aqua shimmer pen.
Para los detalles finales, solo añadí algo de brillo a la imagen con el Nuvo aqua shimmer pen.
I hope you like this card and get inspired to create the components for your cards!
Espero que les haya gustado esta tarjeta y se sientan inspirados para... ¡crear todos los componentes de una tarjeta!
I invite you to subscribe to my blog and YouTube Channel! Something to say? Leave me a comment below! Thanks so much!
Te invito a subscribirte... ¡a mi blog y a mi Canal de Youtube! ¿Algo que decir? Déjamelo en los comentarios abajo de la entrada. ¡Muchas gracias!









.jpg)

0 Comments