

Hello there! It's me again, Cha! As Christmas is closed to celebrate, I've decided to start to post some Christmas cards. This time I created some cards using masking with carpenter's tape or masking tape that helps us to color just that part that we want to. Thanks to this technique, you can create many cards as you wish and just use a few supplies. I hope you like this post.

¡Hola a todos! Soy yo...¡Cha!. Como navidad está tan cerca, he decidido comenzar a publicar algunas tarjetas navideñas. Esta vez, he creado algunas tarjetas utilizando máscaras con cinta de carrocero o carpintero que nos ayudarán a dar color solo a aquella parte que queramos colorear. Gracias a esta técnica, puedes crear tantas tarjetas como quieras y, solo utilizando pocos materiales. Espero que les guste este post.
Remember that all product links are posted below and you can watch the video HERE.
Recuerden que todos los links de los productos los encontrarán al final del post y pueden ver el vídeo AQUÍ.
Background | Fondo
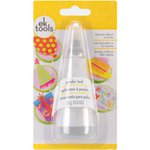
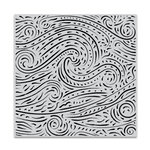
For the background, I created a Christmas tree on a post-it note and I cut it around the edges. Then, I cut the main panel of the card a little bit smaller than the card base (4.25 by 5.5) and positioned this Christmas tree in the center of the panel. Later, I used my Powder Tool on here because I was going to use embossing powders. So, I stamped the Hero Arts Starry Night Rubber Stamp with Versafine Onyx Black ink on the panel. When you remove the tree from the center, you see that gap that I colored later. After that, I added some clear embossing powder and heat it with my craft gun tool. It doesn't matter that you don't mask the center of the card, the embossing powder just adhered to that part that you stamp with the ink previously.
Para el fondo de la tarjeta, primero dibujé un árbol de navidad en un post-it y lo recorté por los lados. Además, el panel principal lo recorté un poco más pequeño que la base de la tarjeta (4.25 por 5.5 pulgadas) y coloqué el árbol que había creado antes en el centro del panel. Más tarde, añadí la herramienta anti-estática en el fondo poque iba realizar embossing en este área. Así que estampé un sello de caucho de Hero Arts en todo el panel con la tinta Versafine Onyx black. Entonces quité la máscara del árbol de navidad que había puesto en el centro anteriormente, y añadí los polvos de embossing claros y los quemé con la pistola de calor. Cuando añades los polvos de embossing, no importa si quitas o no la máscara del centro porque los polvos solo se adherierán en la parte en la que estampas el sello anteriormente.
I positioned again the mask of the tree in the center to color the background without coloring that part of the mask. I colored the background with Distress Ink Mustard Seed.
Volví a poner en el centro la máscara del árbol de navidad y comencé a colorear con un color amarillo utilizando la tinta Distress Ink Mustard Seed.
Volví a poner en el centro la máscara del árbol de navidad y comencé a colorear con un color amarillo utilizando la tinta Distress Ink Mustard Seed.
Creating a Christmas Tree | Creación del Árbol de Navidad
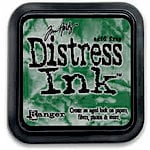
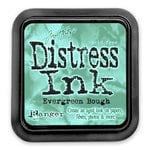
For the image, I decided to create a Christmas tree with masking. The Christmas tree that I created was with three triangles. I started masking the triangles one by one, from the top to the bottom. I first masked the first triangle. I added three pieces of masking tape (or carpenter's tape) around the three sides. When I positioned the masking tape, I left some white borders around each triangle that I colored later. I colored the three triangles with the same colors and, as I mentioned before, one by one. I colored them with Distress Ink Evergreen Bough and Pine Needles.
Para la imagen central del árbol de navidad también utilicé máscaras. Decidí crear el árbol mediante tres triángulos y uno a uno desde arriba hacia abajo. Por lo tanto, primero enmascaré el primer triángulo (el de arriba) utilizando cinta de carrocero (o de carpintero) y dejándo un borde alrededor de color blanco ya que más tarde mi intención es pintarlo de otro color. Como mencioné antes, cada triángulo lo coloreé de uno en uno y con los mismos colores. Para todos ellos utilicé los colores verdes con las Distress Ink y el color Evergreen Bough y Pine Needles.

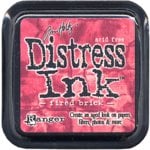
I also masked the pot at the bottom of the Christmas tree in the same way, but, this time I colored it with Distress Ink Fired Brick.
Para la imagen central del árbol de navidad también utilicé máscaras. Decidí crear el árbol mediante tres triángulos y uno a uno desde arriba hacia abajo. Por lo tanto, primero enmascaré el primer triángulo (el de arriba) utilizando cinta de carrocero (o de carpintero) y dejándo un borde alrededor de color blanco ya que más tarde mi intención es pintarlo de otro color. Como mencioné antes, cada triángulo lo coloreé de uno en uno y con los mismos colores. Para todos ellos utilicé los colores verdes con las Distress Ink y el color Evergreen Bough y Pine Needles.
I also masked the pot at the bottom of the Christmas tree in the same way, but, this time I colored it with Distress Ink Fired Brick.
También enmascaré la parte de abajo del árbol de navidad, después del tercer triángulo, para crear una maceta que sostuviera el arbolito. Seguí el mismo proceso que los triangulitos, enmascaré cuatro lados que forman la maceta. Esta maceta la coloreé con un color rojo, Distress Ink Fired Brick.
As I said before, I left some white borders around the sides of the triangles and the pot that formed the Christmas tree. In order to connect the background to the image in some way, I decided to color these white borders with a black marker (Black Promarker by Winsor&Newton).
Como dije anteriormente, mientras creaba los triángulitos del árbol de navidad y la maceta, les dejé un borde a cada parte. Para conectar el fondo con la imagen de alguna manera, esa parte que había dejado como borde, la coloreé utlizando con un rotulador negro (Promarker de Winsor&Newton).
Sentiment | Frase
For the sentiment, I decided to stamp 'Merry Christmas' but I don't have the whole phrase, so I added the letters from an alphabet stamp set to an acrylic block lining up first all the letters. Then, on a piece of black cardstock, I used the Powder Tool and stamped the phrase using Versamark Ink and added gold embossing powder that I heat later with my heat gun tool. I cut the words separately.
Para la frase de la tarjeta, decidí estampar "Merry Christmas" ("Feliz navidad" en inglés). Como no tenía ninguna frase con esas palabras, opté por utilizar un sello de alfabeto y añadir la frase a una base de metacrilato y alineando las palabras. Entonces, en una cartulina negra, primero utilicé el Powder Tool que es una herramienta para eliminar la electricidad estática de la cartulina. Estampé mi frase en la cartulina con la tinta Versamark y añadí polvos de embossing de color oro y los quemé con la pistola de calor. Recorté las dos palabras con unas tijeras por separado, es decir, una tira con la palabra 'Merry' y otra con la palabra 'Christmas'.
Para la frase de la tarjeta, decidí estampar "Merry Christmas" ("Feliz navidad" en inglés). Como no tenía ninguna frase con esas palabras, opté por utilizar un sello de alfabeto y añadir la frase a una base de metacrilato y alineando las palabras. Entonces, en una cartulina negra, primero utilicé el Powder Tool que es una herramienta para eliminar la electricidad estática de la cartulina. Estampé mi frase en la cartulina con la tinta Versamark y añadí polvos de embossing de color oro y los quemé con la pistola de calor. Recorté las dos palabras con unas tijeras por separado, es decir, una tira con la palabra 'Merry' y otra con la palabra 'Christmas'.
I added the two words in the center of the card using some foam tape to give some dimension to the card.
Una vez recortadas las dos palabras, las posicioné en el centro de la tarjeta y las pegué utilizando cinta de espuma blanca o un adhesivo de volumen.

Card Mounting | Montaje de Tarjeta
As I wanted a little bit more of dimension, I cut a piece of black fun foam a little bit bigger than the main panel and less than the card base. I adhered this piece to the back of the main panel and this whole piece I glued on the top of a soft yellow card base.
Como quería un poquito más de volumen en la tarjeta, recorté un trozo de goma eva un poquito más grande que el panel principal de la tarjeta (la que coloreé) pero menos que la tarjeta base. Por ello, añadí este trozo de goma eva negra en la parte trasera del panel, y todo el conjunto la añadí lo más centrica posible a la tarjeta base de color amarillo.
Como quería un poquito más de volumen en la tarjeta, recorté un trozo de goma eva un poquito más grande que el panel principal de la tarjeta (la que coloreé) pero menos que la tarjeta base. Por ello, añadí este trozo de goma eva negra en la parte trasera del panel, y todo el conjunto la añadí lo más centrica posible a la tarjeta base de color amarillo.
Embellishments | Adornos
For final touches, I added some Wink of Stella glitter clear to the background and to the Christmas Tree. I also added some glitter Stickles of red, green, and clear and some black enamel dots. Finally, I added a golden star sequin at the top of the Christmas tree!
Para terminar la tarjeta, añadí algo de brillo con el rotulador de purpurina claro Wink of Stella, tanto al fondo como al arbolito de navidad. También añadí algunos puntos de brillo de Stickles, de color rojo, claro y verde y algunos puntos negros con enamel dots. Finalmente, añadí el adorno de la estrellita dorada en la parte superior del arbolito de navidad.
Para terminar la tarjeta, añadí algo de brillo con el rotulador de purpurina claro Wink of Stella, tanto al fondo como al arbolito de navidad. También añadí algunos puntos de brillo de Stickles, de color rojo, claro y verde y algunos puntos negros con enamel dots. Finalmente, añadí el adorno de la estrellita dorada en la parte superior del arbolito de navidad.


Remember that you can watch my video and subscribe to my YouTube Channel!
Espero que les guste estas tarjetas y recuerden que pueden ver mis vídeos en mi canal de YouTube y, si les gustan... ¡No olviden de susbscribirse!
I hope you see you soon.
Espero verles pronto.
¡Gracias!


Espero verles pronto.
¡Gracias!


DIY Ink blending tools | DIY Aplicadores de Tinta


.jpg)
.jpg)
.jpg)
