

Hello there! It's me, Cha! This time I'm going to show you how I created some cards with colored edges of the images coordinated with the cardstock. It's easy to easy and the colors change a lot giving to the card a lot of contrast. For this technique, you need alcohol markers (I used ProMarkers), stamps, and imagination.

¡Hola a todos! Soy Cha. En esta ocasión les voy a hablar de crear y cortar imágenes con sellos pero con los borders coloreados y que peguen con la cartulina elegida como base para la tarjeta. Es bastante fácil de hacer y la verdad es que contrasta los colores mucho más. Para esta técnica, necesitamos rotuladores de alcohol (yo uso ProMarkers), sellos e imaginación.
Images | Imágenes
For my images, I decided to use again the layering pumpkins and sunflower stamps (these stamps came with the Hero Arts kit - September 2017). This time I used some Hero Arts dye inks to stamp my images. For the petals of the sunflower, I used for the first layer the color Butter Bar , then for the second layer, Orange Soda
 and for the last layer, Tangerine. For the center of the image that came with two layers, for the first one I picked the color Pumpkin Pie
 and for the second one I chose Cup O' Joe
 . Finally, for the branches, I just picked the solid image, the first layer. For this one, I used Forever Green
 .
.
Para las imágenes, decidí reutilizar los sellos de girasoles y calabazas (recuerden que estos sellos venían con el kit de Hero Arts - Septiembre 2017). Para entintar los sellos, opté por utilizar las tintas dye de Hero Arts. Para los pétalos del girasol, y para la primera capa, usé el color Butter Bar
I cut the images with a pair of scissors
Luego, corté la imagen con unas tijeras

Background | Fondo
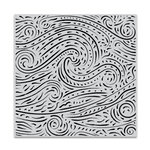
For my background, I decided to stamp on a piece of white cardstock the rubber stamp from Hero Arts Starry Night
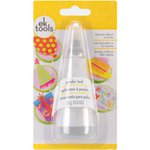
 . First, I used my Powder Tool
 on the cardstock and then I stamped the stamp with Versafine Onyx Black
 . As this ink is a pigment ink, I also added some Ultra Fine embossing powders
 and heat it up with my craft gun tool
 .
.
En una cartulina blanca, estampé el sello de caucho de Hero Arts Starry Night. Primero, utilicé mi Powder Tool para eliminar la electricidad estática de la cartulina y, estampé el sello utilizando la tinta Versafine Onyx Black
 . Como ésta es una tinta de pigmento, espolveré los polvos de embossing Ultra Fine
 sobre toda la cartulina y, seguidamente, los sequé con la pistola de calor
 .
.
I must say that I created a background first using Versamark Watermark ink and added some black embossing powders
 but the result didn't convince me at all.
Durante la grabación del vídeo, decidí también realizar el mismo fondo utilizanfo la tinta Versamark Watermark y añadiendo polvos de embossing negro
 y la verdad, es que el resultado no me convenció.
As you can see in the following photo, I used the Versafine Onyx black and the Ultra Fine embossing powder on the left and on the right, I used the Versamark and some black embossing powders. So the left one is cleaner than the another one and it gives better results.

Como pueden ver en la siguiente foto, en la cartulina de la izquierda utilicé la tinta Versafine Onyx black y los polvos de embossing Ultra Fine, y en la cartulina de la derecha, utilicé la tinta Versamark y los polvos de embossing negro. Como pueden observar, y, a mi parecer, la imagen de la cartulina de la izquierda es más limpia que la de la derecha.
For coloring the background, I also used some Hero Arts dye ink. I blended some colors together. The first one that I used was Pumpkin Pie, then Moss and the last was Deep Ocean
 .
.
Para colorear el fondo del panel, utilicé también las tintas Dye de Hero Arts. Utilicé tres colores y los fui mezclando poco a poco - Pumpkin Pie, Moss y Deep Ocean.

Sentiment | Frase
For my sentiment, I stamped it on some black cardstock. I decided to stamp my sentiment on a black cardstock because I thought it matched with the background. So, I used my Power Tool on here, too. Also, I stamped the sentiment with Versamark Watermark ink, added some gold embossing powder on it and heat it with my gun tool.
Escogí el sello con la frase que quería utilizar para esta tarjeta, y la estampé en una cartulina negra. Decidí estampar el sello en cartulina negra porque pensé que el color quedaba perfecto con el fondo. Por ello, utilicé el Power Tool aquí otra vez. Así que estampé la frase con Versamark Watermark y añadí algunos polvos de embossing dorados (gold) y los sequé con la pistola de calor.
Card Mounting | Montaje de la Tarjeta
I decided to attach my background panel on a black notecard (5.5" by 4.25" - folded card base). So, I cut a little bit the background using the second rectangle die-cut of the Rectangle Infinity Dies . When I attached the background to the black notecard, I added the sentiment and glued it on the cardstock using some foam tape
 .
.
Decidí montar la tarjeta base de color negro (14 x 10.8 centímetros - base plegada). Como quería dejar un borde alrededor de la tarjeta, corté el fondo un poco más pequeño utilizando el segundo troquel rectangular del set de Hero Arts Rectangle Infinity Dies. Cuando pegué el fondo a la base de la tarjeta, añadí la frase que corté en forma de banda y del mismo ancho de la tarjeta y que pegué utilizando un adhesivo dimensional .
.

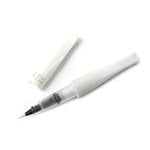
Now that I knew that the notecard and the cardstock of my panel were black, I decided to color the border of my image with a black alcohol marker. I used BX ProMarker by Winsor&Newton but Copics Markers or Spectrum Noir Markers also could work.
Una vez que ya sabía que la base de la tarjeta era de color negro, decidí el también colorearía los bordes de la imagen del mismo color, con un rotulador negro, para ello utilicé el BX ProMarker de Winsor&Newton aunque si tienen Copics o Spectrum Noir también sirven.
En una cartulina blanca, estampé el sello de caucho de Hero Arts Starry Night
I must say that I created a background first using Versamark Watermark ink
Durante la grabación del vídeo, decidí también realizar el mismo fondo utilizanfo la tinta Versamark Watermark
As you can see in the following photo, I used the Versafine Onyx black and the Ultra Fine embossing powder on the left and on the right, I used the Versamark and some black embossing powders. So the left one is cleaner than the another one and it gives better results.
Como pueden ver en la siguiente foto, en la cartulina de la izquierda utilicé la tinta Versafine Onyx black y los polvos de embossing Ultra Fine, y en la cartulina de la derecha, utilicé la tinta Versamark y los polvos de embossing negro. Como pueden observar, y, a mi parecer, la imagen de la cartulina de la izquierda es más limpia que la de la derecha.
For coloring the background, I also used some Hero Arts dye ink. I blended some colors together. The first one that I used was Pumpkin Pie, then Moss
Para colorear el fondo del panel, utilicé también las tintas Dye de Hero Arts. Utilicé tres colores y los fui mezclando poco a poco - Pumpkin Pie, Moss
Sentiment | Frase
For my sentiment, I stamped it on some black cardstock. I decided to stamp my sentiment on a black cardstock because I thought it matched with the background. So, I used my Power Tool on here, too. Also, I stamped the sentiment with Versamark Watermark ink, added some gold embossing powder
Escogí el sello con la frase que quería utilizar para esta tarjeta, y la estampé en una cartulina negra. Decidí estampar el sello en cartulina negra porque pensé que el color quedaba perfecto con el fondo. Por ello, utilicé el Power Tool aquí otra vez. Así que estampé la frase con Versamark Watermark y añadí algunos polvos de embossing dorados (gold)
Card Mounting | Montaje de la Tarjeta
I decided to attach my background panel on a black notecard (5.5" by 4.25" - folded card base). So, I cut a little bit the background using the second rectangle die-cut of the Rectangle Infinity Dies
Decidí montar la tarjeta base de color negro (14 x 10.8 centímetros - base plegada). Como quería dejar un borde alrededor de la tarjeta, corté el fondo un poco más pequeño utilizando el segundo troquel rectangular del set de Hero Arts Rectangle Infinity Dies
Now that I knew that the notecard and the cardstock of my panel were black, I decided to color the border of my image with a black alcohol marker. I used BX ProMarker by Winsor&Newton
Una vez que ya sabía que la base de la tarjeta era de color negro, decidí el también colorearía los bordes de la imagen del mismo color, con un rotulador negro, para ello utilicé el BX ProMarker de Winsor&Newton
When I finished coloring the edges of my images, I glued the image on the band strip of my sentiment. I used some black foam squares
Cuando terminé de colorear los bordes de la imagen, pegué la imagen encima de la banda en la que estampé la frase. Para pegarla utilicé algunos cuadraditos pequeños de adhesivo dimensional

Embellishments | Adornos
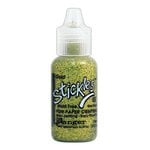
For final touches, I used some Wink of Stella clear glitter
And that's all!
Para adornar la tarjeta, simplemente añadí algo de brillo con Wink of Stella
Y...¡listo para enviar!

Watch the Video! | Ver el Vídeo
BONUS CARDS | TARJETAS BONUS


I hope you used this technique of coloring the edges of your images to better match your panel! If you like the card and like my creations, don't forget to subscribe to my YouTube channel!!!! See you soon!
Espero que utilicen esta técnica para dar un poco más de contraste de color a sus creaciones, y si te ha gustado esta tarjeta y mis otras creaciones...¡No olvides subscribirte a mi canal de Youtube! Muchas gracias. ¡Hasta pronto!


DIY Ink Blending Tools | DIY Aplicadores de Tinta


.jpg)
.jpg)
.jpg)
