

Hello there! It's me, Cha! If you follow me on Instagram, you will know that I've been ill with flu but I'm better and here I am! As I've received My September Monthly Hero 2017 that brings layering stamps, this post and video are about layering stamps and I've also created a background with some Ink Cubes. Remember that Hero Arts launches a limited kit every month and its content is outstanding because it comes with a lot of supplies to create many cards!

¡Hola a todos! Soy Cha. Si me sigues en Instagram, probablemente pudiste leer que estaba con gripe pero, gracias a que ya me siento mejor y ya he vuelvo a las andadas. Como la semana pasada, recibí el kit de Hero Arts de Septiembre 2017 y vino para crear imágenes mediante capas, en este blog les hablo de las sellos por capas pero, también, de cómo he creado ese fondo con las tintas en forma de cubo. Recuerden que la compañía americana Hero Arts lanza todos los meses un kit limitado en el que viene muchos materiales para crear muchas tarjetas.
For creating these cards, I used Snow Layering Paper from Hero Arts.
Para crear estar tarjetas utilicé el papel "Snow" de Hero Arts.
Images | Imágenes
For creating my images, I used my DIY Stamping Tool that it is similar to the Misti or the Hampton Art Perfect Stamping tool which this last is no longer available. As these images are created by layers, you need to stamp each layer one by one in the same place that you position the others to create the images in a real look. For this card, I focused on the pumpkins. So, I positioned the first image, which is the more solid one, on my Stamping Tool and inked with Hero Arts Pumpkin Pie ink. I usually stamp my images twice or sometimes third times because I love having very well stamped images. Moreover, we have to take into account that Dye Inks dries quickly on the paper but because of its water-based properties, the ink absorbs into the paper and that's why the color changed a little bit, so I highly recommend to heat it with the heat gun tool a little bit or just wait a couple of minutes.
Para crear mi imagenes utilicé mi herramienta especial para estampar (hecha por mi misma) que es similar a la Misti o la herramienta de estampar de Hampton Art que ya no se está fabricando aunque en España se puede conseguir todavía en pocas tiendas on-line. Como estas imágenes se crean mediante distintas capas, se necesita estampar una encima de otra poco a poco para conseguir un efecto mucho más realista. Para esta tarjeta, decidí crear la imagen de la calabaza. Así que primero coloqué el primer sello (el más sólido) en la herramienta de estampar y lo estampé utilizando la tinta de Hero Art Pumpkin Pie. Cuando estampas la imagen una vez, es verdad que quedan algunas áreas en blanco, por lo tanto, y gracias a la herramienta de estampar, se puede volver a estampar la imagen tantas veces como sea necesario. A mi me gusta estampar la imagen dos veces e incluso tres veces para que la imagen quede completamente nítida. Además, las tintas Dye Inks (de tinte) se secan muy rápico pero como tienen una base de agua, la tinta se va absorbiendo poco a poco en el papel (no en la superficie del papel) y por lo tanto, el color de la tinta cambia un poco. Por ello, recomiendo secar la imagen entre capa y capa, o bien con la pistola de calor o esperando unos minutitos.

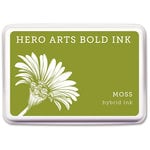
For the second layer of the pumpkin, I used Hero Arts Just Rust and for the third layer, Tangerine Hero Arts Ink. Finally, for the leaves which have two layers, I used Memento Bamboo Leaves Ink for the first layer and for the last layer, I used Moss Hero Arts Ink.
Para la segunda capa de la calabaza utilicé la tinta de Hero Arts llamada Just Rust y para la tercera, también de Hero Arts llamada Tangerine. Finalmente para las hojas que tienen dos capas, para la primera utilicé una tinta de la marca Memento Bamboo Leaves y para la segunda capa y última, la tinta de Hero Arts, Moss.
I used the coordinating dies which also came with the kit to cut all my images with my manual cutting machine (mine is the Sizzix).
Para cortar las imágenes utilicé los troqueles en coordinación con las imagenes que vinieron con el kit y utilicé una máquina de corte manual (la Sizzix).

Background | Fondo
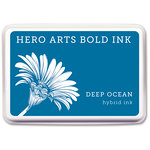
For the background, I wanted some color so, I decided to take some ink cubes which have smaller ink pads and made with them some lines directly on the paper. I made some stripes with color blue that is Hero Arts Deep Ocean and I waited a little bit, then I made the same but with a yellow color, Hero Arts Butter Bar. I just made some stripes in a cross and vertical way.
También para el fondo quería algo de color, por eso, decidí tintar el fondo directamente el papel con las tintas de forma de cubo ya que la almohadilla de la tinta es más pequeña pero no todo el fondo, simplemente hice líneas verticales y horinzontales con dos colores diferentes. Primero utilicé la tinta Deep Ocean, y luego la tinta Butter Bar, ambas de Hero Arts.
Sentiment | Frase
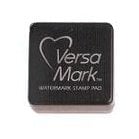
For my sentiment, I used one of the sentiment from the Hero Arts main kit and I made some embossing on it using Hero Arts White Embossing Powder. So, I stamped my sentiment using Versamark Ink and added the White Embossing Powders. Then, I heat my sentiment with my craft heat gun tool.

Card Mounting | Montaje de Tarjeta
For mounting my card, I decided to make the main panel smaller with the fourth die cut of the Rectangle Infinity Dies by Hero Arts. Once my main panel is cut, I glued it on one of the sheets of the Earth Mix layering paper and I adhered all to a basic white card base.
For mounting my card, I decided to make the main panel smaller with the fourth die cut of the Rectangle Infinity Dies by Hero Arts. Once my main panel is cut, I glued it on one of the sheets of the Earth Mix layering paper and I adhered all to a basic white card base.
Antes de montar la tarjeta en la base, primero recorté un poco más el panel principal (el que coloreé con las tintas en cubo) y para ello, utilicé los troqueles de rectángulos de Hero Arts (Infinity Dies - Troqueles Infinitos). Una vez cortada la tarjeta, la pegué en una hoja beige de Hero Arts Layering Earth Mix y todo lo pegué en la base blanca de la tarjeta.
At last, I glued four pumpkins and three of them I glued them with some dimension using 3D foam tape.
Al final, pegué cuatro calabazas y tres de ellas las pegué con un poco de dimensión utilizando un adhesivo 3D.
And... this is the result!
¡Y este es el resultado!

YouTube Video
I hope you find this post useful for your future projects and see you soon!
Espero que encuentren este post útil para sus proyectos y espero verlos pronto. ¡Gracias!


Misti Stamping Tool | Herramienta de Estampación Sellos


.jpg)
.jpg)
.jpg)
