

Hello there! It's me, Cha! I have been playing with Hero Arts MMH August 2017 and I must say that it is my favorite set without any doubt. There are many things that you can create with this set and I think I'm going to use it a lot in my next posts and videos.
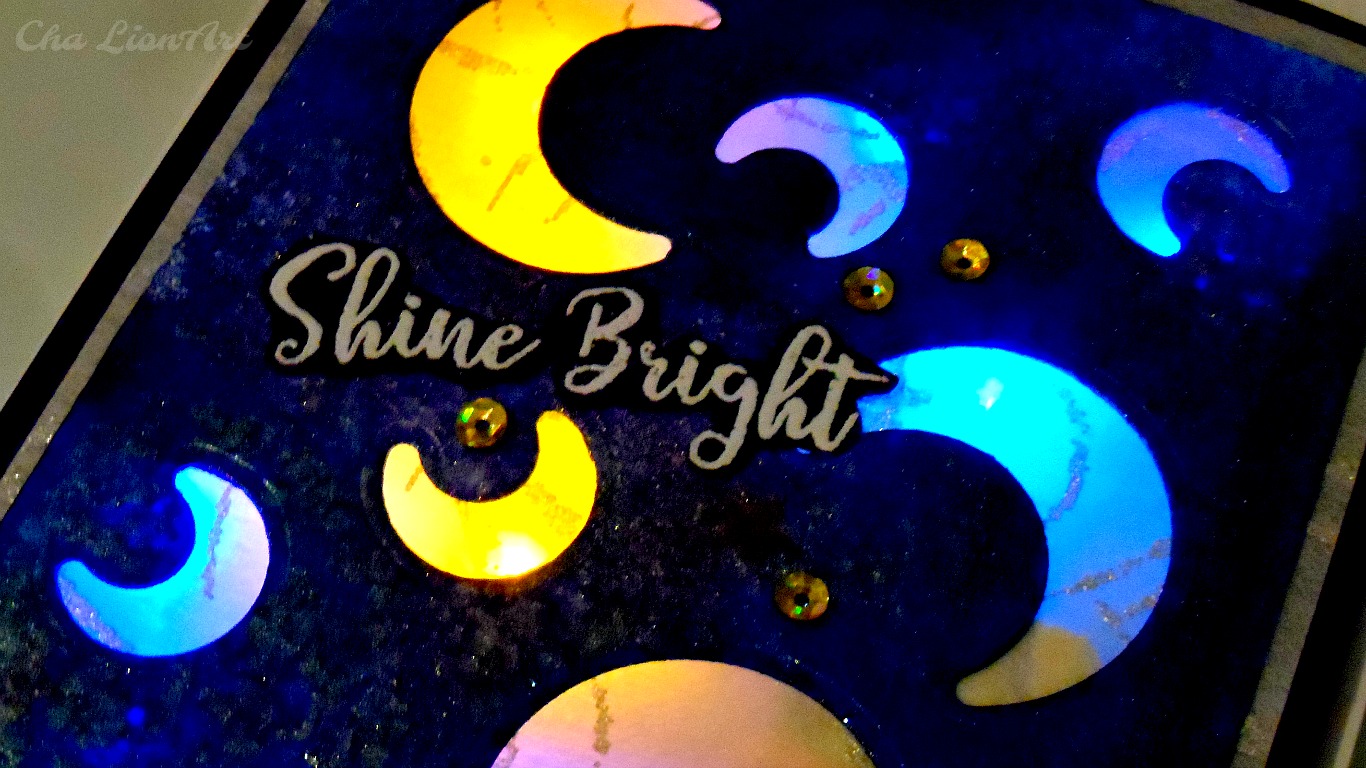
When I saw the kit, the first thing that came into my mind moons and lights. So, I decided to create a background with the moon die-cuts that came with the set. While I was creating it, I decided to add Chibitronics Lights! Let's dream!
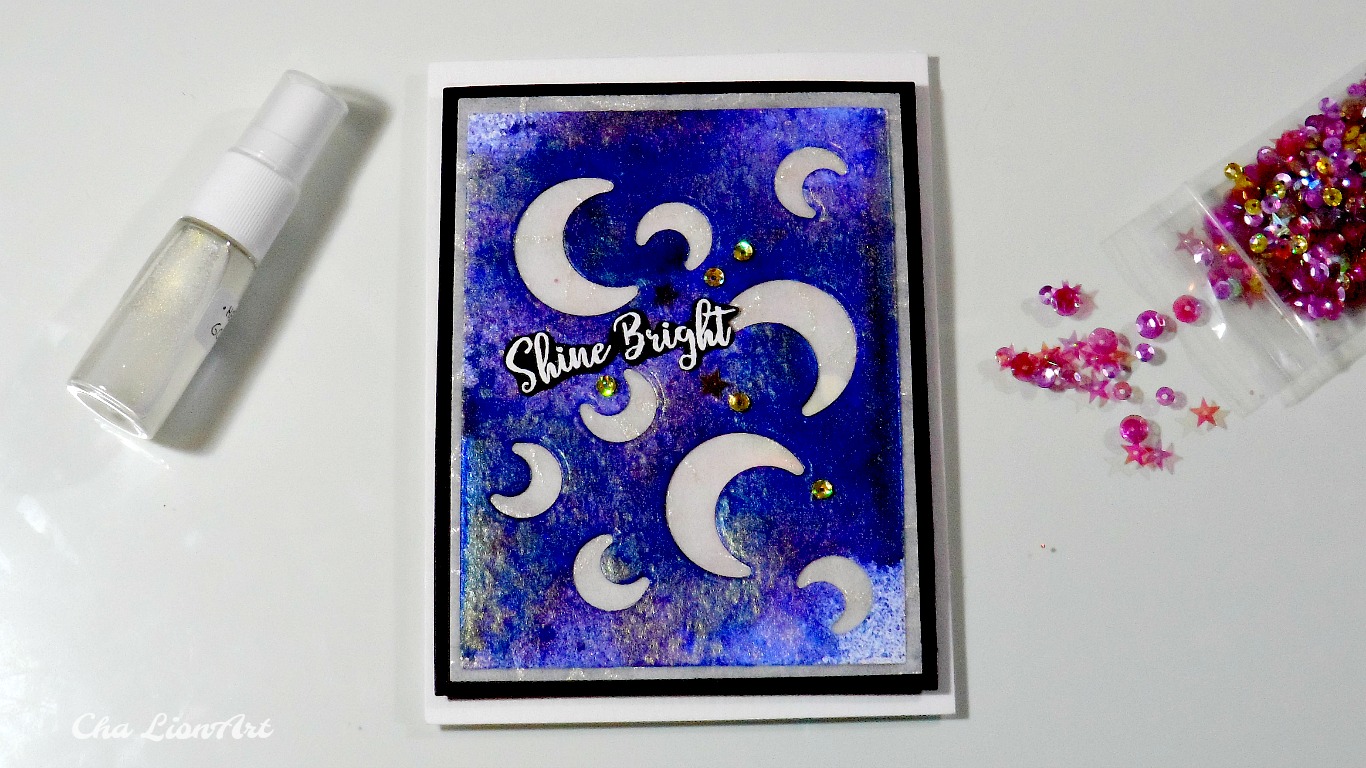
I cut my panel a little bit smaller than usual, 3,7" by 5".
¡Hola! ¡Soy yo, Cha! Durante la semana pasada he estado creando tarjetas con el kit mensual de Hero Arts de agosto y debo decir que es uno de mis favoritos ya que puedes crear una infinidad de tarjetas sin repetirte por todo el material que contiene. Sin embargo, solo hay un número limitado de kits que salen el primer lunes de cada mes, por lo que se agotan enseguida y a veces no da tiempo de adquirirlo a tiempo. Por lo tanto, si verdaderamente te gusta esta marca, lo mejor es subscribirse y recibirlo cada mes unos 42 € en total con gastos de envío internacional incluidos).
Cuando vi el kit por primera vez, lo primero que pensé fue en sacar provecho de los troqueles pequeños de lunas. Así que creé un fondo con lunas y además, durante el proceso de creación le añadí ¡las luces de Chibitronics! ¡Soñemos!
Para realizar esta tarjeta corté el panel principal un poquito más pequeño que la tarjeta americana habitual - 9,4 x 12,7 cm.
Background | Fondo
Firstly, I cut my background with the two moons die-cuts that came with the set using the Big Shot Machine. Once I decided the position of my die-cuts, I cut the paper and started over because there were only two die-cuts. I did this process several times until I had my paper all covered with moons. Later, I put my background in a box to avoid my work surface to get messy. I used the box that came with the kit!. Then, I sprayed on it the two shimmers that also came with the kit. I first sprayed the Blueberry Shimmer and then, I sprayed the Gold Shimmer and I let it dry a little bit and then, I heat it up with my craft gun tool. I must say that the two shimmers are outstanding because depending on the perspective that you look at the panel, the colors totally changed... it's crazy!
Primero, corté mi fondo con los troqueles de lunas que vinieron con el kit utilizando la máquina de la Big Shot. Como solo vienen dos troqueles, lo hice poquito a poco, es decir, en tandas, posicioné las dos piezas a mi gusto, las corté y luego las volví a poner y las volvía a cortar y así sucesivamente hasta terminar todo el papel cubierto de lunas. Luego, cogí la caja en la que me había venido el kit y puse mi tarjeta dentro, ya que iba a esparciar los brillos que vinieron con el kit, los famosos llamados shimmer mists. La caja es para evitar manchar demasiado la superficie de trabajo. Así que primero esparcié mi tarjeta con el Blueberry Shimmer y después con el Gold Shimmer y dejé que se secara un poquito. Más tardé, utilicé la pistola de calor pero porque soy una desesperada...
La verdad es que estos shimmers son espectaculares porque según la perspectiva con la que mires la tarjeta, cambian los colores totalmente. ¡Es magia!

On the back of the main panel, I added one of the patterned paper that came with the kit - the translucent one. I cut this paper to fit on my panel using the 5,3" by 4" square infinity die-cut using again my Sizzix Machine. As my main panel was a little bit smaller, this translucent paper stuck out a little bit and this made the card elegant. I also wanted a frame behind this patterned paper that protruded from the main cardstock. So, I used black cardstock to create that frame, the outside was 5,5" by 4,25" and the inner, 3,5" by 4,8" approximately. So, I added first the patterned paper to the back of my main card and then, I added this black frame also on the back of the main card using double sided tape in both cases.
Detrás del panel principal, añadí un papel especial translúcido que vino con el kit. Corté este papel un poquito más grande que el panel principal para que sobresaliera un poco y le diera un toque más elegante a la tarjeta - 13,5 x 10,2 cm. Para recortar a estas medidas, utilicé el set de troqueles rectangulares de Hero Arts y utilizando la máquina de la Big Shot. Como el papel especial translúcido sobresalía un poco de la tarjeta principal, recorté un marco de cartulina negra para pegarlo justo detrás y así se vería mejor el papel especial - el marco exterior 14 x 10,8 cm y el marco interior 8,9 x 12,2 cm. Cuando corté todo, pegué el panel principal al papel especial translúcido y después le añadí el marco negro por detrás. Recuerden que tuve que cortar un marco, en mi caso elegí el color negro, para poder dejar el hueco en las lunas si no me taparía las lunas.
Detrás del panel principal, añadí un papel especial translúcido que vino con el kit. Corté este papel un poquito más grande que el panel principal para que sobresaliera un poco y le diera un toque más elegante a la tarjeta - 13,5 x 10,2 cm. Para recortar a estas medidas, utilicé el set de troqueles rectangulares de Hero Arts y utilizando la máquina de la Big Shot. Como el papel especial translúcido sobresalía un poco de la tarjeta principal, recorté un marco de cartulina negra para pegarlo justo detrás y así se vería mejor el papel especial - el marco exterior 14 x 10,8 cm y el marco interior 8,9 x 12,2 cm. Cuando corté todo, pegué el panel principal al papel especial translúcido y después le añadí el marco negro por detrás. Recuerden que tuve que cortar un marco, en mi caso elegí el color negro, para poder dejar el hueco en las lunas si no me taparía las lunas.
Sentiment | Frase
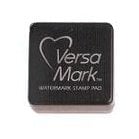
For my sentiment, I picked one of the sentiments that came also in the kit. I decided to stamp 'Shine Bright' onto a piece of basic black cardstock using Versamark ink. Before I used my anti-static tool and I added white embossing powders to the sentiment. When I finally heat it up, I cut around the sentiment with my scissors and adhered to my main card.
Para mi frase, escogí un sello que me venía en el set, el de "Shine Bright" que es algo así como "Brilla Radiante" (lo siento, como traductora no soy la mejor). Como quería que resaltara un poco, estampé el sello en cartulina negra para hacer embossing por lo que primero, utilicé mi herramienta anti estática que ayuda a que los polvos se adhieran solo en la parte en la que estampes el sello. Por lo tanto, utilicé la tinta de embossing Vesamark (¡mi favorita!) y le añadí los polvos de embossing blancos de Hero Arts (¡mis favoritos!). Y los sequé con mi pistola de calor. Para terminar, recorté alrededor de la frase y la pegué en mi tarjeta con cinta de doble cara.
Para mi frase, escogí un sello que me venía en el set, el de "Shine Bright" que es algo así como "Brilla Radiante" (lo siento, como traductora no soy la mejor). Como quería que resaltara un poco, estampé el sello en cartulina negra para hacer embossing por lo que primero, utilicé mi herramienta anti estática que ayuda a que los polvos se adhieran solo en la parte en la que estampes el sello. Por lo tanto, utilicé la tinta de embossing Vesamark (¡mi favorita!) y le añadí los polvos de embossing blancos de Hero Arts (¡mis favoritos!). Y los sequé con mi pistola de calor. Para terminar, recorté alrededor de la frase y la pegué en mi tarjeta con cinta de doble cara.

Chibitronics Lights | Luces de Chibitronics
When I finished my main panel, I decided to give this card a little bit of light, but just a little bit. So, I took another basic piece of white cardstock with the size of my card base - 4,5" by 6,1". I put my main card on this piece of white cardstock and traced it with a pencil. Then, I started marking where I wanted my Chibitronics COLOR Lights and the battery. Once everything was decided, I added a little piece of the carton which was going to hold the battery to avoid falling down. Then, I marked the poles, the positive and the negative and the position that was going to be the copper tape for the positive strip and for the negative strip. When it was done, I started adding the copper tape. At one point, I cut the copper tape in the positive part a little bit smaller but I could fix it adding a little bit more and started again from the positive band of the battery until where I was.
Cuando terminé el panel principal de la tarjeta, decidí añadirle un poquito de luz. Así que cogí un recorte de cartulina del tamaño de la tarjeta base - 11,4 x 15,5 cm. Coloqué encima el panel principal y con un lápiz marqué el tamaño de la tarjeta. Esta tarjeta la hice a ojo porque decidí añadirle las luces de Chibitronics (Color Lights) cuando ya había creado la tarjeta pero, este proceso hubiese sido mejor sin haber pegado la tarjeta principal ya que así se podría marcar mas fácilmente. Marqué dónde iba a posicionar la pila y marqué una línea en donde iba el polo positivo de la pila y otra línea paralela que es donde va el polo negativo. Comencé a pegar la cinta de cobre y cuando terminé puse las luces, en mi caso no quería que las luces estuvieran perfectamente en los huecos de las lunas, así que simplemente puse varias de color azul y otras de color amarillo.
Cuando terminé el panel principal de la tarjeta, decidí añadirle un poquito de luz. Así que cogí un recorte de cartulina del tamaño de la tarjeta base - 11,4 x 15,5 cm. Coloqué encima el panel principal y con un lápiz marqué el tamaño de la tarjeta. Esta tarjeta la hice a ojo porque decidí añadirle las luces de Chibitronics (Color Lights) cuando ya había creado la tarjeta pero, este proceso hubiese sido mejor sin haber pegado la tarjeta principal ya que así se podría marcar mas fácilmente. Marqué dónde iba a posicionar la pila y marqué una línea en donde iba el polo positivo de la pila y otra línea paralela que es donde va el polo negativo. Comencé a pegar la cinta de cobre y cuando terminé puse las luces, en mi caso no quería que las luces estuvieran perfectamente en los huecos de las lunas, así que simplemente puse varias de color azul y otras de color amarillo.
At the end, I added my ChibiLights. I decided to add blue and yellow ones. I wasn't planning anything. I just wanted a little bit of color on the back of my card, so added the lights here and there, taking into account the poles of the lights and the copper strips that had to be well-positioned if not it doesn't work!
Una vez terminado, verifiqué que funcionaran todas las luces. Quizás al principio sea un poco complicado de utilizarlas pero todo es paciencia y mucha práctica, con eso, todo lo demás surge solo y la próxima vez será más fácil.
Una vez terminado, verifiqué que funcionaran todas las luces. Quizás al principio sea un poco complicado de utilizarlas pero todo es paciencia y mucha práctica, con eso, todo lo demás surge solo y la próxima vez será más fácil.
Card Mounting | Montaje Final
As I had to add the main panel onto the cardstock where the Chibitronic circuit was, I added a dimension frame that I made with black foam sheets. I used the same size from the frame that I created early on black cardstock (outside square: 5,5" by 4,25" - inner square: 3,5" by 4,8"). I cut two pieces of these frames and attached them together. Then, I glued the whole piece to the back of my panel and finally, all of this to the base where the circuit of light was and glued to a white card base.
Para el montaje de la tarjeta, necesitaba que la tarjeta por dentro estuviera hueca porque si no, las luces estarían siempre encendidas. Por lo tanto, recorté otro marco como el que hicimos anteriormente, solo que esta vez, recorté dos marcos de goma eva de color negro - el marco exterior 14 x 10,8 cm y el marco interior 8,9 x 12,2 cm. Pegué los dos trozos juntos, aunque si hubiese tenido goma eva adhesiva y hubiese sido mejor, y luego ese trozo lo pegué por detrás de la tarjeta principal, justo donde había pegado el marco negro. Le volví añadir cinta de doble cara, y la pegué a la cartulina del circuito de Chibitronics, y esta a su vez, la pegué a la tarjeta base de color blanca.
Para el montaje de la tarjeta, necesitaba que la tarjeta por dentro estuviera hueca porque si no, las luces estarían siempre encendidas. Por lo tanto, recorté otro marco como el que hicimos anteriormente, solo que esta vez, recorté dos marcos de goma eva de color negro - el marco exterior 14 x 10,8 cm y el marco interior 8,9 x 12,2 cm. Pegué los dos trozos juntos, aunque si hubiese tenido goma eva adhesiva y hubiese sido mejor, y luego ese trozo lo pegué por detrás de la tarjeta principal, justo donde había pegado el marco negro. Le volví añadir cinta de doble cara, y la pegué a la cartulina del circuito de Chibitronics, y esta a su vez, la pegué a la tarjeta base de color blanca.
Embellishments | Adornos
For final touches, I simply glued some sequins that also came with the Hero Arts kit.
Como toque final, simplemente añadí algunas lentejuelas que vinieron también con el kit de Hero Arts.
Como toque final, simplemente añadí algunas lentejuelas que vinieron también con el kit de Hero Arts.
YouTube Video
And that's all!
I hope you like this card and if you have any question I'll be pleased to answer as soon as I can.
¡Y eso es todo por hoy!
Espero que les haya gustado esta tarjeta y si tienen alguna pregunta, aquí estaré para responderla lo antes posible.
Gracias.
¡Y eso es todo por hoy!
Espero que les haya gustado esta tarjeta y si tienen alguna pregunta, aquí estaré para responderla lo antes posible.
Gracias.


.jpg)
.jpg)
.jpg)
