

Hello there! It's me again, Cha! This week, I'll continue posting cards for Christmas and this time I'm using my electronic cutting machine, Silhouette Curio to make these cards. For creating these cards, I also used some patterned paper, some embellishments, baker's twine and wood veneer letters.

¡Hola a todos! ¡Soy Cha! Nuevamente esta semana les traigo una tarjeta que creo que les va a gustar muchísimo, sobre todo para todos los que tengan una máquina Silhouette o similar a ésta. Para la creación de estas tarjetas, también utilicé papel decorado y estampado, algunos adornos y lentejuelas, hilo (o cordón) y letras de chapa.
First, I created my design using Silhouette Studio 4.0. You can download the pattern that I created for this card in HERE. Remember that I would like to see your cards so, please let me know to see the cards that you create with my design!!! It makes me feel so happy if you use it.
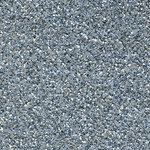
Then, I cut this design many times from white cardstock because I adhered together to give some dimension to the card. For the one on the top of the whole piece, I cut it from glitter silver cardstock.
Primero, creé mi diseño para hacer mis tarjetas. Para ello, utilicé el programa Silhouette Studio 4.0. Si no desean crear ningún diseño para sus tarjetas, pueden descargar mi diseño AQUÍ. Recuerden que me gustaría ver sus proyectos con este diseño si lo utilizaran, simplemente déjenme un comentario aquí o en mi canal de YouTube. ¡Me haría mucha ilusión!
Corté mi diseño muchas veces en cartulina regular blanca porque quería pegarlas todas juntas para así darle un poco de relieve a esta tarjeta. Para la parte superior de esta pieza, decidí utilizar cartulina de purpurina plateada.

I also created some snowflakes that I cut with my Silhouette Curio machine from a piece of silver mirror paper.
También, creé algunos copos de nieve que corté con la Silhouette Curio en un trozo de cartulina de espejo plateada.

Taking into account the design I created, I started cutting some pieces from some different types of Christmas patterned paper in order to attach every piece in each one of these geometric triangles that my design is composed. When everything is cut, I started to attach everything to a piece of white cardstock. Before gluing each piece, I took one of the pieces of my design and put on the white cardstock.Then, I traced every piece on the white cardstock. As I had this guide, now I could glue every piece of patterned paper down on the cardstock for sure.
Taking into account the design I created, I started cutting some pieces from some different types of Christmas patterned paper in order to attach every piece in each one of these geometric triangles that my design is composed. When everything is cut, I started to attach everything to a piece of white cardstock. Before gluing each piece, I took one of the pieces of my design and put on the white cardstock.Then, I traced every piece on the white cardstock. As I had this guide, now I could glue every piece of patterned paper down on the cardstock for sure.
For this background, I picked some glue, green and red colors. The paper collection that I used for this card, it is from Lidl as well as some embellishments.
Teniendo en cuenta el diseño que creé con la Curio, comencé a recortar trozos de papel de diferentes tipos de papel decorado de navidad para así, pegar cada pieza en cada uno de los triángulos geométricos en que está compuesto mi diseño. Cuando todo estuviera cortado, comencé a pegar cada una de las piezas en una cartulina blanca. Antes de pegar cada pieza, cogí una pieza de mi diseño y la puse encima de la cartulina blanca. Entonces, delineé los triángulos para tener una referencia de dónde pegar cada trozo de papel. Así que siguiendo esta guía, comencé a pegar cada trocito de papel.
Para esta tarjeta, utilicé colores azules, verdes y rojos. La colección navideña que utilicé es de Lidl, al igual que algunos adornos.

When I finished gluing all the pieces, I glued my design and, also the final piece on it, the piece that I had cut on glitter silver cardstock.
Cuando terminé de pegar todas las piezas, pegué el diseño que creé anteriormente y, por último, añadí la pieza final, la que había recortado en cartulina de purpurina plateada.

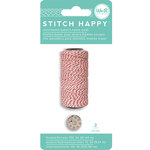
I added a bow on the left corner using red and white baker's twine. I also glued two silver snowflakes that I previously cut with Silhouette Curio and some other white glittered snowflakes that I had already in my stash, too.
I added a bow on the left corner using red and white baker's twine. I also glued two silver snowflakes that I previously cut with Silhouette Curio and some other white glittered snowflakes that I had already in my stash, too.
En la esquina superior izquierda, añadí un lazo que hice con cordón blanco y rojo. También añadí dos copos de nieve plateados que había cortado con Silhouette Curio previamente y, también añadí algunos copos de nieve blancos que ya tenía y casi ni sabía que lo tenía.
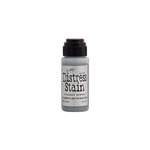
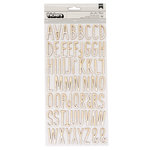
I picked some wood letters from my stash. I chose the word 'joy' for this card and colored each letter with brushed pewter Distress Stain Ink. I heat it a little bit with my craft heat tool. I glued the letters at the bottom of my card.
Escogí algunas letras de chapa que tenía y decidí poner la palabra 'joy' en inglés ('alegría') ya que quería una palabra corta y que no resaltara tanto para no hacer sombra los demás elementos de la tarjeta. Coloreé cada letra con la tinta Distress Stain Ink, brushed pewter y las sequé un poquito utilizando la pistola de calor. Pegué las letras en la parte inferior de la tarjeta.

On a standard white card base, I glued a piece of patterned cardstock that matched with the central panel and on this, I attached this piece to the center.
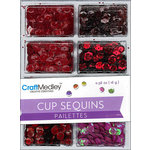
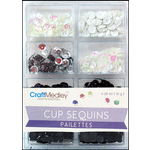
For final touches, I added some silver and red sequins here and there using Tombow AQUA (transparent liquid glue).
En una base de tarjeta estándar blanca, pegué cartulina decorativa que pegaba con el diseño de los papeles decorativo, y sobre este, y en la parte central, coloqué mi pieza que había creado.
Para finalizar, simplemente añadí algunas lentejuelas rojas y plateadas utilizando el Tombow AQUA (pegamento líquido transparente).
CARD BONUS | TARJETA BONUS

I also created a shaker card with this pattern. So, I glued all the pieces of my design together as I did before with the other card. However, before adding the last piece, I added some sequins in some of the gaps in the design. Then, I glued a piece of acetate on top and at last, I added another piece of my design for a perfect final touch. Finally, I just added the sentiment with some gold stickers and some embellishments to this card.
También creé una shaker card con este diseño. Para ello, pegué todas las piezas juntas de mi diseño como hice con la tarjeta anterior. Sin embargo, antes de añadir la pieza final, añadí algunas lentejuelas en algunos de los huecos del diseño. Entonces, le pegué un trozo de acetato encima y, sobre ésta, añadí la pieza final del diseño para un mejor acabado. Finalmente, añadí la frase con pegatinas doradas y algunos adornos a esta tarjeta.


I hope you like these cards and you get inspired to create your own cards with this pattern!! See you soon!
Espero que les guste estas tarjetas y se inspiren para crear sus propias tarjetas con este diseño que creé. ¡¡Hasta pronto!!


.jpg)
.jpg)
.jpg)
