

Hello there! It's me, Cha! This week I created a card with a little of dimension with die cuts but also I would like to focus on a beautiful sunny sky that I created doing some masking with post-it notes. The die cut that I used is one of my favorites, the die-cut grass by Hero Arts and also, I used the best inks in the world, Distress Inks by Tim Holtz.

¡Hola! ¡Soy Cha! En esta ocasión les traigo cómo realizar una tarjeta con un poquito de dimensión usando troqueles pero, en realidad, donde me gustaría enfocar esta tarjeta es a la creación de un bonito cielo soleado que creé máscaras utilizando notas adhesivas, es decir, los llamados "Post it". Además, el troquel que utilicé para resaltar esta tarjeta y darle esa pequeña dimensión fue el troquel césped de Hero Arts y también las mejores tintas del mundo para colorear fondos, las Distress Inks de Tim Holtz.
Background | Fondo
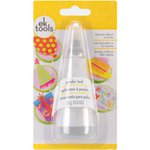
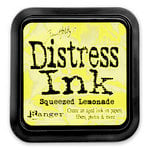
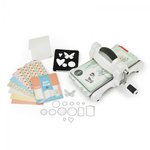
First, I used one of the circle die cuts that came with the Sizzix Starter kit and I cut off on a piece of cardstock. I removed the circle and used this piece of cardstock as a masking paper. So, I positioned this paper in the center of my panel and started coloring with some Distress Inks. For the center of my circle, I used Squeeze Lemonade and I colored the edges with Mustard Seed. As I was going to create sun lights, I didn't want the sun to be contaminated with other inks, so I made 'Embossed Ink Resist' here that it is basically, embossed the image using Embossed Dabber by Ranger, added some Ultra Fine Embossing Powders and heat it up with my heat gun tool.
Primero utilicé uno de los troqueles de forma de círculo que me vinieron con el kit para principiantes cuando adquirí la máquina manual Sizzix y para cortarlo, lo posicioné en el centro de un trozo de papel. Retiré el circulo y utilicé el papel con el hueco para crear una máscara para pintar el circulo en el panel principal de la tarjeta. Para colorearlo utilicé algunas tintas Distress Inks. Para el centro del cículo utilicé Squeeze Lemonade y coloreé los bordes con Mustard Seed. Como iba a crear rayos de sol y para evitar que el centro de ese sol se mezclara con más tintas, y también, evitar que se manchara la tarjeta, decidí realizar la técnica "Embossed Ink Resist" ya que es, básicamente, añadir la tinta de embossing con aplicador encima de la imagen pintada y añadir polvos de embossing transparentes para que así se vea el color, y por último, quemamos los polvos con la pistola de calor. De esta manera, evitamos que la tinta manche toda la tarjeta si estamos realizando otras técnicas en la misma tarjeta.

Primero utilicé uno de los troqueles de forma de círculo que me vinieron con el kit para principiantes cuando adquirí la máquina manual Sizzix y para cortarlo, lo posicioné en el centro de un trozo de papel. Retiré el circulo y utilicé el papel con el hueco para crear una máscara para pintar el circulo en el panel principal de la tarjeta. Para colorearlo utilicé algunas tintas Distress Inks. Para el centro del cículo utilicé Squeeze Lemonade y coloreé los bordes con Mustard Seed. Como iba a crear rayos de sol y para evitar que el centro de ese sol se mezclara con más tintas, y también, evitar que se manchara la tarjeta, decidí realizar la técnica "Embossed Ink Resist" ya que es, básicamente, añadir la tinta de embossing con aplicador encima de la imagen pintada y añadir polvos de embossing transparentes para que así se vea el color, y por último, quemamos los polvos con la pistola de calor. De esta manera, evitamos que la tinta manche toda la tarjeta si estamos realizando otras técnicas en la misma tarjeta.
For creating the sunlights, I used some 3x5 inches basic post-it notes. I positioned one piece of post-it notes on the paper from the circle to the edge of the panel, and another piece on the contrary of the first one, just leaving a gap between the two pieces of the post-it notes. Also, this gap is narrowest near the main circle and widest at the edges of the paper. Remember that I was trying to create the sunlights and to save some time, I made two 'sunlights' at once. So, I positioned four pieces of post-it notes, two on the right side of my panel and two pieces on the contrary side. Then, I started coloring these gaps using first, Squeeze Lemonade in the whole gaps but I colored a little bit darker near the circle, using Mustard Seed. As I needed to create more of these 'sunlights' using the post-it notes, I wanted that the ink didn't stain the paper, so once again, I used the 'Embossed Ink Resist' in here. So, I heat a little bit my panel first, and before removing the post-it notes, I added the Embossed Dabber by Ranger in the two gaps. Once the two parts were all wet, I removed the post-it notes, added the clear embossing powders and finally, I heat it up with my heat gun tool. I continued creating this 'sunlights' and used this technique until I was satisfied the result.
Para crear los rayos de sol, utilicé algunos post-it notes más grandes de lo habitual para que me cubriera parte de toda la tarjeta. Puse un post-it encima del papel desde el circulo hasta el borde de la tarjeta, y otro post-it al lado del otro, dejando un hueco entre ambos. El hueco lo posicioné como si fuera un rayo de sol, es decir, por parte del círculo más estrecho y hacia el borde más ancho. Como tenía que hacer muchos de estos "rayitos de sol" lo que hice fue crear dos a la misma vez para ahorrar un poco más de tiempo. Como dije antes, con el huequito en medio, lo que hice fue colorearlo todo de un mismo tono con las Distress Inks, empecé con el color Squeeze Lemonade y le di un tono más oscuro utilizando el color Mustard Seed. En esta ocasión la técnica "Embossed Ink Resist", es decir, todavía con los post-it en la tarjeta, añadí la tinta de embossing de Ranger. Entonces quité los post-it y les añadí los polvos claros de embossing y terminé quemándolos con la pistola de calor y así sucesivamente alrededor del círculo.

When I finished creating the 'sunlights' around that circle, I started coloring the background with tones of blue, also with Distress Inks. I colored the edges of my card with Salty Ocean and in the center, I added the color Tumbled Glass and I blended this last color with a little bit of Squeeze Lemonade.
Cuando terminé de crear los "rayos de sol" alredecdor del círculo, comencé a colorear el fondo con diferentes tonalidades de azul, también con las tintas Distress Inks. Primero, coloreé los bordes con la tinta Salty Ocean y añadíe el color Tumbled Glass en el centro que, mezclé ligeramente con la tinta Squeeze Lemonade.
Images and Sentiment | Imágenes y Frase
For decorating this background, I used the Grass Fancy Dies by Hero Arts. I cut this image several times on a piece of white cardstock using my Big Shot machine. On one of these pieces, I added my sentiment with Versamark ink and added some gold embossing powders. The sentiment that I picked was one that came with the Hero Arts kit July 2017.
Para decorar el fondo de esta tarjeta, utilicé el troquel de césped de Hero Arts. Esta imágen la corté varias veces en cartulina blanca utilizando la Big Shot y en uno de ellos, estampé mi frase con Versamark ink y, más tarde, le añadí polvos de embossing dorados. La frase que escogí fue una que me vino con un kit de Hero Arts (específicamente, el mes de julio 2017).
I randomly colored these pieces of grass in different green tones, also with Distress Inks - Mowed Lawn, Twisted Citron, and Shabby Shutters.
Coloreé estos céspedes con diferentes tonalidades de verde, también con las tintas Distress Inks. Esta vez, utilicé Mowed Lawn, Twisted Citron y Shabby Shutters.

Final Touches | Detalles Finales
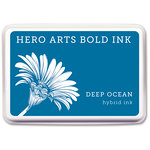
I stamped some birds on the sky with Deep Ocean by Hero Arts. This stamp set with tiny birds came with the Hero Arts June Kit 2017 (Safari kit). Finally, I gave some highlights of yellow with Mustard Seed Distress Ink again on the grass.
En el cielo, elegí algunos pájaros que estampé en el cielo con la tinta Deep Ocean de Hero Arts. Este set de sellos con pájaros me vino con el kit de Hero Arts de Junio de 2017. Para finalizar, añadí algunos toques de color amarillo, utilizando Mustard Seed al césped.

YouTube Video
I hope you like this post and try this technique in your future projects.
See you soon!
Espero que les haya gustado este post y que intente utilizar esta técnica en sus proyectos.
¡Hasta la próxima!


DIY Ink Blending Tools | Aplicadores de Tinta

.jpg)
.jpg)
.jpg)